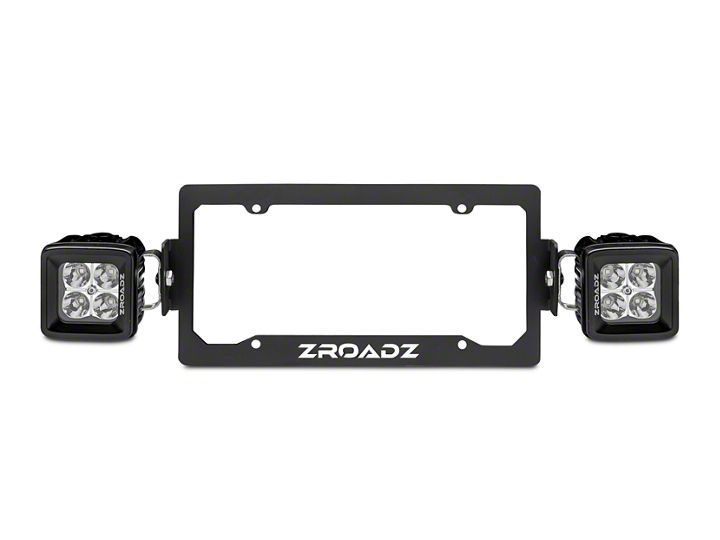

How to Install ZRoadz License Plate Frame LED Mounting Kit on your Jeep Wrangler
Installation Time
60 minutes
Tools Required
- Box Cutter/Knife
- Pliers
- 13mm Wrench
- Philips Head Screwdriver

Shop Parts in this Guide
1. Carefully open the package using pliers and a box cutter or knife (Figure A) and ensure the hardware and LEDs are included and undamaged.
2. Locate the screws holding the license to the license plate on the rear of the vehicle (Figure B).
3. Remove the screws using a Philips head screwdriver (Figure C).
4. Align the ZRoadz License Plate Frame Mount over the license plate (Figure D).
5. Carefully thread each of the screws back over the ZRoadz License Plate Mount (Figure E).
6. Using a Philips head screwdriver, tighten each of the screws.
7. Align one of the LED cubes with the mounting hole protruding from the ZRoadz License Plate Mount.
8. Thread a mounting bolt with washer (supplied) through the mounting bracket of the LED cube, as well as the mounting hole of the ZRoadz License Plate Mount (Figure F).
9. Angle the LED cube so that the light projects in the direction desired, then tighten down the mounting bolt nut using a 13mm wrench (Figure G).
10. Repeat Steps 7-9 on the other side of the ZRoadz License Plate Mount.
11. Run the wiring harness (Positive ( ) Red to the battery, Negative (-) Black to the chassis) to the rear of the vehicle.
12. Connect the wiring harness to each LED cube (Figure H).
13. Power on the lights to ensure both are properly connected and project light (Figure I).
Installation Instructions Written by ExtremeTerrain Customer J. Sandlin 05/17/2018.

