
How to Install Westin Platinum Oval 4in Step Bar - Black on your Wrangler
Installation Time
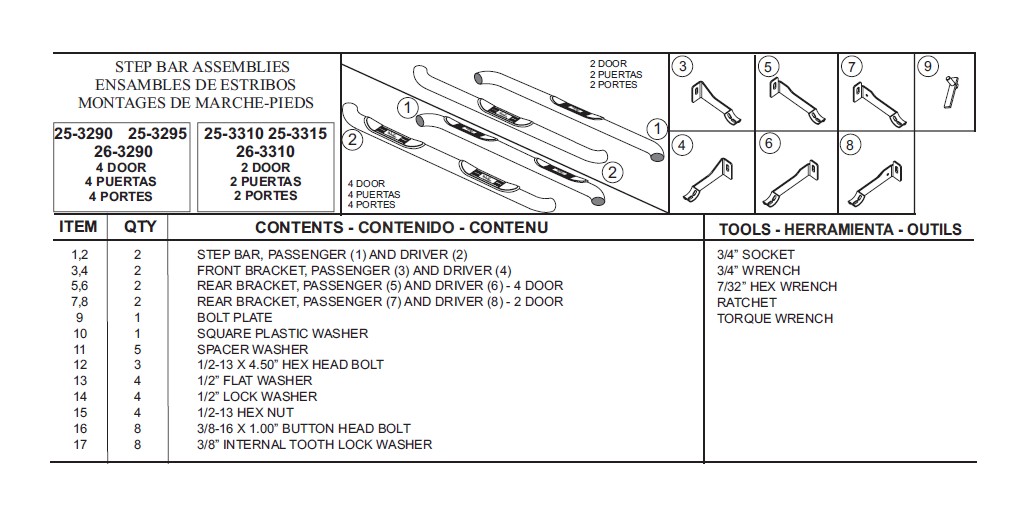
2 hours
Tools Required
- 3/4” SOCKET
- 3/4” WRENCH
- 7/32” HEX WRENCH
- RATCHET
- TORQUE WRENCH

Shop Parts in this Guide

STEP 1. Remove the contents from box and check for damage. Verify all parts are present. Read instructions completely before beginning.
STEP 2. Determine passenger and driver brackets.
CAUTION: Exhaust system may be hot. Some of the installation will be close to the exhaust system.
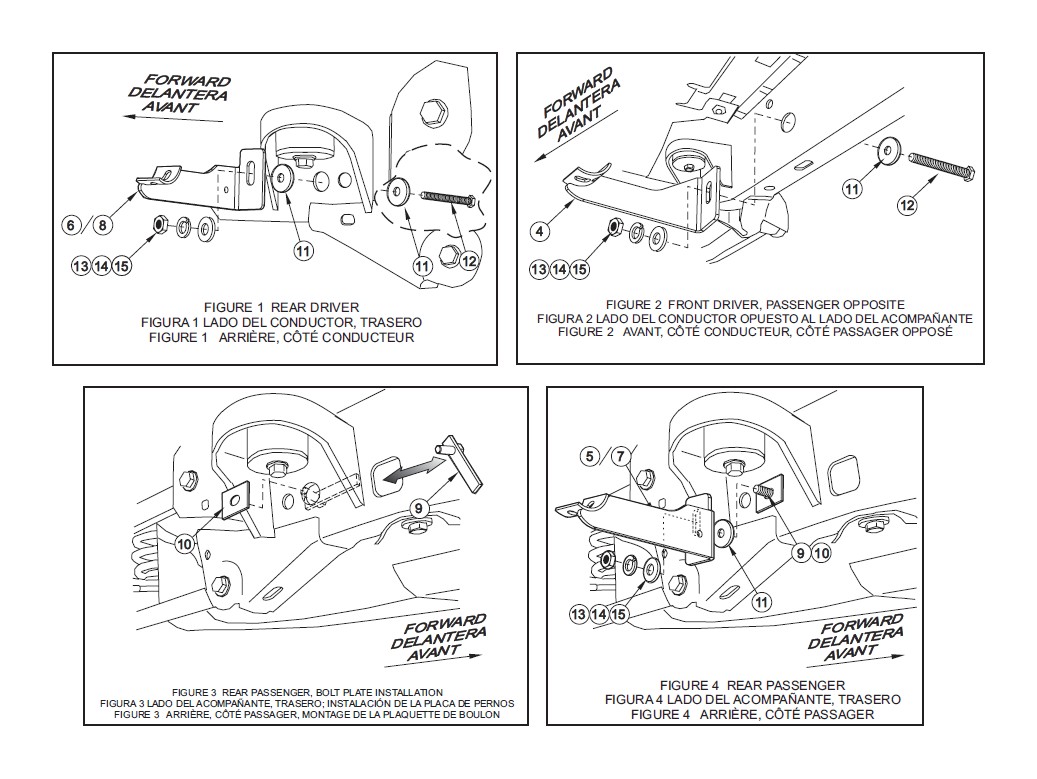
STEP 3. Locate hole on drivers side of frame in front of the rear tire. SEE FIGURE 1. Attach the spacer washer to the 1/2-13 x 4.50” hex head bolt. Insert bolt through the backside of frame. Place another spacer washer on the front side of frame. Attach drivers side rear bracket to bolt and secure with a 1/2” fasteners. Leave loose. SEE FIGURE 1.
STEP 4. Locate front hole on drivers side of frame behind the front tire. SEE FIGURE 2. Attach the spacer washer to the 1/2-13 x 4.50” hex head bolt. Insert bolt through the backside of frame. Attach drivers side front bracket to bolt and secure with a 1/2” fasteners. Leave loose. Repeat for passenger side.
STEP 5. Locate rear hole on passengers side of frame. SEE FIGURE 3. Insert bolt plate through square opening on the backside of frame. Secure in place with plastic washer. Place spacer washer over the plastic washer. Attach drivers side rear bracket to bolt and secure with a 1/2” fasteners. Leave loose. SEE FIGURE 4.
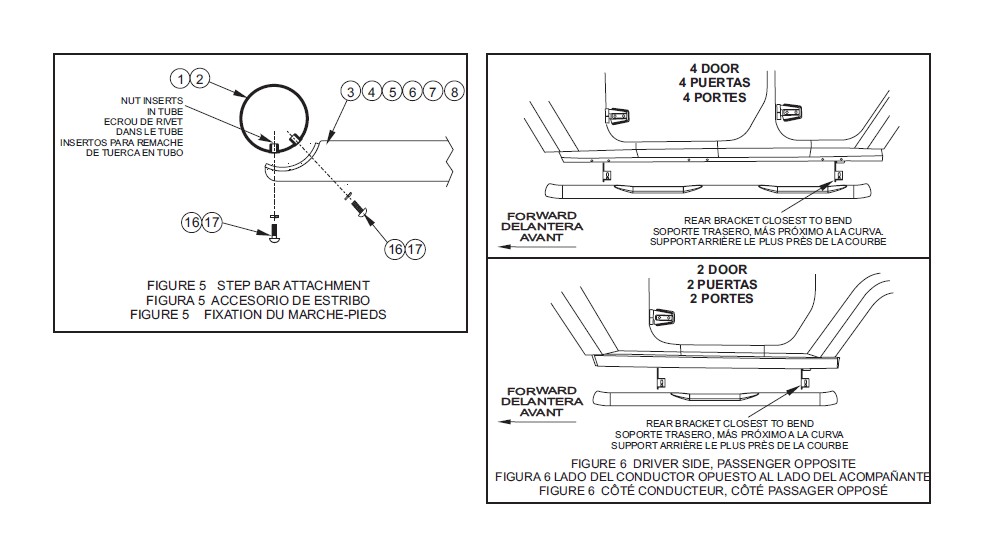
STEP 6. Place driver side tube on cradles as shown and fasten using 3/8-16 x 1.00” button head bolts and 3/8” internal tooth lock washers. Leave loose. SEE FIGURE 5 AND 6. Repeat for passenger side.
STEP 7. Make sure step bar and brackets are properly aligned and tighten all fasteners. Recommended torque values are 64 Ft.Lbs. for 1/2” fasteners and 20 Ft.Lbs. for 3/8” fasteners.


