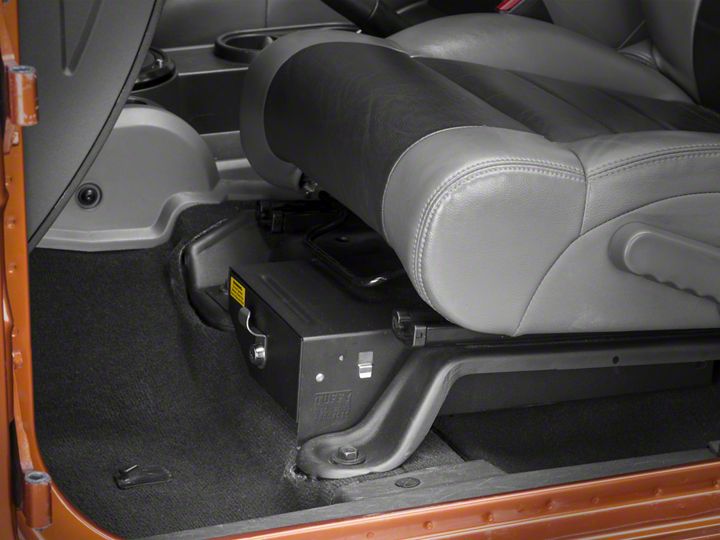

How to Install Tuffy Conceal Carry Underseat Drawer - Driver Side (07-10 Wrangler JK 2 Door; 07-17 Wrangler JK 4 Door) on your Jeep Wrangler
Installation Time
1 hours
Tools Required
- Electric drill (Optional)
- 18MM Socket and Ratchet
- 1/2" Socket and ratchet (Optional)
- 3/16" Allen wrench (Optional)
- Marker or pencil
- Knife
- 2011+ JK only, T-30 torx, Pliers & a flat head screwdriver

Shop Parts in this Guide
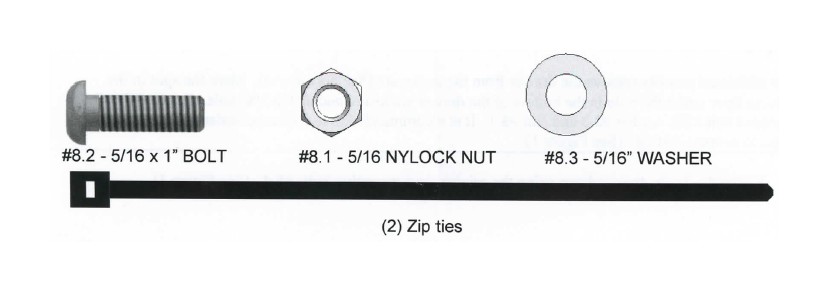
PARTS CHECKLIST

PLEASE READ ALL INSTRUCTIONS THOROUGHLY BEFORE STARTING INSTALLATION
Warning! Do not operate the vehicle without the drawer locked shut. If left unlocked normal vehicle movements while driving could cause the drawer to open creating an unsafe situation.
Note: To remove the drawer from the enclosure, pull the drawer out as far as it can go then locate the small black plastic stops visible on the ball bearing drawer slides. One of the black stops will need to be deactivated by pressing down and the other one pulled up. Be careful not to break these plastic stops. While deactivating the stops push the center slide section back into the drawer enclosure off of the front slide section attached to the drawer until they are separated. To reinstall, line up the slide sections and push the drawer in gently, do not force it or it can be damaged.
2011 JK Additional instructions - Remove harness mounting plate and secure harness to seat base.
• Under the driver's seat remove the OEM harness mounting plate using a T-30 torx.
• Remove the wire harness and connector plug from the OEM mounting plate. The plastic attachment fastener on the wire harness toward the rear of the vehicle can be squeezed together and popped out with pliers. The plastic attachment fastener toward the front of the vehicle on the wire harness connector plug can be removed by squeezing the wafers with pliers while prying it out with a flat head screwdriver . If these break off it is not a problem, they will not be reused.
• Zip tie the wire harness cable, just behind the harness plug toward the rear of the vehicle, to the holes in the lower OEM seat slide bracket where the OEM torx screws fastening the OEM mounting plate were removed.
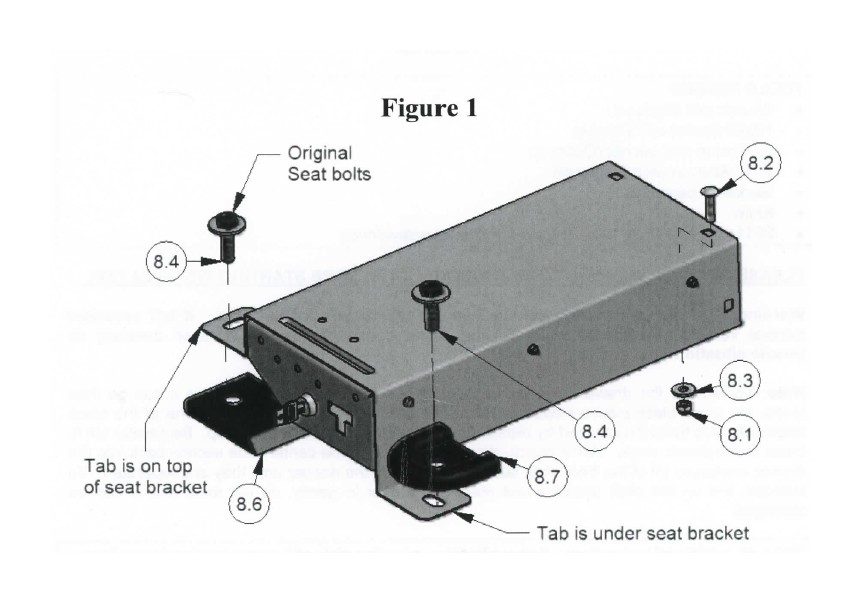
1. Remove the original seat mounting bolts #8.4 holding the front of the Drivers side seat to the body. (See Figure 1)
2. Insert the drawer in the mounted position. Make sure the right side seat bracket #8.6 is under the mounting flange on the Tuffy drawer and the left side seat bracket #8.7 is on top of the mounting flange on the drawer as illustrated. (See Figure 1)
OPTIONAL SECURITY STEP
WARNING! - Make sure that there is nothing under the vehicle that will be damaged by the drill bit when drilling. The exhaust is located in that area, be cautious not to touch it when hot.
For additional security remove the drawer from the enclosure (See note above). Mark the spot in the vehicle floor under the hole in the bottom of the drawer enclosure and drill a 3/8" hole. Fasten using the included bolt #8.2, washer #8.3 and Nut #8.1. It is recommended to use silicone sealant on any drilled holes to prevent rusting. (See Figure 1)
3. Fasten the Tuffy drawer down using the original seat mounting bolts #8.4. (See Figure 1)


