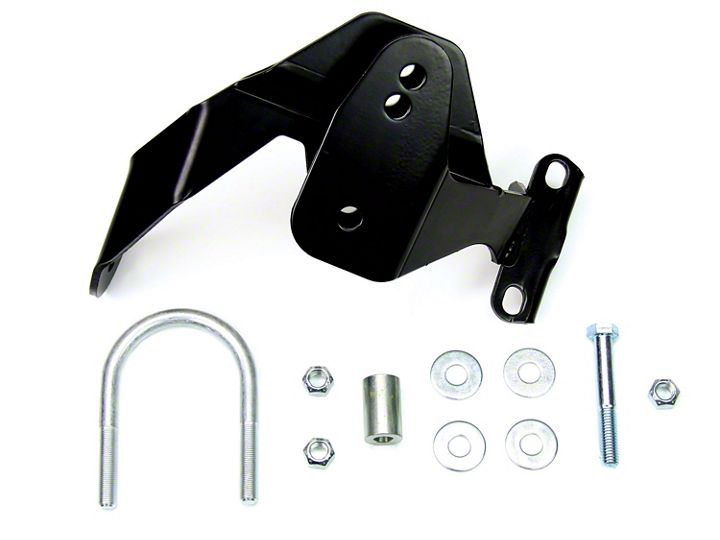

How to Install Teraflex Rear Track Bar Axle Bracket Kit for 2.5 in. Lift (07-18 Jeep Wrangler JK) on your Jeep Wrangler
Installation Time
60 minutes
Tools Required
- Crescent Wrench
- 19mm Socket Wrench
- 21 mm Socket Wrench
- Torque Wrench

Shop Parts in this Guide
Installation Instructions:
1. Using a 21mm socket wrench and a crescent wrench, un-torque the upper rear track bar from the frame (Figure A).

Figure A
2. Remove the rear nut from the upper track bar (Figure B).

Figure B
3. Using a 21mm socket, un-torque the bottom track bar from the axle (a winged nut is affixed to the other side which will hold in place while removing the bolt (Figure C).

Figure C
4. Loosen bolt until it can be removed (Figure D).

Figure D
5. Remove the driver's side lower control arm at the axle using a 21mm socket wrench (Figure E).

Figure E
6. Slide the bracket into place with the arm covering the area the control arm bolt was just removed from in Step 5 (Figure F).

Figure F
7. Slide the crush-proof sleeve into the bracket and run the supplied bolt and washer through (Figure G).

Figure G
8. Insert the U-bolt around the axle and thread the two supplied nuts and washers onto each end (Figure H).

Figure H
9. Torque down the U-bolt washers to 85 ft. lbs. using a 19mm socket wrench (Figure I).

Figure I
10. Slide the lower end of the rear track bar into the sleeve.
11. Torque the center bracket bolt to 75 ft. lbs.
12. Torque the control arm bolt to 125 ft. lbs.
13. Torque both the upper and lower rear track bar bolts to 125 ft. lbs.

Before

After
Installation Instructions Written by ExtremeTerrain Customer J. Sandlin 11/11/2018

