 FREE 1 to 3-Day Delivery on Orders $119+ Details

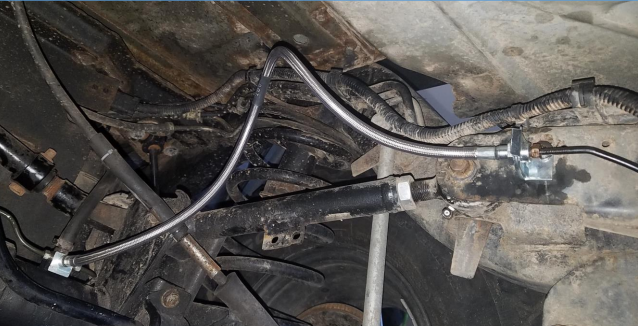
How to Install Synergy Extended Brake Lines for 0-4 in. Lift (97-06 Wrangler TJ) on your Jeep Wrangler
Installation Time
90 minutes
Tools Required
- 9/16 Wrench
- 7/16 Wrench
- 3/8 Wrench
- 13 MM Wrench
- 18 MM Wrench
- T40 Torx Socket
- Hammer or Mallet
- Flat Blade Screw Driver
May require removing front wheels to access the brake lines; however, you should be able access them by turning the wheels all the way to the driver/passenger side. If wheels are removed, make sure to park on a level surface, set parking brakes and chock wheels first.
It does not matter which line is replaced first. A catch pan should be used to catch brake fluid from spilling on the ground. When loosening brake line flare nuts, make sure the nuts spins freely and does not kink or damage the brake line. Frozen nuts may require the brake line to be replaced.
FRONT BRAKE HOSE
1. Starting with the Driver side, use 7/16 wrench to loosen the brake line flare nut attached to the brake hose at the frame.
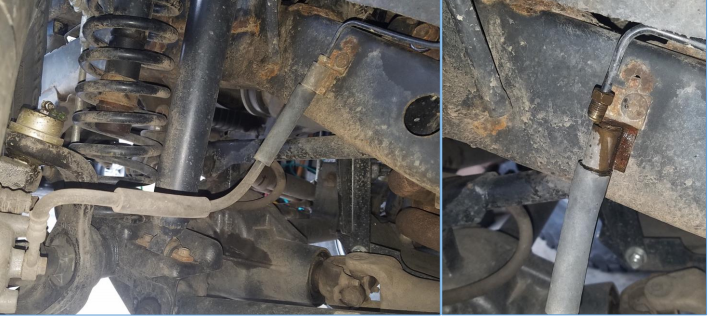
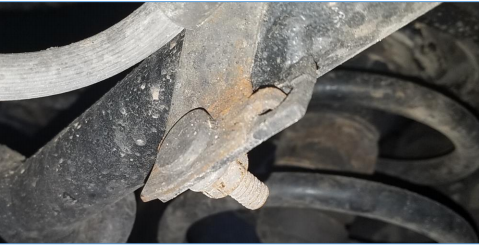
2. Use a T40 Torx wrench/socket to remove Torx bolt securing the brake hose to the frame. Retain the Torx bolt. Place catch pan under brake line and allow brake fluid to drain.
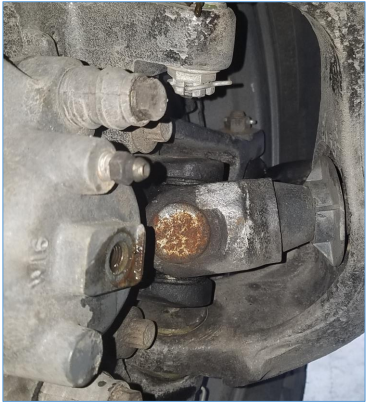
3. Use 9/16 wrench wrench to loosen brake hose from the brake caliper. Make sure to remove both copper washers when removing hose from the caliper. Retain brake like caliper bolt.
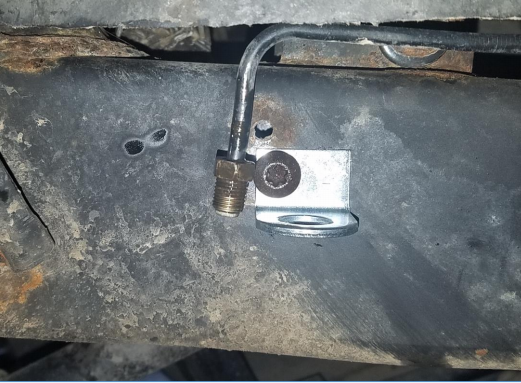
4. Use Torx bolt to secure new hose bracket to the frame.
TIP: Use a little anti seize compound on the bolt.
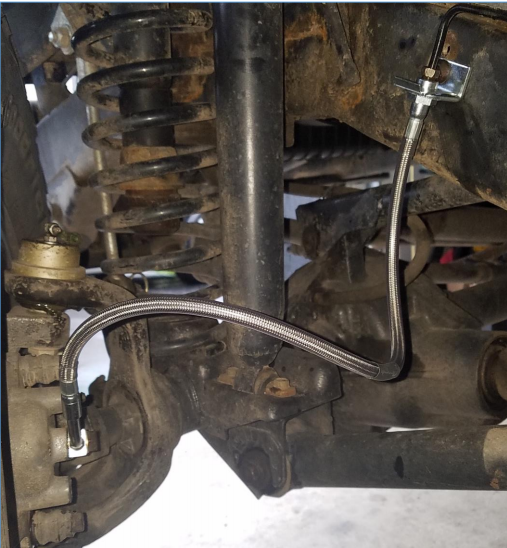
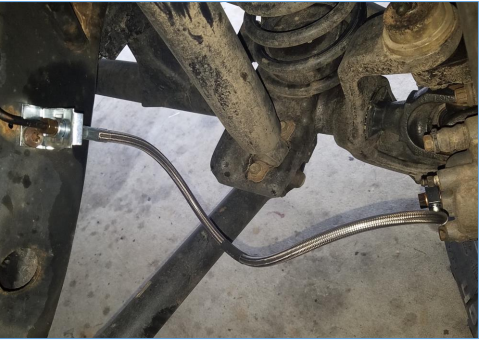
5. Use brake line caliper bolt with new copper washers to attach new brake hose to the calipers. Make sure to place a copper washer on each side of the new brake hose coupling.
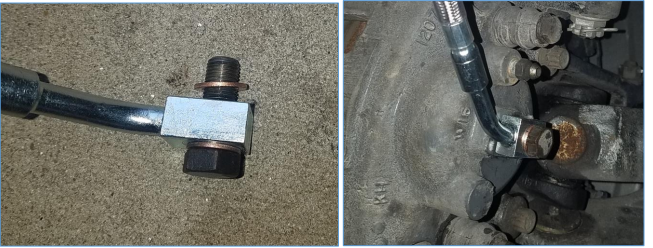
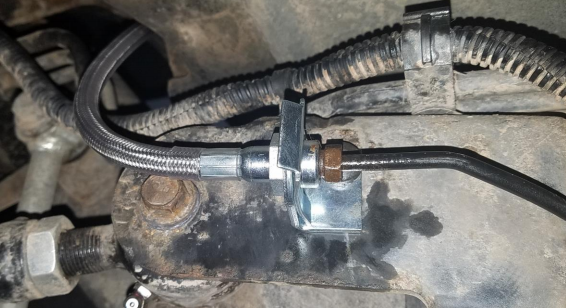
6. Place new hose coupling (frame side) through the hole in the bracket and secure with the clip. Use a mallet or hammer to secure the hose clip. Attach brake line flare nut to the new hose. Use 18 MM box wrench to hold the nut on the new brake hose while tightening the hard brake line.
7. Repeat Steps 1-6 on the Passenger Side.
REAR BRAKE HOSE
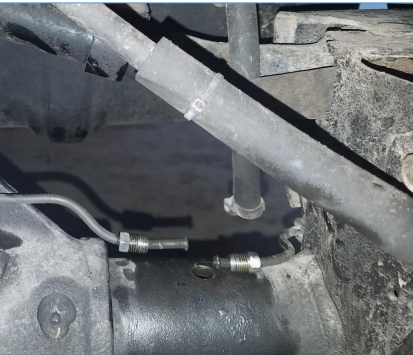
8. Use 7/16 wrench to loosen rear brake line from brake hose. Use a catch pan to collect brake fluid as it drains.
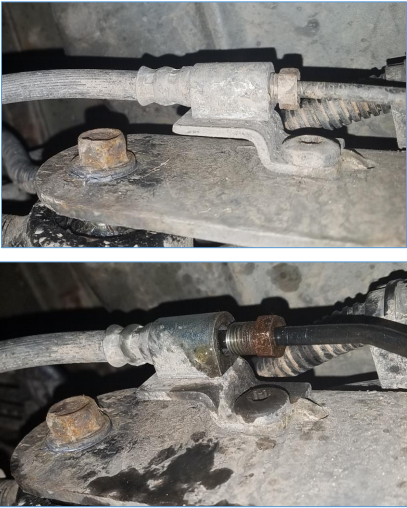
9. Use 13 mm wrench to remove nut holding brake hose to the rear Driver side upper control arm.
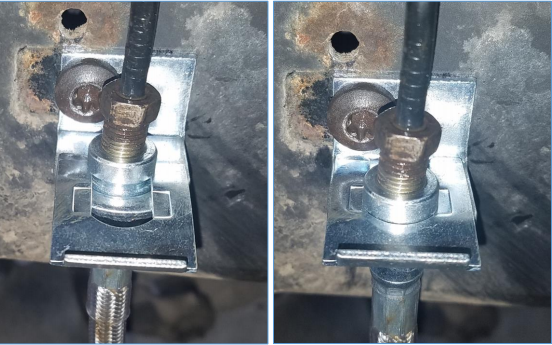
10. Use T40 Torx wrench to remove Torx bolt securing the brake hose on the frame side. Allow the line to drain into the catch pan. Use Torx bolt to secure the new bracket to the frame and attach the new brake hose to the brake line.
TIP: Doing this now will stop brake fluid from dripping down while removing the axle junction box.
TIP: Tuck the new brake hose up out of the way to prevent the brake fluid from draining down.
11. Use 7/16 wrench (or 3/8 depending if you have replaced the brake lines) to loosen the Driver and Passenger side brake lines from the junction box. Remove axle breather tube from the brake junction box on the axle. Use a flat head screwdriver to loosen the clamp and slide the tube up.
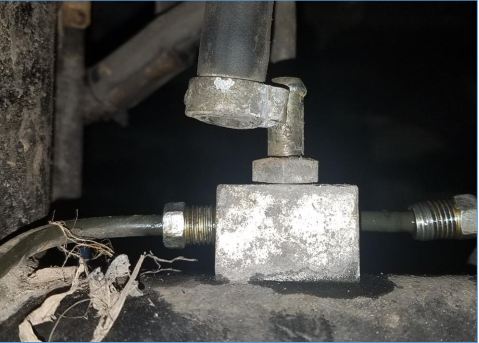
12. Use 9/16 wrench to remove axle breather tube from the junction box and remove the brake hose. Retain the breather tube and bolt.
13. Re-install breather tube bolt through the new brake hose and attach brake lines to the junction box. TIP: Since hard brake lines may not line up with the new box, start a couple threads on each brake line before securing the junction box to the axle with the breather tube bolt. Once all lines are connected, tighten the flare nuts and breather tube bolt. Re-attached breather tube to the axle.
14. After the brake lines have been installed, the system must be bleed off. This is done through the speed bleeder valves on each brake caliper and brake cylinder. Start at the farthest place from the master Cylinder (typically the rear Passenger side). Loosen the speed bleeder and have someone depress the brakes until fluid starts coming out the bleeder. Make sure the brake pedal is depressed when tightening the bleeder to prevent air from getting back into the lines. Repeat the process working from the Driver side rear, Passenger Side Front and then Driver Side Front. Add brake fluid if needed. Check all connections for leaks.
15. Take vehicle for a test drive to test brakes. Recheck all lines as needed.
Installation Instructions Written by ExtremeTerrain Customer Tim Hoffecker 5/17/2018.