
How to Install Synergy 0.75 in. Front & Rear Lift Spacer Kit (07-18 Wrangler JK) on your Jeep Wrangler

Shop Parts in this Guide
General Notes:
● These instructions are also available on our website; www.synergymfg.com. Check the website before you begin for any updated instructions and additional photo for your reference.
● These coil spacers are designed to be placed on top of stock coil springs, between the stock coil retainer.
● Installation tools required: metric wrenches, floor jack, 2 jack stands, and lug wrench.
● We recommend installing rear sway bar drop brackets or longer sway bar links for the 1.75” lift.
Installation instructions:
Front Suspension
1. Jack up the front of the vehicle and support the vehicle at the frame with
jack stands. Put wheel chocks behind the rear tires.
2. Leave the floor jack under the center of the front axle, it will be used to raise and lower the axle during installation.
3. Remove the front wheels.
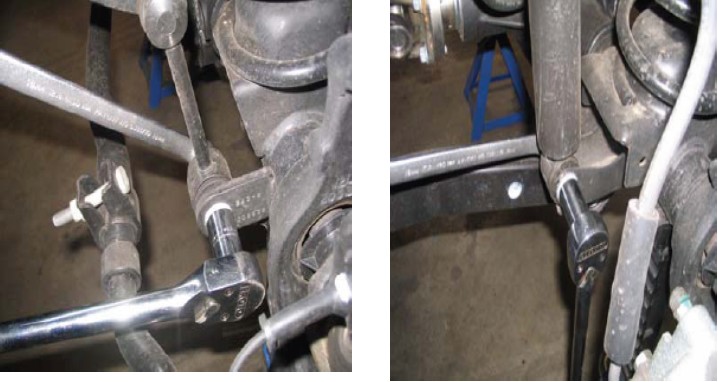
4. Disconnect the front sway bar link at the axle.
5. Disconnect the front shocks at the axle.

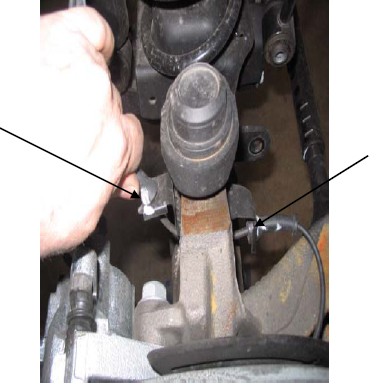
6. Disconnect the ABS line from the bracket on the steering knuckle on both sides of the vehicle.

7. With the shocks, sway bar end link and ABS line disconnected, lower the axle down to remove the coil springs.
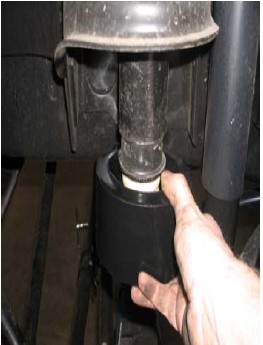
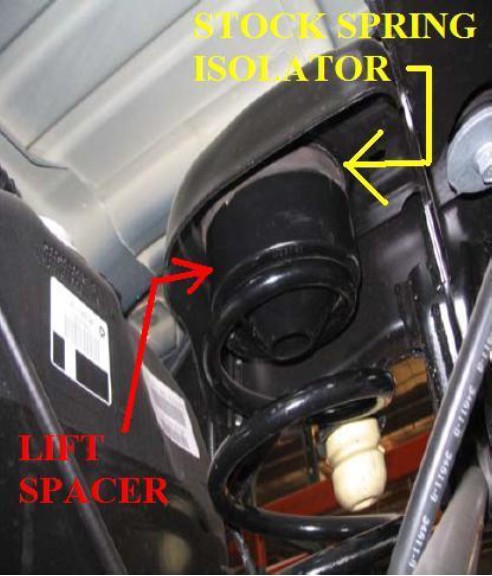
8. With the coil spring removed, install the lift spacer over the stock spring isolator. To clarify, from top to bottom; install the stock spring isolator, then install the lift spacer, then the coil.

9. Reinstall the coil springs.
10. Raise the axle up to reinstall the shocks, sway bar links and ABS sensor.
11. Reinstall front wheels.
12. Remove Jack stands from front of vehicle.
Rear Suspension
1. Place wheel chalks at the front wheels.
2. Raise the rear suspension and support the vehicle with jack stands at the frame.
3. Remove the rear wheels.
4. Remove the rear sway bar links and shocks at the axle. Unbolt the brackets that hold the rear brake lines to the outside of the frame.
5. Lower the axle to remove the rear coil springs.
6. With the coil removed, install the rear lift spacer over the stock spring isolator and install the coil springs. See picture below.

7. Raise the rear axle to reconnect the shocks and install the rear sway bar and brake line brackets.
8. Install the rear wheels and remove the jack stands.
9. We recommend having the wheel alignment checked.
10. Check all bolts and nuts after 500 miles and lug nuts.

