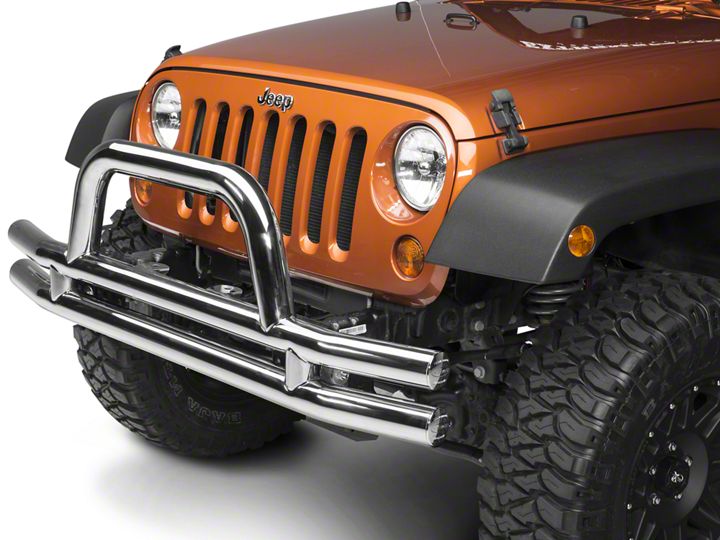

How to Install Smittybilt Stainless Steel 3" Front Tubular Bumper w/Hoop on your 07-18 Jeep Wrangler JK; 2018 Jeep Wrangler JL

Shop Parts in this Guide

PROCEDURE:
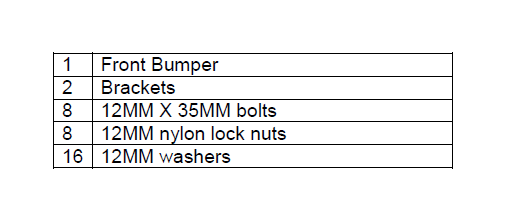
1. REMOVE CONTENTS FROM BOX. VERIFY ALL PARTS ARE PRESENT. READ
INSTRUCTIONS CAREFULLY.
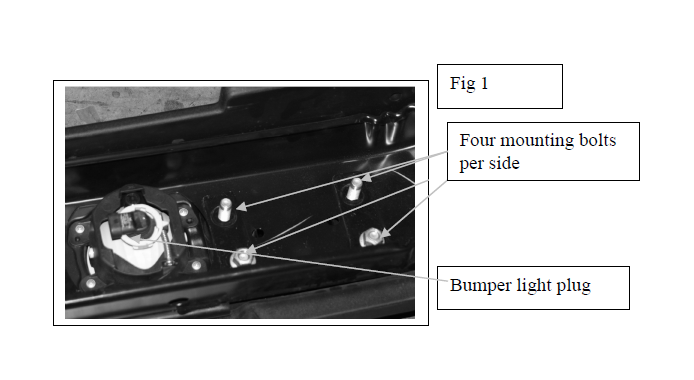
2. Unplug the bumper lights electrical connections (Fig 1)
3. Remove front factory bumper by removing the eight mounting bolts with a 17MM socket wrench (Fig 1)
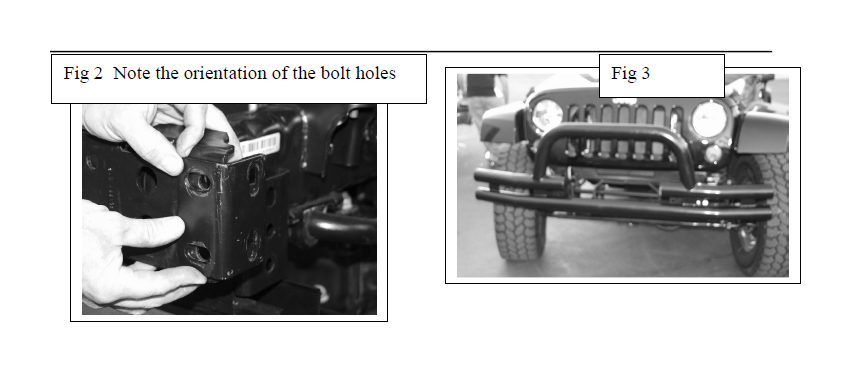
4. Install the new bumper brackets as shown in photos. Note that the bracket faces rearward and the forward facing holes (those the mounts bolt onto the frame) are horizontal, and those the bumper mounts to are vertical. (Fig 2)
5. Install the 12MM bolts and locking nuts to the mounts but leave finger tight to allow for adjustment
6. Install the 12MM bolts and locking nuts to the bumper and the mount.
7. Adjust the bumper and tighten all the bolts. (Fig 3)


Cleaning and Maintenance
To protect your investment, wax this product after installing. Regular waxing is recommended to add a protective layer over the finish. Do not use any type of polish or wax that may contain abrasives that could damage the finish.
For stainless steel: Aluminum polish may be used to polish small scratches and scuffs on the finish. Mild soap, window or glass cleaner may be used also.
For gloss black finishes: Mild soap, window and glass cleaner may be used.

