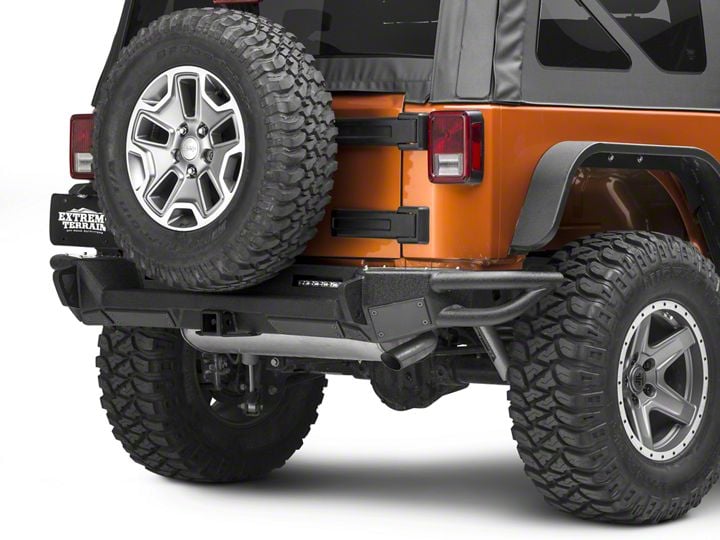

How to Install Smittybilt SRC Gen2 Rear Bumper (07-18 Jeep Wrangler JK) on your Jeep Wrangler

Shop Parts in this Guide
Installation Notes:
✓ You’ll need a strong assistant (111lbs bumper) for about 15 minutes as you are setting the new bumper in place.
✓ Images are supplemental to those provided in the instruction sheet by manufacturer.
✓ Torque bolts to spec sheet in instructions.
Pre-Installation notes:
✓ Remove the rear mounted spare.
✓ Pre-install aux reverse light brackets in bumper (lenses just snap in place later). The holes make for good hand-hold while installing bumper though, so wait to install lights until bumper is mounted.

Before
Installation Instructions:
1. Remove factory Bumper, Tow Hook, and Bumper support bracket.
a. Remove 5/8 inch bolts from the Bumper and Brackets.
i. 2 securing the bumper to the bracket, per side.
ii. 2 securing the bracket to the frame, per side.
iii. 4 securing the center brackets.
b. Remove the 18mm bolts (3, 2 from side, 1 from bottom) supporting the tow hook.

i. Factory Bumper, brackets and tow hook removed
2. Install reinforced box mount (aka nut plate PN 93-315BH013) inside RR frame rail
(The pair of welded on bolts are on the outside edge, the single welded on bolt is on the rear inside edge, hole in box mount is at the bottom). Loosely secure, from inside edge of frame, the bolt, compression washer, and washer, to the inside rear bolt mount (see grease protruding from bolt below).

3. Insert L-shaped angle bracket (PN 93-315DV003) in LR frame rail, tall end with welded on bolts flush with left edge of frame rail.
4. With an assistant, position bumper for install and hold in place.
a. Loosely screw in bolts, compression washers, washers into the right frame rails. (2 sets)
b. While the bumper is still being held in place, from under rear, hold L shaped bracket in place with one hand/finger thru frame rail and loosely thread in hardware (2 sets).
c. While bumper is still being held, but loosely secured from both frame rails, secure the center 4 bolts that reinforce the tow hitch with the provided hardware and nut plates (PN 90-315DV002). You will likely need to slightly lift the bumper to get the bolts to insert completely and thread into the nut plates.

Center bolts in place, nut plates hidden in slots

LR frame rail bolts in place
Completely mounted, factory spare re-installed
NOTE: The factory spare is pressing against the vertical part of the new bumper, with minimal pressure needed to close the tailgate. However, oversized width tires i.e. greater that 255s will likely require modification to the spare mount to allow the tailgate to close properly.
Installation Instructions Written by ExtremeTerrain Customer Jim S. 5/21/2017

