
Top Sellers for Titan XD
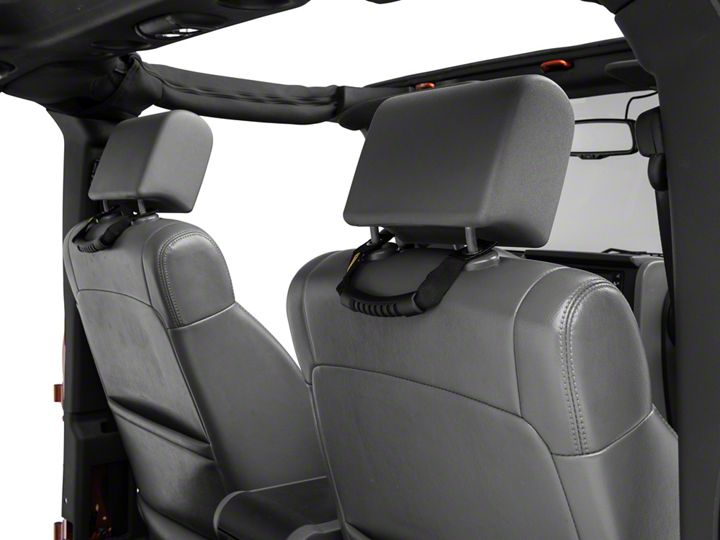
How to install Smittybilt JK Extreme Grab Handles, Black in your 07-18 Jeep Wrangler JK; 2018 Jeep Wrangler JL

Shop Parts in this Guide
Note: Read instructions completely before installing this accessory. These handles can be installed in a variety of locations below you will find instructions on installation of each location.
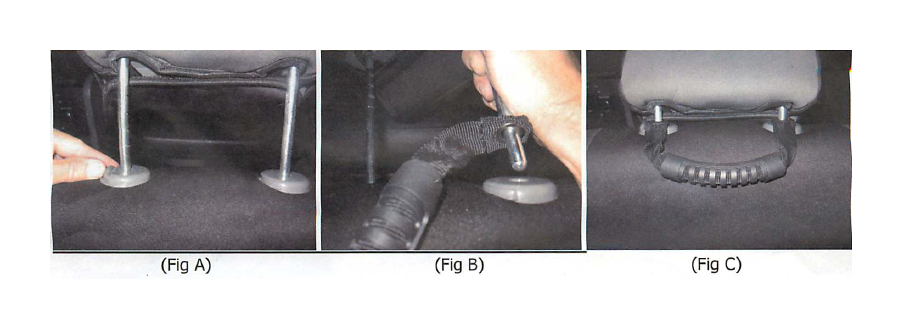
HEADREST INSTALLATION
Step 1: Raise Headrest up and remove by pushing in the locking tabs on each side. (Fig A) Stet)
2: Slide the headrest shafts through the grommets on each end of the strap. (Fig B) Step
3: Reinstall headrest in seat. (Fig C) Installation is now complete.

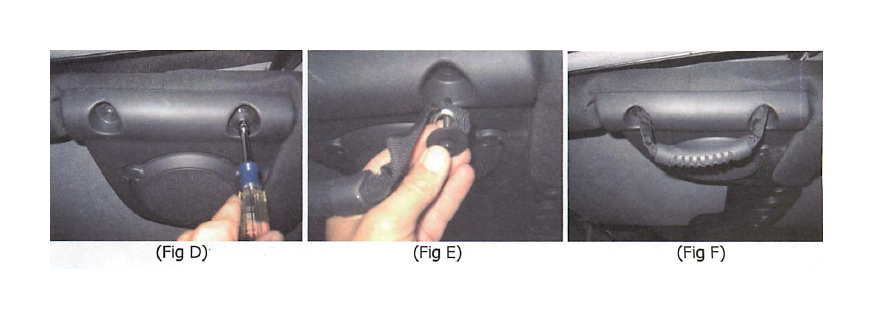
REAR SIDE INSTALLATION
Step 1: Using a 10mm socket remove the two screws located on the sides of the roll bar at the edge of the sound pod. (Fig D)
Step 2: Insert the previously removed bolts through the grommets on each end of the strap and then reinstall them. (Fig E) Installation is now complete. (Fig F)


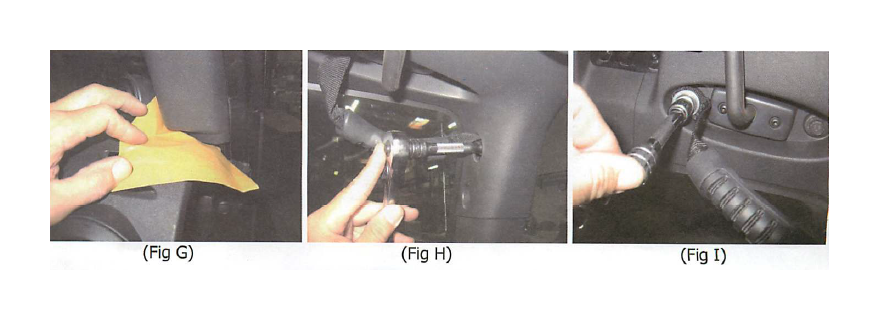
FRONT CORNER INSTALLATION
Note: Due to the bolt on the windshield pillar being located behind the factory plastic trim, it is recommended to place a piece of cardboard between on top of the dash between it and the bottom of the pillar trim. (Fig G) This will help prevent the bolt from falling behind the dash.
Step 1: Remove the top bolt on the side pillar using a 1/2" socket. (Fig H) Use caution in order for the bolt not to fall and to keep you tool from hitting the windshield.
Step 2: Now remove the inner most bolt on the sun visor bracket. (Fig I)
Step 3: Insert the previously removed bolts through the included flat washer then through the grommet in the handle and install. (Fig I) Installation is now complete.


