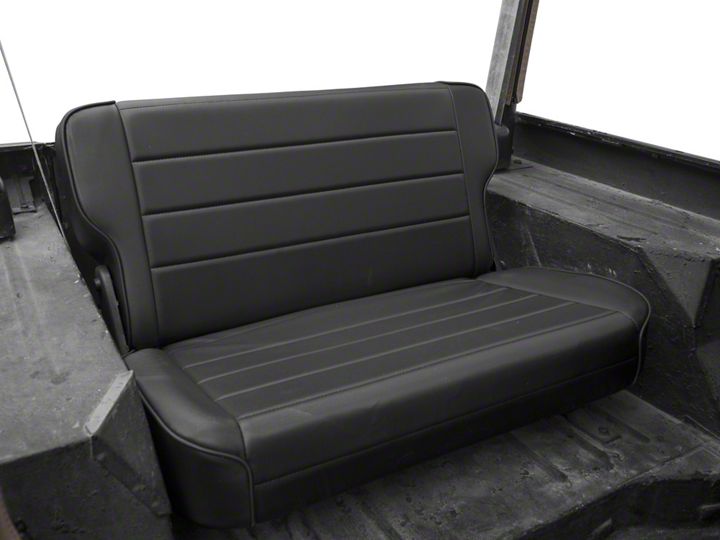

How to Install Smittybilt Fold and Tumble Rear Seat Vinyl, Black Denim on your 1987-1995 Wrangler

Shop Parts in this Guide
- Smittybilt Rear Fold and Tumble Seat; Black Denim (87-95 Jeep Wrangler YJ)
- Smittybilt Rear Fold and Tumble Seat; Traditional Black (87-95 Jeep Wrangler YJ)
- Smittybilt Rear Fold and Tumble Seat; Charcoal Light Gray Denim (87-95 Jeep Wrangler YJ)
- Smittybilt Rear Fold and Tumble Seat; Spice Denim (87-95 Jeep Wrangler YJ)
Note: Please read instructions thoroughly before installing this product. Some pictures and steps may vary depending on the year of the vehicle. These instructions are intended to help with the installation process on all models.
Step 1: Remove seat mounting bolts from floor. Please note that some early CJ models may only have one mounting hole for each side. Drilling of the second mounting hole will be required. (Additional hardware to be supplied by customer - Grade 5 or higher bolt and washer are recommended.)
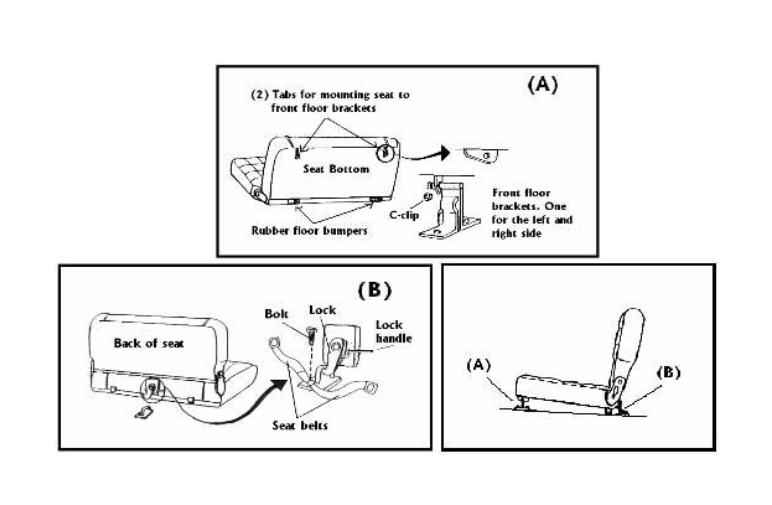
Install front seat brackets through seat mounting tabs as shown. Install C-clip to secure bracket to tab. Align mounting bracket over holes in floor and securely tighten with seat mounting bolts. (Fig. A)
Step 2: Remove seat belt anchor bolt from floor. Position lock underneath seat belt & eyelets as shown in (Fig. B) Please note that more than one hole may be supplied to align the bracket with the floor mounting hole and seat lock. If desired, an additional hole can be drilled for the bracket to be secured with two bolts. (Additional hardware to be supplied by customer - Grade 5 or higher bolt and washer are recommended.) Reinstall seat belt anchor bolt through seat belt eyelets and seat lock. DO NOT TIGHTEN YET.
Align seat lock with striker so that the seat locks when the seat is pushed down into position. Tighten seat belt anchor bolt. At this time, a second hole, if desired, can be drilled for the bracket to be secured with two bolts. (Additional hardware to be supplied by customer - Grade 5 or higher bolt and washer are recommended.)


