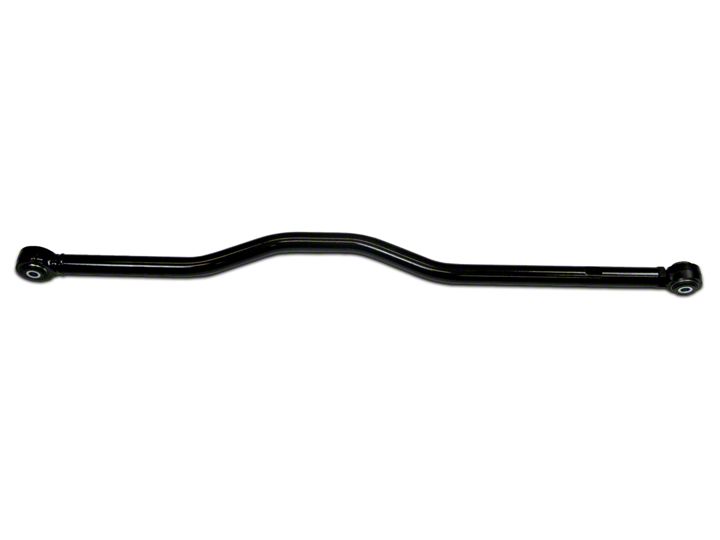

How to Install SkyJacker Rear Adjustable Track Bar for Stock Height (07-17 Wrangler JK) on your Jeep Wrangler
Tools Required
- Safety Glasses
- Metric / Standard Wrenches & Sockets
- Adjustable Wrench
- Tape Measure
- Torque Wrench

Shop Parts in this Guide

Before beginning the installation, thoroughly & completely read these instructions & the enclosed driver’s WARNING NOTICE. Affix the WARNING decal in the passenger compartment in clear view of all occupants. Please refer to the Parts List to insure that all parts & hardware are received prior to the disassembly of the vehicle. If any parts are found to be missing, contact SKYJACKER® Customer Service at 318-388-0816 to obtain the needed items. If you have any questions or reservations about installing this product, call SKYJACKER® Technical Assistance at 318-388-0816.
Component Box Breakdown:

Installation:
1. Park the vehicle on a level asphalt or concrete surface & chock the front & rear tires / wheels.
2. Remove the OEM track bar bolt from the lower axle mounting location using a 21mm socket or wrench. Note: If needed, attach a ratchet strap between the frame & the rear differential to take the load off of the lower OEM track bar bolt.
3. Remove the OEM track bar bolt from the upper frame mounting location using a 21mm socket or wrench.
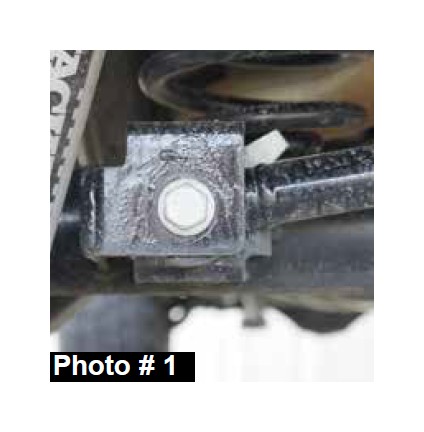
4. Remove the OEM track bar & install the fixed end of the new Skyjacker adjustable rear track bar to the lower track bar mounting location using the OEM hardware & a 21mm socket or wrench. Do not tighten at this time. (See Photo # 1)
5. Using a tape measure, check the vehicle to make sure the body is centered over the rear tires / wheels & adjust the new Skyjacker rod end to align with the upper track bar mounting location.
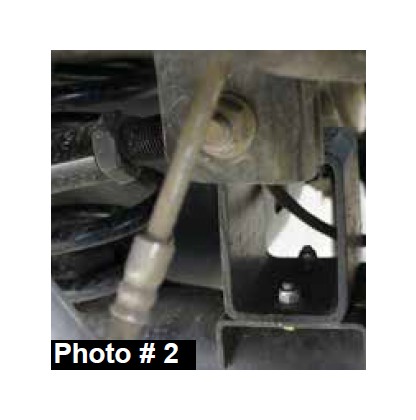
6. Install the adjustable end of the new Skyjacker adjustable rear track bar to the upper track bar mounting location using the OEM hardware & a 21mm socket or wrench. Do not tighten at this time. (See Photo # 2)
7. Tighten the upper & lower track bar mounting hardware to the OEM specifications using a 21mm socket or wrench.
8. Tighten the jam nut of the new Skyjacker rod end using an adjustable wrench.


Final Notes:
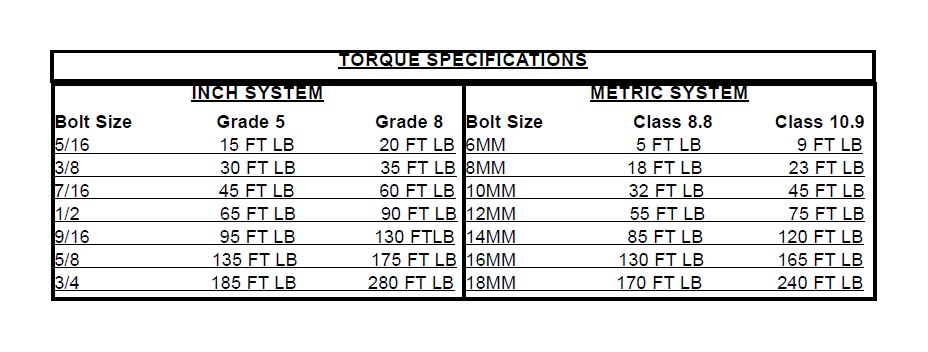
• After the installation is complete, double check that all nuts & bolts are tight. Refer to the following chart below for the proper torque specifications.
• With the vehicle placed on the ground, cycle the steering lock to lock & inspect the steering, suspension, brake lines, front & rear drivelines, fuel lines, & wiring harnesses for proper operation, tightness, & adequate clearance.
• After the first 100 miles, check all of the hardware for the proper torque & periodically thereafter.


