
How to Install SkyJacker Front & Rear Lower Contol Arms for 2-6 in. Lift (07-17 Wrangler JK) on your Jeep Wrangler
Tools Required
- Safety Glasses
- Metric / Standard Wrenches & Sockets
- Measuring Tape
- Torque Wrench
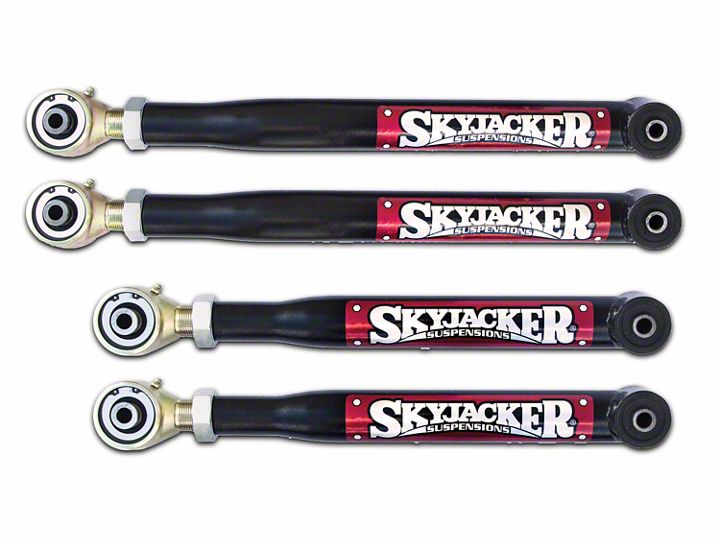
Shop Parts in this Guide
Before beginning the installation, thoroughly & completely read these instructions. Please refer to the Parts List to insure that all parts & hardware are received prior to the disassembly of the vehicle. If any parts are found to be missing, contact SKYJACKER® Customer Service at 318-388-0816 to obtain the needed items. If you have any questions or reservations about installing this product, contact SKYJACKER® Technical Assistance at 318-388-0816.
IMPORTANT NOTES:
• After installation, a qualified alignment facility is required to align the vehicle to the OEM specifications.
Component Box Breakdown:

Installation:
1. Park the vehicle on a flat level surface, set the emergency brake, & block the front & rear tires / wheels.
2. Measure the length of the new Skyjacker lower control arms between the center of the rod end & bushing on each control arm. Rotate the rod end as needed, being sure to keep the ends square with each other until the new Skyjacker front lower control arms measure 22 13/16" center to center & the new Skyjacker rear lower control arms measure 20" center to center.
3. Install the new Skyjacker rod end step bushings into each side of the new rod ends.
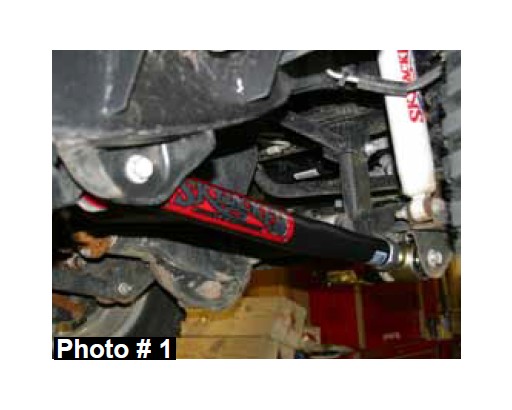
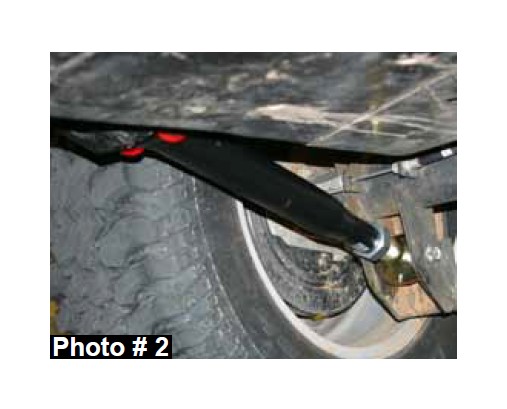
4. One at a time, remove the OEM lower control arms & install the new Skyjacker lower control arms using the OEM hardware. (See Photos # 1 & # 2) Note: Install the new front lower control arms with the offset bend toward the inside of the vehicle. Tighten each jam nut to seat against the base of the new lower control arms.
FINAL NOTES:
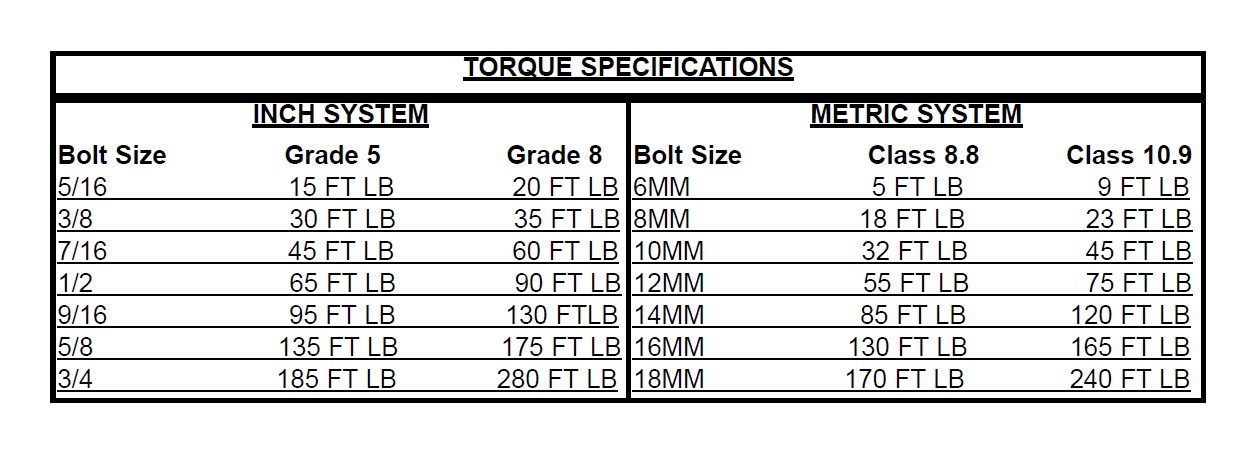
• After the installation is complete, double check that all hardware is tight. Refer to the following chart below for the proper torque specifications.
• Retorque all hardware after the first 100 miles.
