
How to Install Rugged Ridge Sherpa Roof Rack On Your 07-14 Wrangler
Shop Parts in this Guide
Optional Accessories:
Lightbar Lowering Kit SKU#11232.22
Crossbar Adapters SKU#11703.10
WARNING
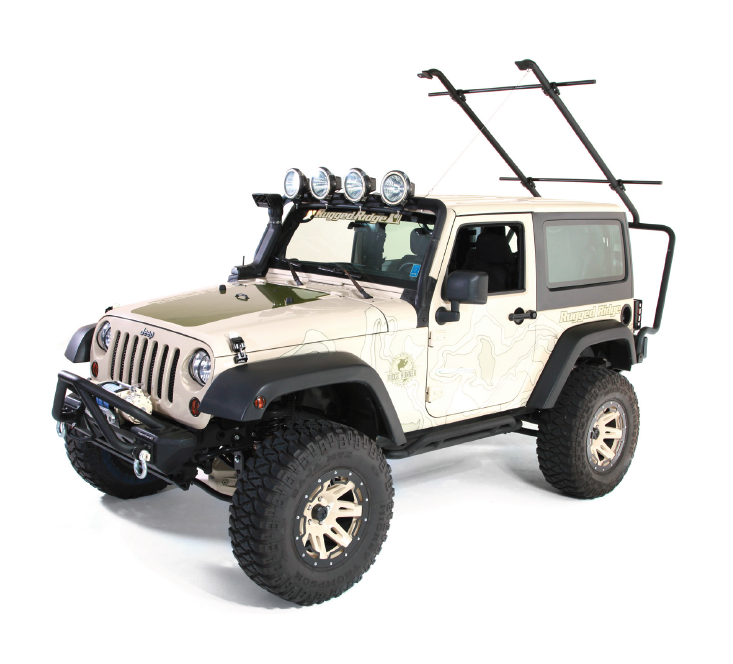
The Sherpa Rack is rated to a 300lb evenly distributed load. Further loading could result in serious injury or death.
NOTICE
Installer is responsible for ensuring adequate silicone is used and applied correctly to all tubing joints, bolt locations and wire grommets. Apply an even bead of silicone on the inside of the female end. Insert the male end into tube. Silicone may also be used under bolt heads and nuts for additional weatherproofing. The following symbol is a reminder:
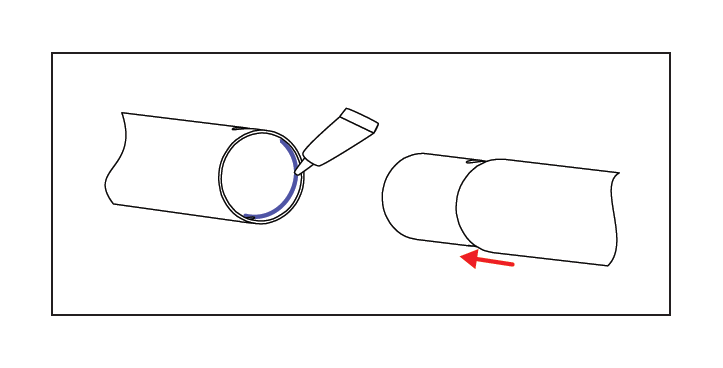
NOTICE
Notice: If lights will be used, it is necessary to run wire leads during steps 1-3 using pre-drilled holes in the left windshield bracket and front crossbar, shown in red below. Use included rubber grommets and seal with silicone.
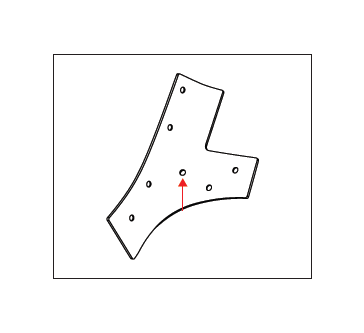
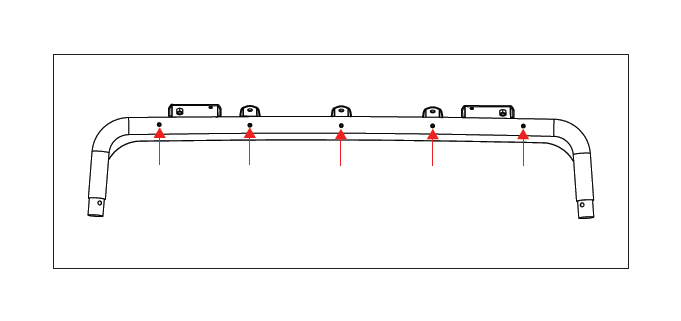
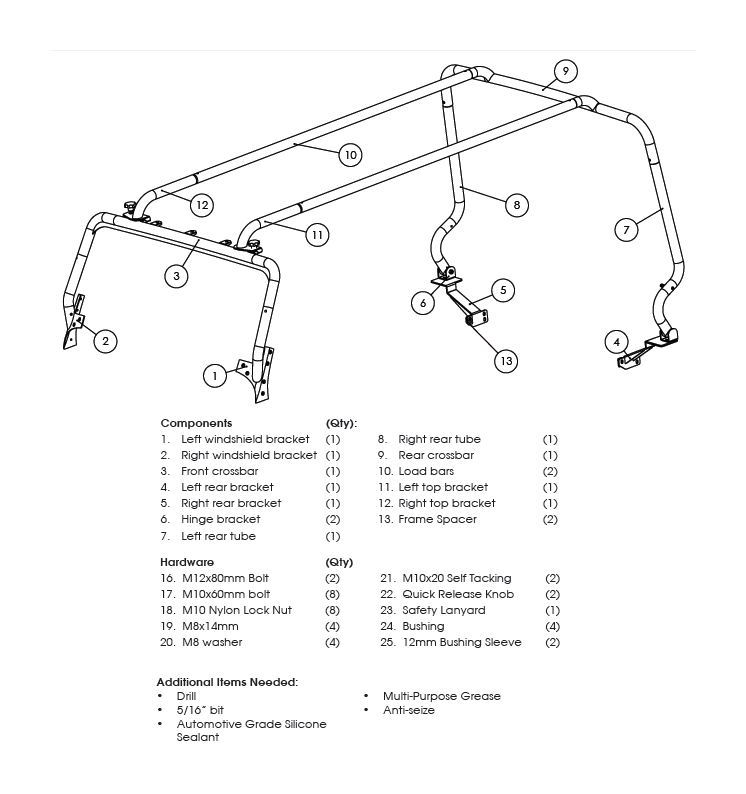
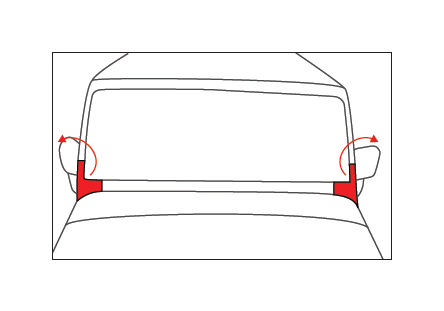
1. Remove the factory left and right windshield brackets. Retain factory hardware for later use.
2. Attach left and right brackets to front crossbar with supplied M10x60 bolt and nylon lock nut. Do not tighten completely to allow for adjustment.
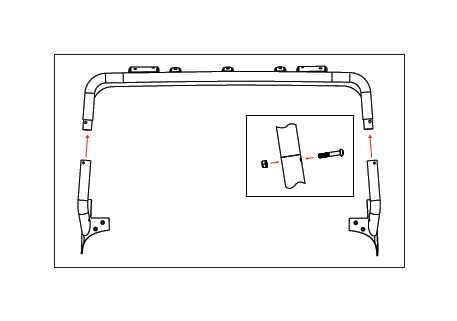
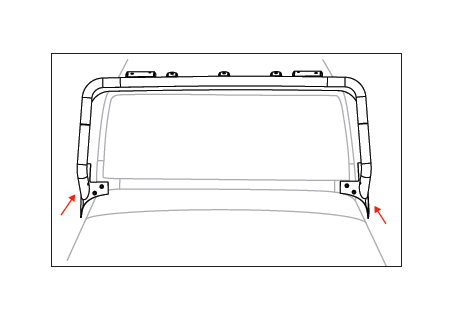
3. Install front crossbar assembly to vehicle using factory hardware retained from Step 1. Do not tighten completely to allow for adjustment.
CAUTION
Use of tape on the a-piillar, cowl, and fender is recommended to prevent damage to vehicle’s finish.
Two people are also recommended for this step: One on each side.
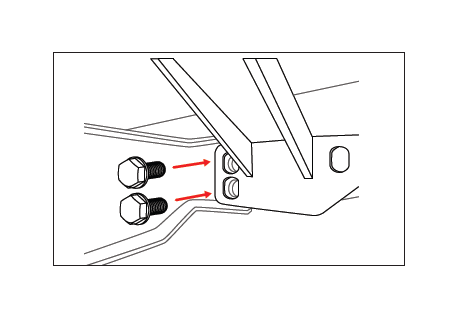
4. Remove rear bumper bolts. Slide rear bracket into position and attach with the factory hardware. Repeat for opposite side. Do not tighten completely to allow for adjustment in later steps.
Note: This rack is designed for use with Rugged Ridge® and OE rear bumpers. Other aftermarket bumpers may require complete removal of the bumper for installation or other modifications.
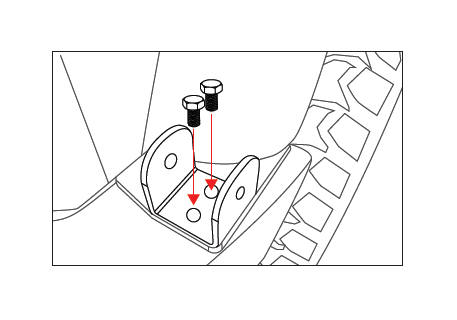
5. Install hinge brackets to each rear bracket using supplied M8 bolts and washers. Ensure the weld-nut is facing the body of the Jeep.
6. Grease bushings. Insert one into either side of a rear tube opening. Insert metal sleeve into bushings. Repeat for opposite side.
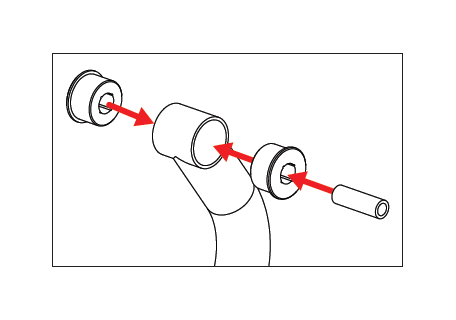
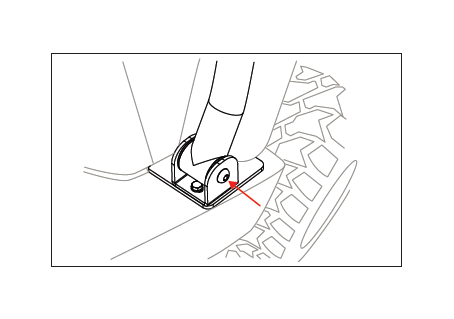
7. Place rear tube into hinge bracket. (There are Left-hand and Right-hand sides; tube should bend in towards fender flare.) Insert the M12x85 bolt through the hinge and bushing sleeve, and into the weldnut. Tighten bolt. Repeat for both sides.
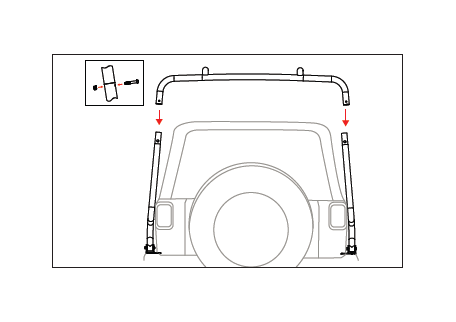
8. Install rear crossbar with supplied M10x65 bolts and nylon
lock nuts. The tube horn openings will face the front of the
vehicle. Do not tighten completely to allow for adjustment.
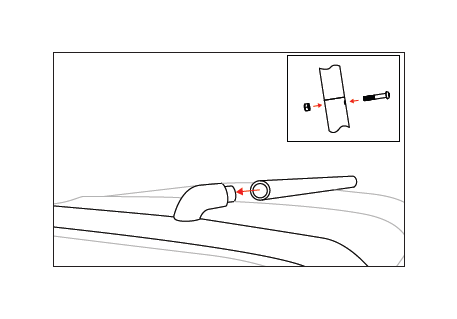
9. Install load bars onto the tube horns on the rear crossbar using the supplied M10x65mm bolts and nylon lock nuts. Do not tighten completely to allow for adjsutment.
CAUTION
To protect against scratches, it is recommended to place a sacrificial covering on the vehicle top as the front of the load bars may rest on the top during this time.
10. Insert the right top bracket onto the right load bar and install using the supplied M10x65mm bolt and nylon lock nut. Repeat prodecure for the right top bracket and right load bar.
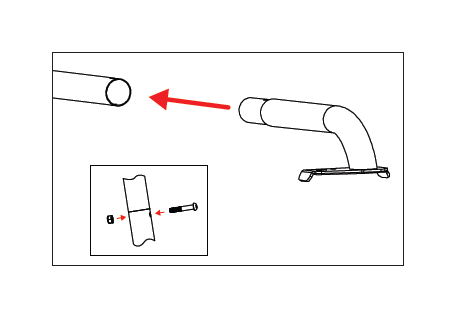
11. Locate the front brackets on the receiving plates of the front crossbar. Use supplied quick release knobs to connect the tiltable section to the lightbar portion.
Note: To ease future removal, it is recommended to use anti-seize on the threads of the knobs.
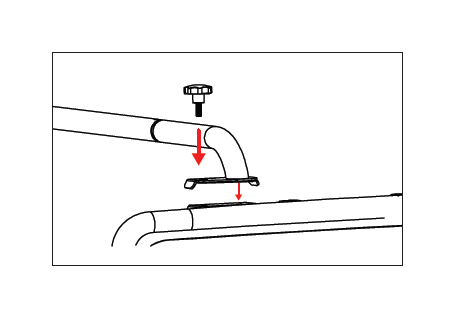
12. Mark and drill 3rd hole for the rear brackets using a 5/16” bit. Use supplied self-tapping screw for the 3rd hole. Adjust the rack to the best position and tighten all bolts.
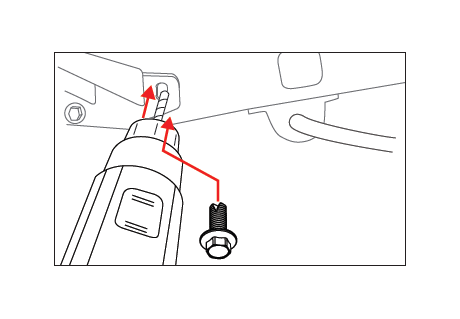
13. Assemble the rubber bumper assembly as shown. Use the washers to move the bumper inward enough to contact the body. Bumper should have slight tension against vehicle to prevent rack from swaying.
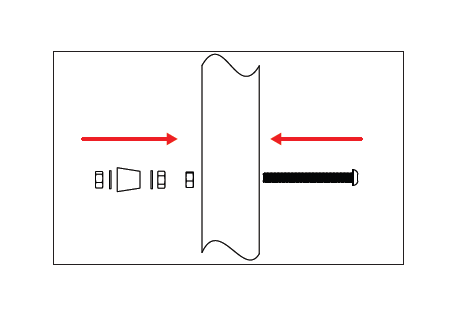
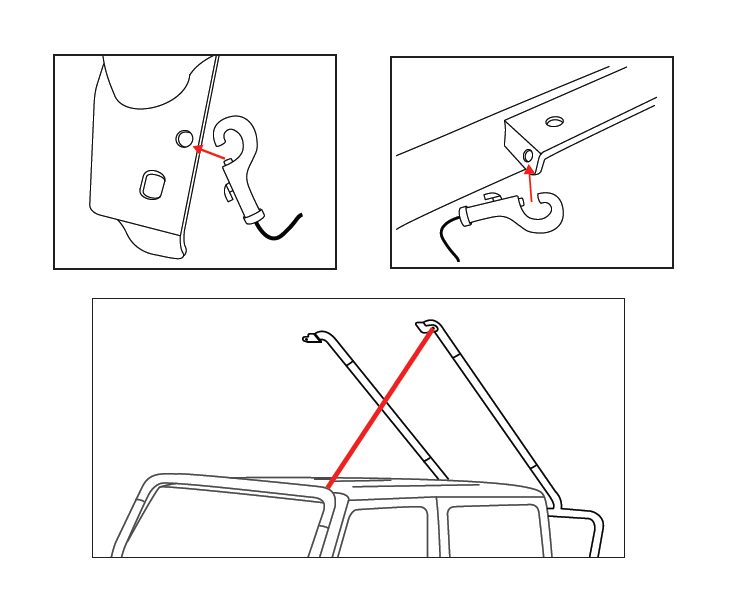
Tilting the Rack. To tilt the rack, attach the safety lanyard to the hole on the top bracket and the other end to the side hole on the landing pads of the front crossbar. Slowly tilt the rack until the lanyard is holding the rack from continuing.
WARNING
DO NOT attempt tilting rack while loaded. Serious injury or death may occur.
