

How to Install Rugged Ridge Front Euro Light Guards, Black on your 2007-2013 Wrangler
Shop Parts in this Guide
Step (1)
Open hood of vehicle and prop up securely.
Step (2)
Locate the (6) plastic screws that attach the front grille to the upper body support (Fig. 1).
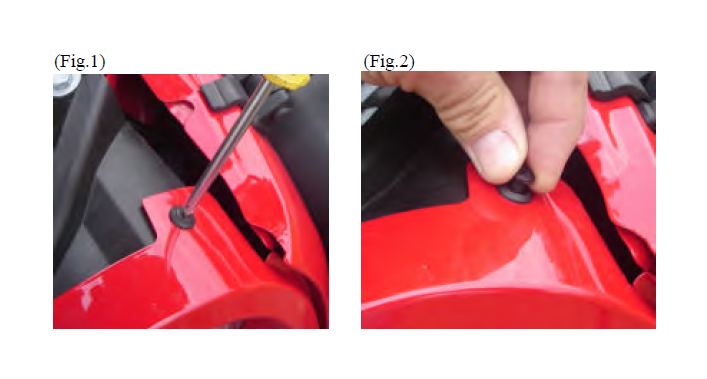
unscrew the plastic screws using a Phillips head screw driver.
Note: the plastic screws can be pulled out by hand after they have been loosened. (Fig. 2)
If screws do not want to back out a small flat head screw driver can be used to pry
the screws upward.
Step(3)
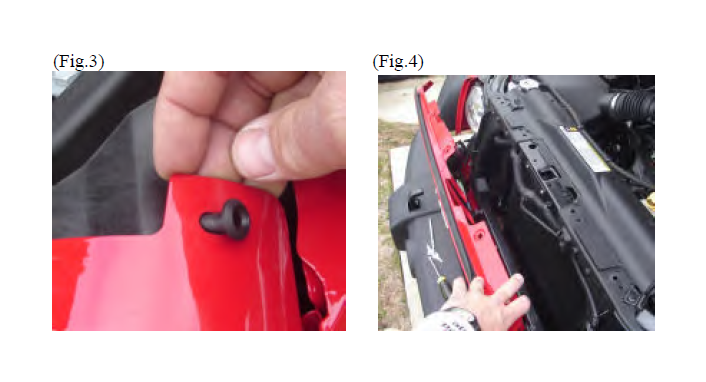
With the screws removed pop out the black retainer clip. (Fig. 3)
Step(4)
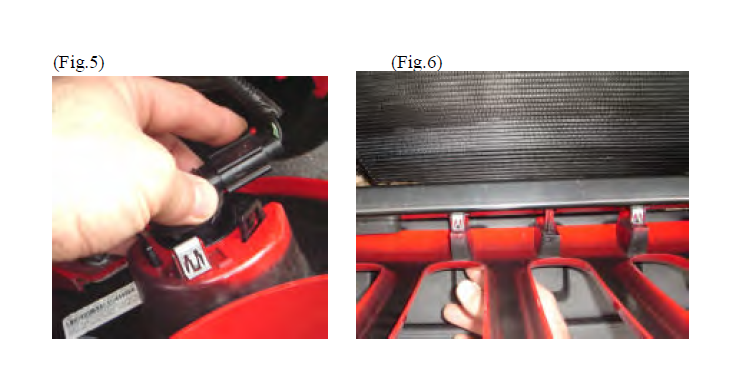
Gently pull the grille forward (fig. 4). If desired the grille can be removed by disconnecting the two front turn signal bulbs and gently popping the grille from its lower retainer clips. (Fig. 5 – 6)
Step(5)
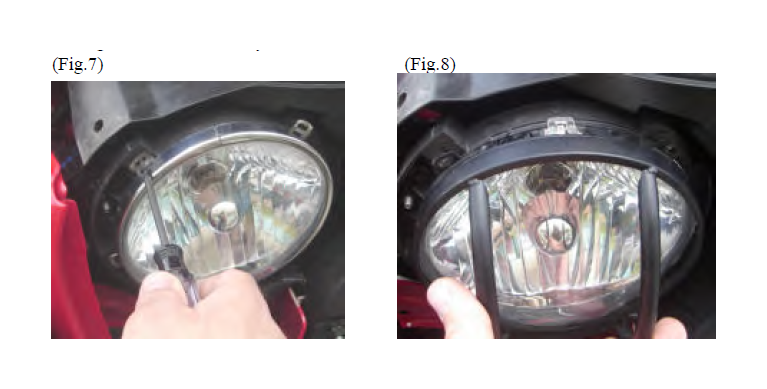
Remove the original headlamp retainer ring using a T15 torx head screwdriver. Do Not Discard Screws as they will be reused. (Fig. 7). With ring removed place new Euro Guard retainer ring over lamp , aligning the tabs as shown (Fig. 8). Please note that the headlamps have keyed tabs molded into the rear of the light. This insures that the light is properly aligned when installed. The new guards are the same part for both left
and right sides and can only be mounted in one direction.
Step(6)
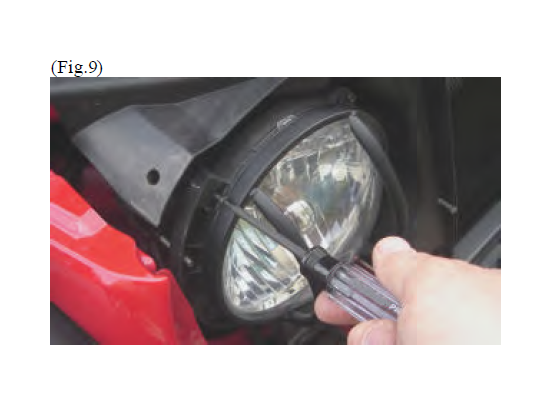
With the ring in place reinstall the torx head screws saved in step 5. The ring has been designed with a very tight fit around the lamp and may not slide easily over your lens. If this happens, simple insert one screw into the outer top mounting tab and loosely tighten. Now insert the remaining four screws insuring that the lamp is correctly positioned into assemble tabs. With all screws in place start tightening each screw a little at a time until the Euro Guard retainer ring is pulled over the lamp and is secured to the lamp assemble base. Tighten all screws with the T15 torx head screw driver. (Fig. 9 )
Step(7)
Repeat steps 5 and 6 for the installation of the other Euro Guard lamp retainer ring.
Step (8)
Re-install the front turn signal electrical plug and grille. This will be the opposite of steps 1 through step 4.

