
Top Sellers for Gladiator
How to Install Rugged Ridge All Terrain Entry Guard Kit on your Wrangler
Shop Parts in this Guide
Read all instructions thoroughly before installation.
For proper installation, mounting surface of item should be between 4-38°C (40-1 COT) prior to application.
THIS STEP MUST BE DONE FOR ADHESIVE TAPE TO PROPERLY MOUNT FAILURE TO CLEAN COULD RESULT IN POOR ATTACHMENT OF ITEM.
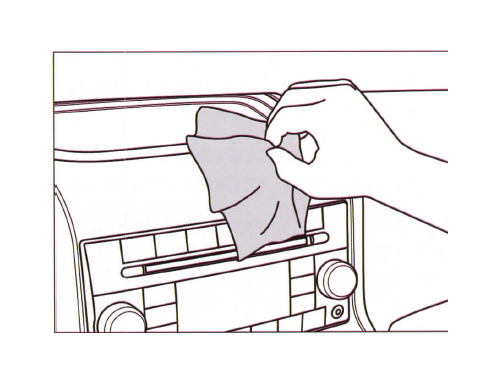
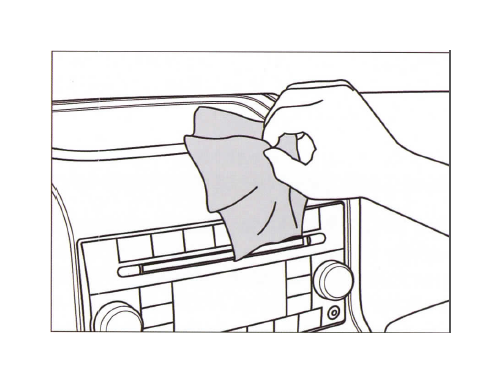
1. Clean surface with isopropyl alcohol (rubbing alcohol). Avoid cleaning areas that tape will not contact.
2. If your kit includes 3M© Adhesive Promoter 06396, apply to mounting surface. Avoid areas that tape will not contact. Allow 90 seconds for Adhesive Promoter to dry before proceeding. Note: For best results, install within 10 minutes of installing Adhesive Promoter.
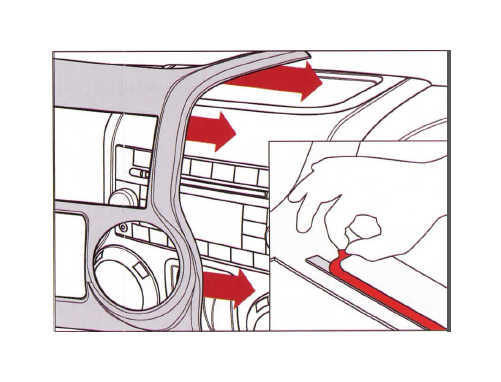
3. Test fit item to the vehicle before removing plastic liner from mounting tape. This will aid in aligning the item before adhesion.
4. Remove only enough plastic liner to be easily gripped when item is installed.
Note: The plastic liner of the shorter tape sections may need to be fully removed before installing.
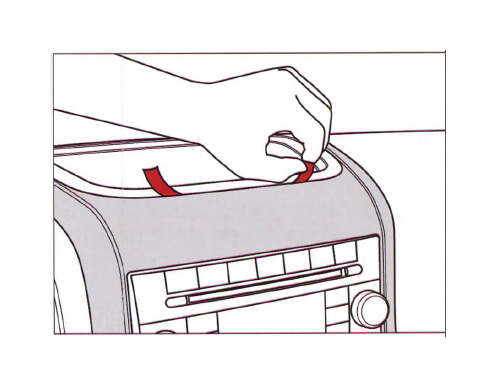
5. Install item in proper mounting position while keeping partially removed liner ends accessible.
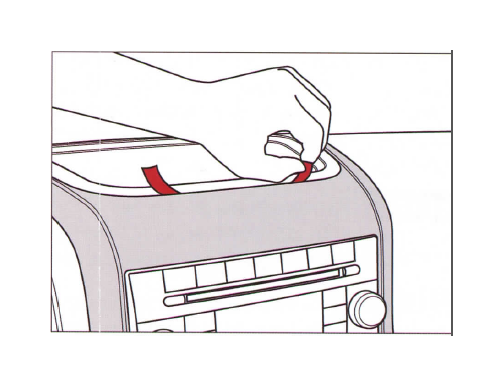
6. Firmly hold item in proper mounting position while pulling the exposed plastic liner to completely remove. Maintain pressure on installed item for 30 seconds to ensure proper contact. Full adhesion occurs within 24 hours of application.
NOTICE Areas where promoter may be visible can be cleaned with acetone solvents or methylethyl keytone (MEK). See promotor manufacturer for further detail.
CAUTION Solvents can cause cosmetic damage to plastic surfaces. See promoter manufacturer for further detail.
THIS STEP MUST BE DONE FOR ADHESIVE TAPE TO PROPERLY MOUNT. FAILURE TO CLEAN COULD RESULT IN POOR ATTACHMENT OF ITEM.
1. Clean surface with isopropyl alcohol (rubbing alcohol). Avoid cleaning areas that tape will not contact.
2. If your kit includes 3M© Adhesive Promoter 06396, apply to mounting surface. Avoid areas that tape will not contact. Allow 90 seconds for Adhesive Promoter to dry before proceeding. Note: For best results, install within 10 minutes of installing Adhesive Promoter.
3. Test fit item to the vehicle before removing plastic liner from mounting tape. This will aid in aligning the item before adhesion.
4. Remove only enough plastic liner to be easily gripped when item is installed.
Note: The plastic liner of the shorter tape sections may need to be fully removed before installing.
5. Install item in proper mounting position while keeping partially removed liner ends accessible.
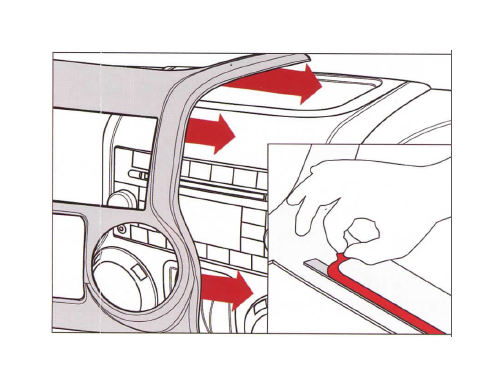
6. Firmly hold item in proper mounting position while pulling the exposed plastic liner to completely remove. Maintain pressure on installed item for 30 seconds to ensure proper contact. Full adhesion occurs within 24 hours of application.
NOTICE Areas where promoter may be visible can be cleaned with acetone solvents or methylethyl keytone (MEK). See promotor manufacturer for further detail.
CAUTION Solvents can cause cosmetic damage to plastic surfaces. See promoter manufacturer for further detail.
