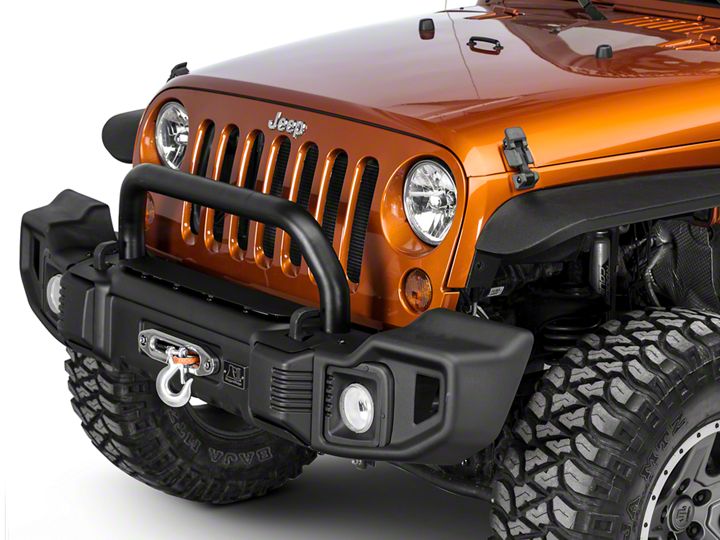

How to Install Rugged Ridge Spartacus Front Bumper Kit w/Overrider Satin Black on your 07-18 Jeep Wrangler JK; 2018 Jeep Wrangler JL
Shop Parts in this Guide
JK Spartacus Stamped Front Bumper
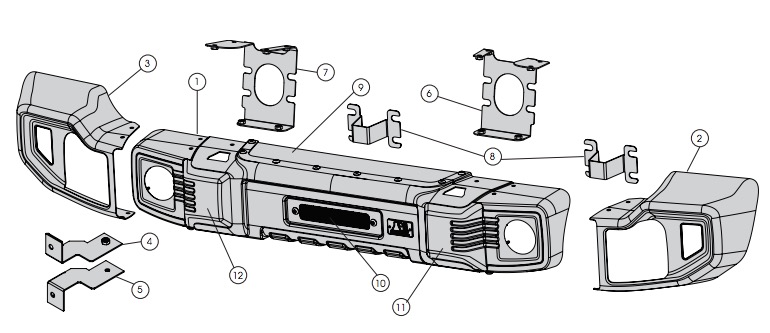
Bumper Components
1. Bumper Center Section (1)
2. Bumper End, LH (1)
3. Bumper End, RH (1)
4. Support Bracket, LH (1)
5. Support Bracket, RH (1)
6. Bumper Mount Bracket, LH (1)
7. Bumper Mount Bracket, RH (1)
8. Stanchion (2)
9. Winch Delete Plate (1)
10. Fairlead Cover (1)
11. Plastic Cover, LH (1)
12. Plastic Cover, RH (1)
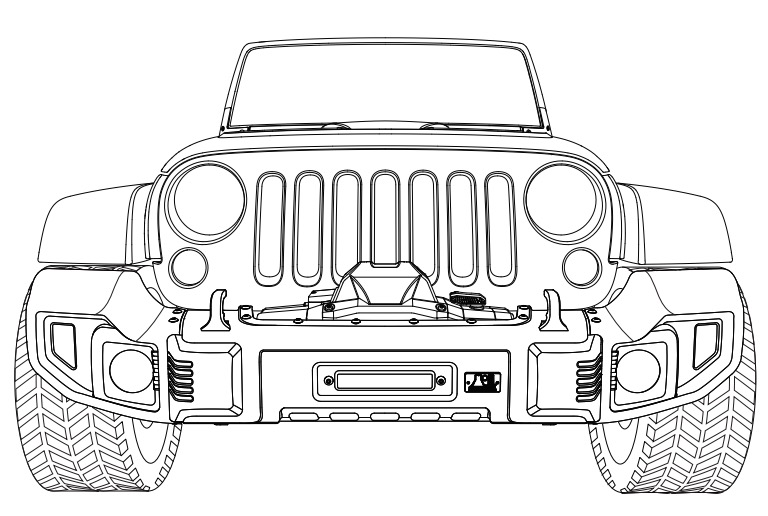
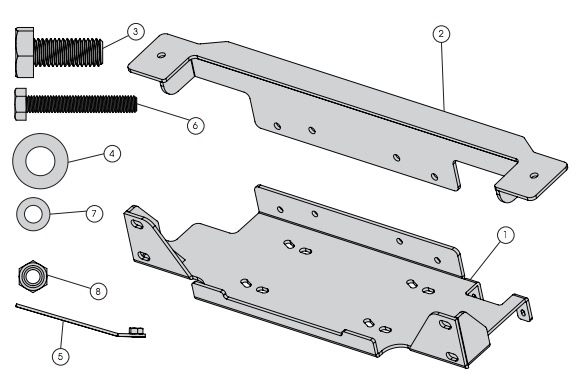
Winch Plate Components
1. Bottom Plate (1)
2. Top Plate (1)
3. M10 Hex Bolt (6)
4. M10 Flat Washer (6)
5. M10 Nutplate (2)
6. M6 Hex Bolt (2)
7. M6 Flat Washer (2)
8. M6 Lock Nut (2)
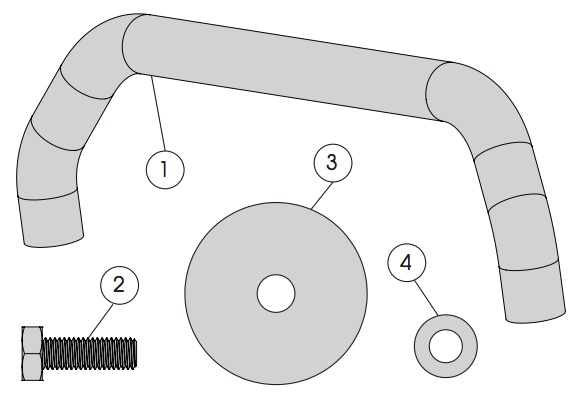
Overrider Components
1. Hoop (1)
2. M10 Hex Bolt (2)
3. Gasket (2)
4. Flat Washer (2)
1.Disconnect fog lights from vehicle and remove factory bumper and tow hooks. Remove fog light housing from factory bumper.
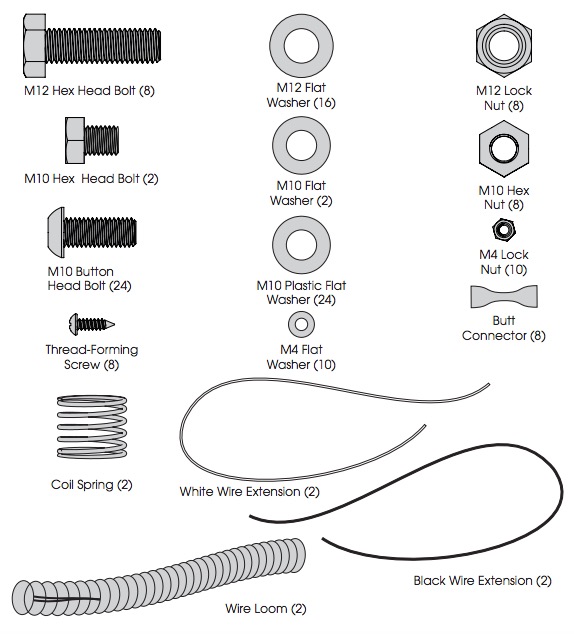
2. Install Plastic Covers to Bumper Center Section using M4 Lock Nuts and Washers.
3. Press Coil Spring onto molded cross feature of Plastic Covers.
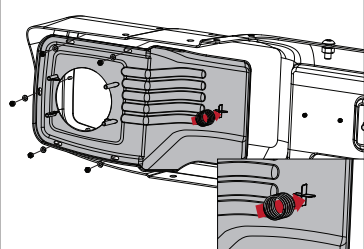
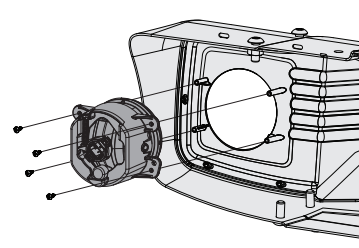
4. Remove bulb from factory fog light housing and install housing to bosses in Plastic Cover using supplied Thread Forming Screws. Do not overtighten.
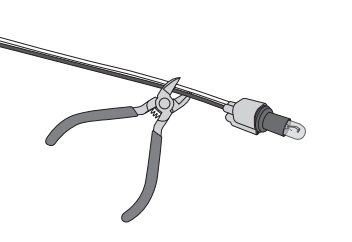
5. Cut bulb wire 2” from base of bulb fixture. Strip ¼” from the ends of each wire.
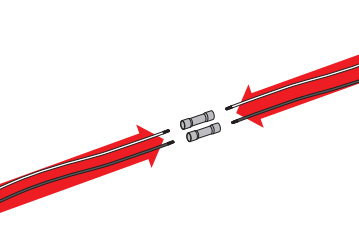
6. Splice bulb wires with supplied black and white Extension Wire and Butt Connectors.
7. Wrap exposed wire with Wire Loom.
NOTICE - For non-Winch Plate installs, skip to step 22.
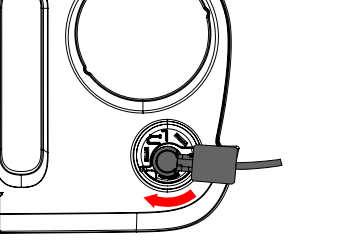
8. Disconnect turn signal from behind grille. Rotate bulb assembly down and pull out of light housing.
9. Raise hood and remove (6) plastic fasteners on top of grille. First pull up on center pin, then pull up on entire plastic retainer assembly. (These will be reused in later steps)
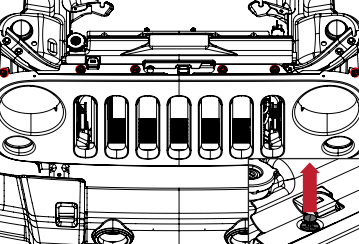
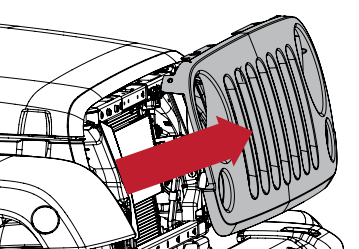
10. Pull bottom of grille away from vehicle to disengage metal clips on bottom rear of grille. Remove factory grille from vehicle.
11. Remove factory plastic closeout panel by releasing the plastic fasteners that attach it to each frame rail.
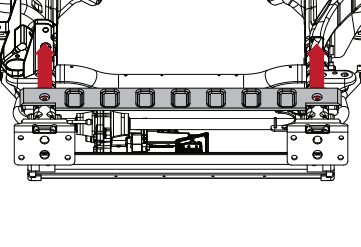
NOTICE - For Winch Plate installs on 07-11 model year vehicles, skip to step 17.
12. Unbolt and remove factory vacuum pump. Retain factory bolts.
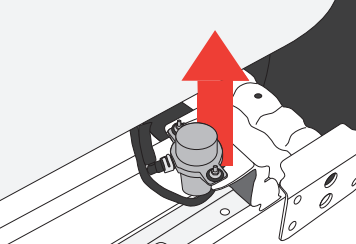
13. Using cutoff wheel, remove both tabs from mounting bracket. Remove as much material as possible.
14. Coat exposed metal with rust-inhibiting black paint.
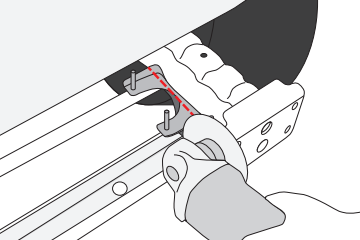
15. Disconnect hose retainer clips from vacuum pump and remove zip ties holding air lines.
16. Attach vacuum pump to Winch Plate using M6 Hex Bolts, Flat Washers, and Lock Nuts supplied with Winch Plate.
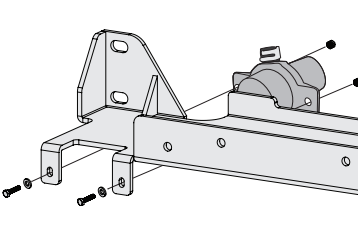
17. Install Winch Plate by first placing Bottom Plate between frame horns.
18. Position Top Plate onto frame horns with rear flange located forward of Bottom Plate rear flange.
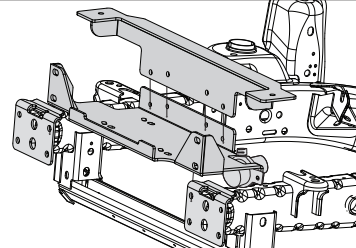
19. Attach Top and Bottom Plate at rear flange with M10 Hex Bolts and Flat Washers supplied with Winch Plate.
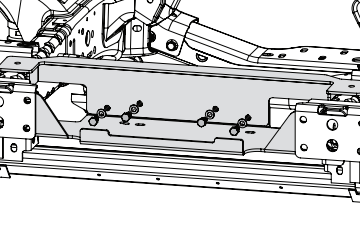
20. Attach Winch Plate to top of each frame horn using M10 Hex Bolt and M10 Nut Plate supplied with Winch Plate.
21. Reconnect vacuum pump and reinstall grille.
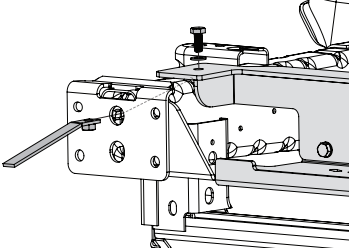
22. Insert Support Bracket into opening in frame and secure with supplied M12 Hex Bolts and Flat Washers
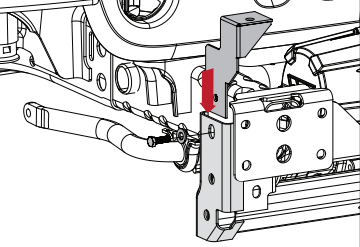
23. If not installing a winch at this time, attach Fairlead Cover and Winch Delete Plate with M10 hardware to Plastic Cover.
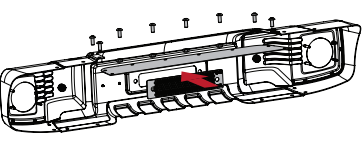
NOTICE - To skip optional crush can install and use supplied Stanchions, skip to step 27.
24. Remove crush cans, including (4) mounting holes, from factory bumper using cutoff wheel.
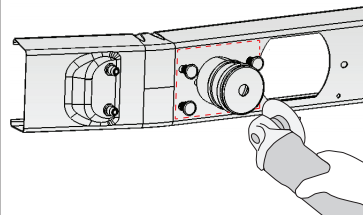
25. Insert Tow Hooks into opening in Bumper Center Section. If not using Tow Hooks, replace with M12 Hex Head Bolts. Place Crush Can and Bumper Mount Bracket in place in front of Tow Hooks or M12 Bolts
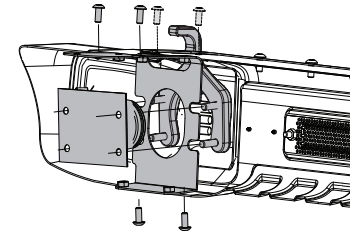
26. Position Bumper Assembly over frame rails, aligning Tow Hooks with mounting holes on frame horns. Secure with OE Nuts. If not using Tow Hooks, secure with M12 Lock Nuts.
27. Align with holes in Bumper Mount Brackets and secure with M10 Button Head Bolts, Plastic Flat Washers, and Hex Nuts. Skip to step 30.
NOTICE - If installing a winch, tighten Tow Hook (or M12 Hex) bolts now.
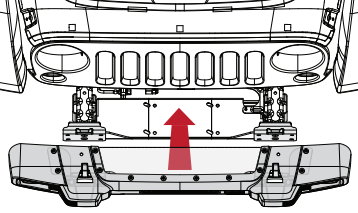
28. Place Stanchion, Bumper Mount Bracket, and factory Tow Hook on frame horns and secure with OE Nuts. If not using Tow Hooks, replace with M12 Hex Head Bolts and Lock Nuts.
NOTICE - If installing a winch, tighten Tow Hook (or M12 Hex) bolts now.
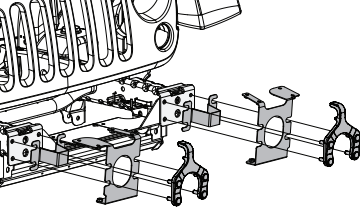
29. Position Bumper Center Section to accept factory tow hooks and lower into place on frame rails. Align with holes in Bumper Mount Brackets and secure with M10 Button Head Bolts, Plastic Flat Washers, and Hex Nuts. Tighten bolts attaching Bumper Mount Bracket to vehicles frame.
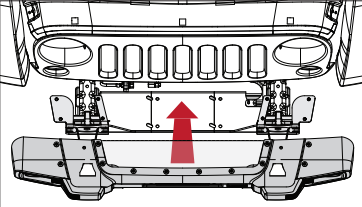
NOTICE - If not installing a winch at this time, skip to step 32.
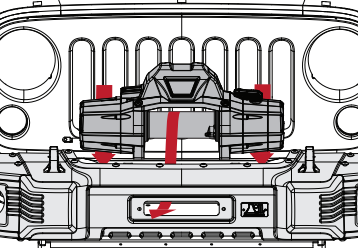
30. Install winch and fairlead.
31. Reconnect fog lights to vehicle.
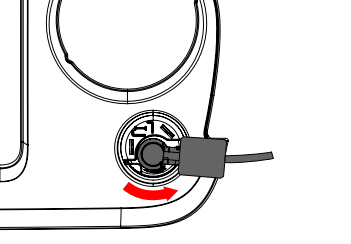
32. Install turn signal bulb assembly into light housing and rotate assembly up to lock into position.
NOTICE - If not installing Overrider, skip to step 34.
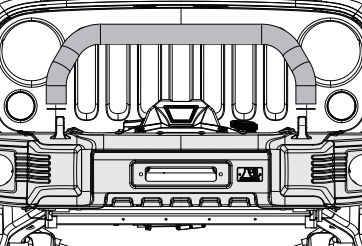
33. Align Gaskets supplied with Stamped Bumper Overrider with mounting holes in top of Stamped Bumper. Attach Overrider from underside using M10 Hex Bolts and Flat Washers. Skip to step 34.
34. Attach Stamped Bumper to Support Bracket using supplied M10 Button Head Bolts, Plastic Flat Washers, and Hex Nuts.
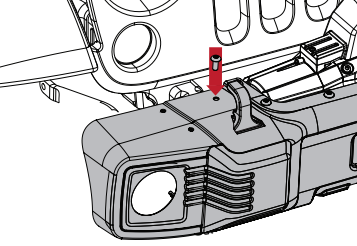
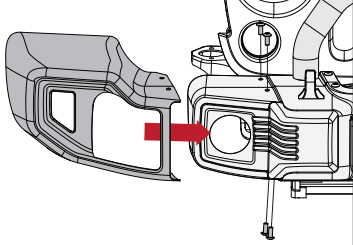
35. Install Bumper Ends, aligning mounting points of Bumper Ends, Center Section, and Mounting Bracket, using supplied M10 Button Head Bolts and Plastic Flat Washers.
36. Adjust and tighten all bolts.
