Guaranteed 12/24 Delivery Still Available see item page for details! available on most items - Details

How to Install a Rough Country Brake Pump Relocation Bracket in your 2012-2015 Jeep Wrangler JK
Installation Time
1 hours
Tools Required
- 18mm Socket / Wrench
- 5/16" Allen Wrench
- 9/16" Socket / Wrench
- 3/4" Socket / Wrench
- Drill Motor
- 1/4" Drill Bit

Shop Parts in this Guide
PRODUCT USE INFORMATION
If question exist we will be happy to answer any questions concerning the design, function, and correct use of our products by calling 1-800-222-7023.

INSTALLATION INSTRUCTIONS
1. All steps are performed after the front bumper is removed and ready for Rough Country Bumper installation.
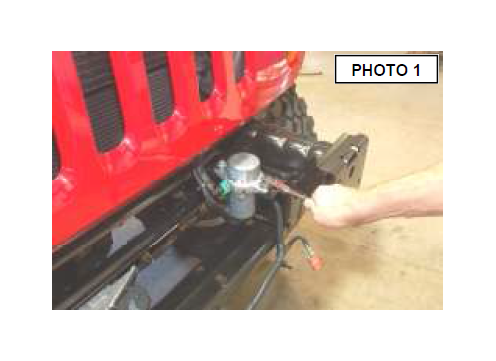
2. Remove the canister from the frame using a 10mm socket / wrench. See Photo 1. Remove the connectors and lines from the canister. Use care not to damage any lines or connectors. Retain the factory 10mm nuts.
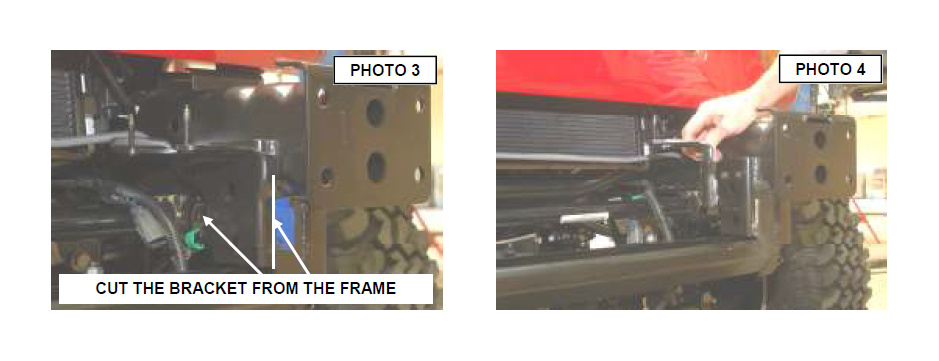
4. Cut the canister bracket off as shown in Photo 3 from the frame rail using a reciprocating saw or cut off wheel. The edges can be ground down and black paint is recommended to prevent rusting. Photo 4 shows the bracket removed.
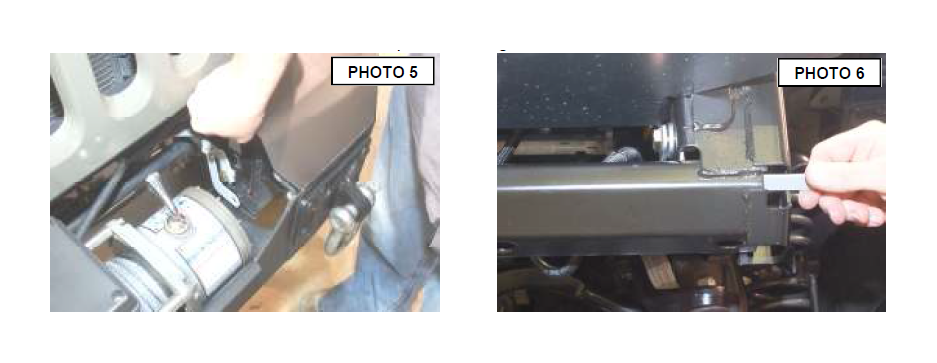
5. For Install on the winch plate: Install the bracket on the frame with the supplied 1/2” x 3/4” bolt, flat washer between the bracket & frame as a spacer & flat flag nut. The 1/2” x 3/4” bolt / flag nut included with the winch plate will be used in the lower location. See Photo 5.
6. For Install on winch bumper: Install the bracket on the frame with the supplied 1/2” x 3/4” bolt, flat washer in the lower hole between the bracket & frame as a spacer & flat flag nut on the lower mount. See Photo 6.
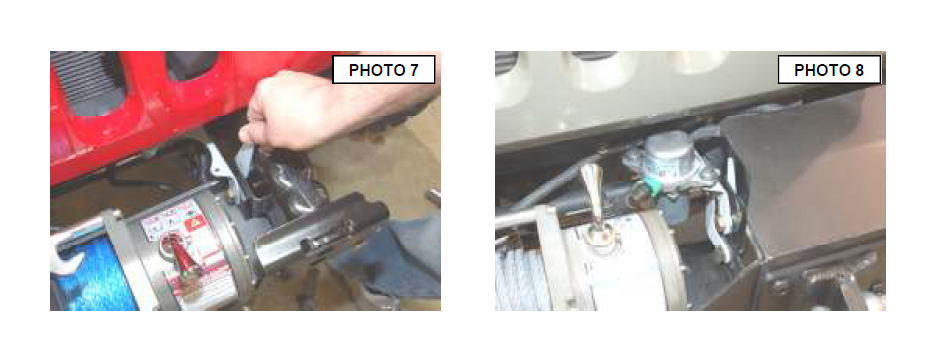
7. The upper hole will be secured with the 1/2” hardware included with the winch bumper. See Photo 7.
8. Install the hoses, wiring harness and couplings on the canister and tighten the hardware using a 10mm socket / wrench. See Photo 8.
POST INSTALLATION INSTRUCTIONS
• All hardware must be checked periodically to ensure all fasteners are tight.
