Talk to a Wrangler Sales Tech
1-877-870-8556
M-F 8:30A-11P, Sat-Sun 8:30A-9P
Logo Image
St. Pat's Sale - Up to 50% Off! Shop Now>

Rhino-Rack Pioneer Platform with RCL Legs; 72-Inch x 56-Inch (18-25 Jeep Wrangler JL 4-Door w/ Hard Top)Find parts that fit my vehicle

Item J180931
ExtremeTerrain no longer carries the Rhino-Rack Pioneer Platform with RCL Legs; 72-Inch x 56-Inch (18-25 Jeep Wrangler JL 4-Door w/ Hard Top). Please check out Jeep CJ7 Exterior Accesories & Parts for 1976-1986 Wrangler for an updated selection.
Wrangler Sales Tech

Verify parts fit & get product recommendations

M-F 8:30A-11P, Sat-Sun 8:30A-9P

$0.00
6 Reviews

    Product Videos

    (1)

    Merideth: Hey, guys. So, today, we are talking about the Rhino-Rack Pioneer Platform with the RCL Legs, fitting all 2018 and newer 4-door JL Wranglers equipped with the factory hard top.So, when you run out of room inside the jeep and you really wanna maximize your space, roof racks are usually the go-to. And this option by Rhino Rack is going to be a great pick.Now, this will be right up your alley if you are in search of a very low-profile and modular rack that will offer a very sleek and extremely clean look to your four-door. Now, this will be specifically for the JL hard tops, so, I would like to say right upfront that there is going to be drilling required and it is going to be more of a permanent modification.Now, if you really don't mind the drilling and you're into this hard top and you're really interested in the Rhino Rack platform specifically, then this will give you a ton of surface area on top of your jeep for whatever cargo or tools you don't want inside your Wrangler.Now, the Rhino Rack includes multiple attachments, different mounts, and a plethora of accessories, including light mounts, high-lift jack mounts, and all the bracketry. This is also going to have or be compatible with bike carriers and spare-tire holders, and there is a lot more to that list, just to name a few.Now, I really just like the fact that, not only is it going to be aesthetically pleasing with how low-profile it is, but it's also going to be very functional. It's going to be aerodynamic and offer minimal wind noise.Now, unlike other racks, you also don't have to worry about an exoskeleton or even just side rails of a basket that could, potentially, get hung up on obstacles while you're out on the trail or while you're over landing.Now, this is even great if you're looking to mount up a rooftop tent and you need a ton of surface area to do so without raised edges, like some other choices available in the category.Now, as far as the specifics are concerned, again, this has a ton of space on top, coming in at 72 inches by 56 inches, and it's gonna be approximately 2-inches tall.Now, the rack will be made of an aluminum material and will have fiberglass-reinforced corners and it will have a 264 dynamic load capacity. Now, when you're parked and you are static, it is going to have a higher load capacity. So, if you are concerned about the weight capacity when you have a rooftop tent on, this is going to be a little bit higher than that 264-pound mark.Now, the platform will also come with the backbone mounting system which will attach on the inside as well as the outside of the hard top. It's going to add some structural integrity to the kit and is going to just strengthen it overall. There is gonna be a big bracket on the inside of your back hard-top window that's gonna go around the bottom, it's gonna rest on the bottom of the tub rail [SP] there, and it's going to attach up at the top where the legs to the roof rack are going to be drilled through your hard top.Not to mention this is going to have a very nice black-powder-coat finish to it and black mounting hardware which assists in the rugged look, as well as protecting the aluminum from any corrosion. Which is especially important if you're doing a lot of off-roading, the roof rack is very vulnerable up there, it can catch a lot of brush and branches while you're out on the trail. And if you do come in contact with that, it is going to be pretty resistant to any damage or scratching. But if not, that is going to do a lot of protection to the aluminum underneath.Now, as far as all the features and the quality of this rack is concerned, you can expect that this is going to have a more premium price point, coming in at roughly $2,000.Now, this rack will include the full rack and full backbone mounting kit, so, everything that you need in the kit is going to come with it. And this is actually going to include most of the tools that you need to put this on your jeep. So, it is going to be a pretty hassle-free system.Now, other options in the category will mainly consist of baskets that attach to either the A-pillar or the body of the jeep and have that exoskeleton, or they're also going to attach to the rain gutter on the hard top itself.Now, the difference between this and some of those other options available in the category is just the fact of how it's built. This is going to have a platform style as to where some other choices that attach strictly to the hard top are going to have more of a basket style that are not going to accommodate a rooftop tent. And the sides may give you a little bit trouble when it comes to brush and branches, while you're on the trail, as this, again, is very low-profile.Now, they also may not have the load capacity that you're looking for out of a roof rack when it strictly comes to mounting it up to the hard top. And then other options for roof racks are usually going to be the bigger and bulkier body-mounted options. With that exoskeleton, again, they are going to be a little bit more bulky in comparison to this, considering that it is strictly on the hard top and those are attached to the bodies.Now, speaking of other choices as well, Rhino Rack also does offer some smaller Pioneer-style racks that will be a little bit more cost-effective. But, again, if you're looking to maximize the space on your hard top, this is going to be the better option. This is gonna be a solid rack, it's going to offer a lot of quality in the design, and it's also going to have endless ways to configure it with the larger Pioneer option. So, I personally think, if you're looking for all of those features, then this is going to be right up your alley.Now, install is fairly easy but because there is some drilling involved, I'm gonna give it a two out of three wrenches on the difficulty meter and I would suggest having an extra set of hands on deck to pop the platform on top of your jeep. It can be difficult to do it by yourself and you definitely don't wanna damage anything in the process.Now, you'll also need some other tools in addition to the ones that come in the kit, including a 1/2-inch, 1/4-inch, and 5/16th-inch drill bit. You're gonna need a drill for this. And you also may want to look into getting any rubber sealant for the hard top to make sure that there's no drilling after you drill into your hard top.Now, I also would highly recommend to have a mask, as well as some PPE on hand, the hard top is fiberglass, you will be drilling into that and you definitely don't wanna breathe that in. So, I would just keep that in mind when you are installing this onto your jeep.However, speaking of the install, one of our customers here, at ExtremeTerrain, has installed this on his JL and is going to walk you through all of these steps of getting this onto your Wrangler. So, let's hop into the install.Man: The first step to do is to find part F, which are the cross bars for the sides of the Pioneer platform. They will be distinguishable by having a 90-degree angle on the side, as well as measurement marks on the inside. Go ahead and lay them across from each other with the 90-degree angles on the outside. And then you're gonna come and take part L, which are square screws.And keep in mind that the instructions are also made for different lengths and widths of the platform, so, it's gonna be different depending on which size you have. In my case, I have five cross bars. So, I'm going to use 20 of these square screws. And you're gonna insert five of these square screws in both tracks, and ensure that you're using the top track and not the bottom. Let's slide them away so they don't fall out.And then the next step, number two, is finding the end caps, both parts A and C. So, they're gonna be the top pieces of your left and right corners. These will be distinguishable from B and D, A and C is going to have all of the track inserts and will look similar to this. And B and D has no inserts, it's just an end cap that goes on top.You'll notice that there's going to be a very complicated side with several different plugs and then a very simple side with two plugs. You're gonna use your two plugs and you're gonna find the caps that correspond, so, that they're 90 degrees to the inside of your platform. Go ahead and slide those into the two tracks itself, as well as the 90-degree rail.And then you're going to use item K, which is a coarse-thread short screw to secure these in through the hole right here at the middle. I take that back, you're gonna flip it over and secure it from the top middle hole.There is a recommended torque on these screws, which is 1.1-foot-pounds. However, I don't have a torque wrench that is small enough for that, so, I just hand tighten it, making sure that it doesn't over tighten to break the plastic caps. Flip that over...and flip that over.Step three requires you to get the horizontal cross members. The nice thing about these is that they're very easily distinguishable. One, from the complicated bracing on the inside of the cross member, but also it has, on both the front and back cross member, the Rhino Rack badge.You'll go ahead and attach them with the end-piece caps by sliding them in. There is definitely an upside and a downside, so, make sure that they go together.And then, next, you're gonna use item J, which are the fine-thread metal screws, and you will use three each to secure the cross member to this end piece. Instructions say that you can use the bit and the drill to install these screws. Okay, now we can move on to step five.Okay, step four now is to install the covering caps for your end pieces. The instructions might be a little bit confusing, it took me a second to realize this. It says to use J, item-J screws, which are the longer metal screws that were used for the insides, but in reality it should be item K with the thicker thread shorter screws since they'll be screwing directly into the plastic of the top piece cap to secure the bottom cap. They'll require three screws each.Once again, there's no requirement for torque on these. But since you're screwing into plastic, probably better using a hand screwdriver and ensuring you're not overtighten it.In order to do step five, we need to remove the side rails of the platform so that we can place our middle planks through here because they will actually go on the top side. So, you will grab all pieces of your widest bars, crossbars, and ensure that the two tracks are facing up and that the single track is facing down.Now, depending on how many crossbars you have, the smaller crossbars, these ones right here, you need to put in the corresponding square screws, just like you did for the outer sides of your platform frame. In my case, I have five, so, I'm gonna put five of the screws in each track. These are item L. And make sure that you're on the top side of the track, instead of the bottom. There are two slots that you'll see. And then you need to actually put two additional for the end pieces as well of the actual frame, not just the crossbars. So, in my case, it'll be seven in total.Now that we've inserted all seven of our square screws, the next step we can move on to is step seven where we take the actual outer frame and lay it on top of our crossbar. I would say, for ease of installation and assembly, if you had a second pair of hands, that would probably help to prevent scratching. If not, you just wanna gently lower it down and make sure your platform cross members fit within the frame of the platform.Once you have that, you'll align your cross members up with the holes along the front and rear cross member to ensure that the two tracks are in line. And then you'll take the square screws, run them back, and insert them in the holes.Okay, once they're all lined up and inserted, you can move on to step 10. You'll use the provided item number N, which is the torque wrench, and P, which is the adapter. And then you'll use the nyloc nuts, which is item M, as in mic, and you'll go ahead and screw these on. So, this torque wrench is already set at the appropriate torque, which is 6 newton meters, and you'll just go until you hear one click. Once those are all torqued down, now you can move to step 11, which is going to be securing your cross members on the bottom side of this platform.All right, now we're at step 11. And that requires us to space all of our L square screws equally across this platform so that we can put our cross braces, or cross members, on it. Fortunately, there is a ruler that is on the outside portions of the frame of the platform and it starts at zero, which is centered. And because I have five cross members, I decided to go ahead and equally space these out, which would put me at 0, 28, and 54 on both ends. Once you do that, go ahead and line out the rest of your square screws so that they all line up generally in the same area. So that they'll be lined up when you go ahead and lie your crossbars across.Once you have those generally aligned, go ahead and move on to step 12, which requires you to get crossbars, each, and line them up on your platform. Now, you'll see that one side is flat and another side has a channel, you're gonna wanna make sure that the flat side is on the crossbars itself of the platform. And then go ahead and insert these screws within the holes that correspond with the crossbars.All right, once you have those all seated, you'll go ahead and make sure that you're lined up. There are a little view window inside of these bars so that you can see it with a little tick mark so that you know that you're...go ahead and perfectly align.All right, now that you have it all lined out and generally in line, you wanna make sure that the view window is showing where you want it secured. So, in my case, I have 56 and 28. Then you'll use the nyloc-threaded nuts, item M, and secure them down into place. And before you torque them, I would suggest getting them snug but not overly tight so that you can make sure your other side is lined up according to the view window.All right, once you know you have them all in line, you can go ahead and secure all the rest of the interior nuts and ensure that they're all torqued down.Now, keep in mind, these bars may need to be adjusted based on the position of the feet, specifically since there will be three positions, the backbone system for the jeep JL working position. And in order for the feet to correspond with the positions on the actual backbone system, these braces may need to be adjusted accordingly.And because that's the case, I will only snugly tighten these down so that they can be adjusted if need be. I will no longer torque them down completely.Okay, once all of those nuts are installed and torqued down, your Rhino Rack platform is now assembled. As soon as I install the backbone system, the Rhino Rack backbone system within my jeep, I'll be able to mount this onto the RCL legs that connect to the backbone mounting points. And we will adjust these cross members as necessary, depending on where they mount.All right. So, this is the assembled Rhino Rack platform. This is the bottom that will mount closest to the top of my hard top. We'll flip this around...it's got a little bit of weight to it. This is the top and this is where all the accessories can go into the channel locks. And we'll be able to safely secure any of the accessories that you would want, such as a rooftop tent, recovery boards, jerrycans, anything that you wanna place up here.For the assembly of the platform, I utilized the power drill with the supply Phillips-bit driver. I used a hand screwdriver with a Phillips-bit T1. I used the supplied torque wrench from Rhino Rack that does the 6-newton-meter torque. And lastly, the 8-millimeter socket that adapts to the torque wrench so that you can secure your nyloc-threaded nuts to secure your crossbars.So, now we'll move into installing the Rhino Rack backbone system into the jeep JL. Before we got started, we took this all apart, did an inventory on all the parts and hardware, and laid it out on the illustration map so that we know that we have everything. But there are a few things that did not come with the kit that you have to provide on your own. The first one is a power drill so that you can drill the holes through your hard top, a 1/2-inch drill bit, 1/4-inch drill bit, and a 5/16th drill bit, a shock vac so that you can clean up the dust from your drilling through the fiberglass hard top, Butyl rubber sealant and a caulk gun, the supplied T15 Torx bit and wrench that comes with your hard top. And personal protective equipment, a face mask, respirator, eye protection, and gloves so you don't get any fiberglass splinters from drilling. And lastly, something that they don't actually use, or say to use, is something to prep your area for the Butyl mastic sealant. I've chose to use 91% isopropyl alcohol to prep the area so that it'll adhere and remove any sort of residue preventing the Butyl mastic from sticking.So, according to the instructions, step two is to use your T50 Torx bit and wrench to unloosen the three Torx screws that are in your hard top from the body of your jeep.Once you've removed all three of the Torx screws, you're going to utilize either item one or two, depending on which side you're working on. Since I'm working on the right side, I'll use item two on the layout map. When you put this into your vehicle, you're going to just lay it sideways, slide it in behind the roll cage, and place it up. Go ahead and insert the Torx screws...and snug down your Torx screws until contact is made between the hard top and the body of your jeep.All right, step six is to lay your seats down, but I already did that to make room so I could work in there a little easier. And you'll take the other frame-support piece, which, in this case, for the right side, is item number four, and install that on the front side of your window frame.Now, there is cut grooves here that's going to line up with the other part of the frame, as well as the hole for the Torx screw. All right, and then snug it down the same as the other two bolts so that you're making contact with your hard top to the body of your frame.The next step, step eight, is to use your power drill and the 5/16th drill bit to be able to drill the holes out of your hard top where it corresponds with the braces of the Rhino Rack backbone.All right, for step eight you're utilizing your personal protective equipment. You're going to drill out the holes here on the back side of the support for the backbone. When doing this, you're gonna wanna try and keep the angle as close to the back or the hard top as possible. And then vacuum up the fiberglass shavings from the drill. You'll then wanna move to the outside and vacuum off any of the shavings from the drilling out here. Just for an extra step, like I said, I'm choosing to use some isopropyl alcohol to clean this area for the rubber Butyl mastic that I'll be using.The next step is to seal the holes with the rubber Butyl...or the Butyl rubber sealant. And it shows that you should put some inside the hole so it goes through and seals on both sides.This step you'll install item eight for the right rear panel of the backbone system, along with item 17, through these holes.At step 13, you'll move to the inside of the jeep and you'll use items 22, flat washer, 2 of them per bolt, and item 25, a nyloc nut. So, you'll install one of the washers on the back side of the backbone system, on both sides of the screws, and then you'll push your screw through the holes. In my case, I'm gonna loosen the Torx screws, that secure your hard top to your body, so that I can have some room to push these screws through. And in order to get these screws to come through, you might have to go outside and sort of move the outside piece around so that they'll fit through the screws. Place the flat washers on and thread the nyloc nuts onto the screws.Next, step 14. You'll use the provided T50 Torx bit and wrench along with item 14 of the kit, which is this little handy bolt lock system and key, or screwdriver, and you'll place it here so that it'll hold it and go out to the screw and tighten it down. It requires 4 to 5 newton meters of torque, or 3 to 4 foot pounds. I don't have a torque wrench that's that low of a setting, so, I will hand tighten it to what I assume would be the right torque, ensuring that I'm not overtightening and cracking my hard top. And then do the same on the other.All right. So, step 15 you're gonna wanna have part 9, if you're working on the right side, along with either part 5 or part 6, this is gonna be used as a spacer so that you know the distance between your rear piece and your front piece on the windshield, which will be your middle piece, actually. What you're going to do is you're gonna make sure that it's concaved and you're gonna want it so that the concave faces up.You'll then also need part 18, which are these small silver bolts that have a thread lock on them, and you're gonna need a step stool or a ladder so that you can get up here. You're first going to insert one of the silver nuts...or bolts, I'm sorry, number 18, into the hole that's closest to the oval hole. And then down here, on this one, the same thing. And that's gonna give you your spacing. So, then, when you get up here, you're going to insert this bolt into the top piece where it's threaded, just like this one, and you'll insert the same one here. It only requires finger tightening, they don't need to be snugged down, it's just to give you your measurements.Step 17, after you've already put this up here, is you're gonna grab your little Rhino Rack key wrench. And you're gonna notice that there is a 6.5 and an 11 on this wrench. And what you're gonna do is you're gonna use the 6.5 measurement and you're going to insert it under this piece and within the rain gutter so that you have your spacing.Once you've placed that into the rain gutter, you're going to grab your power drill and your item C, which is your 1/4-inch drill bit, along with item 13, to use as a spacer gauge when you're drilling. So, you'll place this up here with the flange side in and you'll drill at a 90-degree angle through here so that you don't go too far through the hard top.All right, now that I have my protective gear on, I'm gonna drill my holes. Ensuring I'm at a 90-degree angle from the hard top, I can drill...change my spacer over so I know I have the right height. And now I can move on to 19B, which is using the 5/16th drill bit, and finish drilling the hole out to the appropriate size.Now I can move on to step 20 and vacuum all of the drill dust out from both the outside and the inside. Once again, I'm gonna prep the area using my isopropyl alcohol to ensure that the Butyl rubber mastic adheres well.All right, we're on step 21, applying the Butyl rubber mastic. All right, so, you'll wanna reapply your spacer brace, if you removed it to put the mastic on, and you'll use bolt 17, item 17, and run them through the holes. Then you'll go inside and use items...flat washer 22 and nyloc bolt 25 to secure the bolts in place.All right, to make this step easier, to push your screws through the frame of the backbone system, I'm gonna loosen this bolt here so that I have some play. And I'm gonna manipulate the outside piece so that they feed through the hole.Okay, once you have those fed through, go ahead and put your second washer on, along with the nyloc nut. Do that with both sides. Grab your T50 Torx wrench, along with your Rhino Rack key wrench, re-tighten my top down to the body. And then tighten your two screws.All right. So, now that you have your Rhino Rack mounting plate up here in the general area that it should be, you're gonna use your spacer that you use to drill your back two pieces and have that appropriate space. But this time, instead of using the hole that's near the ovals here, you're gonna use the opposite side where there's only a singular hole and then there's a hole between two large holes. Now, you're gonna wanna ensure that this spacing bracket right here is faced forward to your new plate because these holes here are what you're gonna use a spacer to actually drill your holes into the hard top. So, go ahead and apply that to get your appropriate spacing. It only needs to be finger-tight so that you can work with it.Next, on step 27, you're gonna grab your Rhino Rack wrench key. And instead of using the 6.5-millimeter spacer, you're gonna turn it over and use the 11-millimeter spacer, place it under your plate and between the rain gutter.Step 28 is to grab one of these spacers, which is item 13, and go ahead and place it in the hole where the mounting spacer bracket is and the holes where the mounting plate will be drilled at.Now, at step 29A, you're gonna use your personal protective equipment because you're gonna be drilling into your hard top again. You will use item C, which is the 1/4-inch drill bit, your power drill, and ensure that your spacer's in place so you don't drill too deep and mar your roll bar from the inside. Ensure that you're doing a perfectly 90-degree angle directly into your hard top. Now you'll trade your bit for the 1/2-inch drill bit and you'll drill your hole. All right, you can go ahead and remove this piece right here and vacuum up all of the dust.Okay, once you have that removed, you can go ahead and grab your 1/4-inch drill bit, along with your spacer, and you'll complete the hole with this out of place to go through. Now, the reason why you wanna use your spacer is this is gonna fit inside of the bigger hole and it's gonna prevent you from going through the inner portion of the two hard-top layers, and that's so you don't mar your roll bar...and drill your hole. Do the same thing to the other side.You'll grab your 1/2-inch drill bit along with item 15, which is a drill stop. Once again, go ahead and vacuum up all of the fiberglass. To make things a little easier for access, I'm gonna remove the front freedom panels. Once those are clean, I'm gonna prep the area using my isopropyl alcohol...and move on to step 33, which is to apply the Butyl rubber sealant.To make the install a little more easier, one suggestion I would make is to loosen all of the T50 Torx screws that connect your hard top to your body of your jeep. The three in the back right through here...along with the one that's up top. That way you'll be able to pick your top up just a little bit, like that, to insert this piece into your roll bar, between your roll bar and your hard top. Now that you have that loosened, you're gonna wanna grab your Butyl rubber sealant and apply a generous amount up here.Now we're at step 34. You're gonna want to have this piece right here. And ensure that the nut, which came already installed, is in here. And you're gonna install it from inside and you're gonna make sure that it is facing with the two cross pieces here, the two support pieces, towards the wall, towards your door of the jeep. Like I said, this will make this process a whole lot easier fitting this in here if you loosen up all your hard-top screws. And it should fit nicely on your roll bar and onto the top here.Step 35 is to remove the bracket that gives you your spacer. Step 36 requires item 19, item 22, which is a flat washer, item 23, which is a rubber flat washer. And you'll come up here and insert it with the spacer first, the rubber spacer...or washer, I'm sorry...the metal flat washer and then the long bolt. You'll go ahead and put it through the holes and line it up with the bracket inside on the roll bar. And now that you have the bolts through both your bracket and the roof, you'll use item 26, which is the nyloc flange nut, and you'll go ahead and secure those bolts.To tighten down these bolts and screws, you're gonna use the included Allen wrench, as well as your Rhino Rack key wrench.Lastly, to secure our bracket from the inside, we're gonna use items 21 and 24, it's a long bolt with a flat washer, and you're gonna find that there is a pre-drilled hole on your roll bar. You're gonna insert this bolt through here and you're gonna find that it'll line up with the bracket that you installed on top of your roll bar between the roll bar and your hard top. All right, to tighten this, you'll just use your T50 Torx...and tighten that down.All right, next step is step 37. You'll use the bracket that you used as a spacer. This one will require to make sure that you have the right part. If you're working on the right side, this will be item six. And the way you'll be able to distinguish the two, between six and five, five being the left side, is that, when you lay this out on your diagram board, you'll see that it concaves and you wanna lay it down so that the concave faces up. And you'll be able to distinguish based on the chart which part you're actually working with. So, I'll be using item six, and we'll go ahead and install that on this cross brace here from the inside.All right. So, to install this crossbar, you're gonna need item 6, which is this, and 22, two pieces of 22, which are the flat washers, and two pieces of 20, which are the shorter bolts. Now, to install this, you're gonna wanna ensure that the angle piece is facing down and that it's concaved back towards the window. And lastly, you're going to insert it into the drilled out pieces of the oval. Once you've replaced that cross member, you're now complete with the one side and you'll move on and do the exact same thing for your other side in the same order and steps.This is a fully completed Rhino Rack backbone system. And we walk outside, we will see the three mounting plates that the RCL legs will attach to that will then connect our Pioneer platform to mount.Now that we have the backbone system installed into your jeep, the last part of this installation is attaching the Pioneer rack to the backbone mounting platform. So, in our assembly of the platform itself, I left these cross members here loose so that I could take measurements and space them apart appropriately based on the plates for the backbone system.So, what I'll do first is I will take and I will measure from the end here, where I want the rear of the Rhino Rack platform to go, to the center point where the threads are for your bolt. For me, that's approximately 8 inches from the rear here, of the top, to that point. The next measurement I'm gonna take is from the center of the threads of this mounting platform to the center of the threads of the middle mounting platform. And that comes out to be 24 and 7/8th. Lastly, I'm gonna do the same from the middle platform to the front. That comes out to 26.5 inches.So, now that I have the measurements, this is going to be the rear of my platform. I know that I want 8 inches from the top rear to the center of this crossbar. So, that's approximately 71 on the measurement bar, so, I'll know that, through the viewfinder and the tick mark, I'll need to line up 71 and 71 on that side. Once I have it lined up, I'm gonna tighten this down and ensure that I hear one click on the torque wrench.And so, before I forget my measurements, now that I have this one snugged down on the end, I'm going to go to my second crossbar. And I know that that's, from center point to center point, going to be 24 and 7/8th. That comes up to be 8 on the measurement bar. So, I'm gonna tighten these down. And then, next, the front crossbar mounting point, 26.5 inches from center point to center point, which comes out to be about 59.5. So, I'm gonna make sure I got that lined up and tighten this down in one click.Now, for the remaining two bars that don't have any mounting feet to them, all I'm gonna do is split the difference between the front and middle and the middle and rear. So, that comes out to about 12.5 inches. And that's gonna give me about 40 on the slide scale...or on the measurement scale. And then center point to center point is 26.5 inches, so, I'm gonna put it at 13 and a quarter. That comes up to 26.All right. Now what I'll do is I'll just snug down all of these bolts to one click on my torque wrench. If you're not sure about your measurements, you may wanna do a pre-fitment without torquing down everything, just making sure they're snugged, putting your feet on...or putting this on top and making sure that your center point of these cross members align with your mounting plates on the backbone system.Okay, once those are tightened, now you can go ahead and grab your RCL legs and install those. Okay, so, for this part of the install, I'll be using the RCL mounting legs. When I inventoried this kit, I ensured that we have all of our locking covers along with the locking barrels and that we had our key for them. So, I removed all the covers off of the front here. Basically, go on like this and you go ahead and unlock them...and then it's coming.So, then next step you're gonna do is you're gonna locate the Allen-wrench-threaded screw along with a flat washer and a lock washer. What you're gonna do is you're gonna put your lock washer on first, then your flat washer. You'll run it through the bottom, which is recessed, and you'll grab your square bolt and you'll just get it started. So, you'll just get the threads on there and start it. Once you do that, you can go ahead and find the cut-out part right at the middle of the cross member and you'll slide it in and push it out here.Now, the one thing that you wanna be sure of is you don't want to tighten this down too tight so that, when you get it up there, you're gonna be able to make your adjustments from side to side before you tighten it down.So, just snug it up so that they don't slide too easily. As long as you can do that, they'll be stuck and you won't be able to slide those without actually forcing them. And you'll do that with each foot. Make sure that the mounting plate is towards the outside edge. Back them up so you can at least move them a little bit so they don't slip around when you're actually turning this back over.And now you're gonna wanna get another pair of hands so that we can go ahead and lift this up, mount it onto the backbone mounting plates that are directly on your hard top. And then, once you get these lined up appropriately and you have it centered on your vehicle, you'll tighten these down.Okay. So, we're gonna rotate our platform over. And then you're gonna wanna get on that side so that we're on each side of the jeep. And we'll go to the back here. And then each of these braces right here will fall into little notches that are on this actual platform here. Okay. So, then, once you have that mounted onto your platforms here and they're within the little notches on top here, just ensure that you are centered on the vehicle left to right. And that's why we left these plates a little bit loose. In my case, I think I wanna come a little bit to this side. And now you'll want to tighten down each of the feet to the Pioneer platform.Once you have your mounts placed on top of the backbone mounting plates, the next thing you're gonna wanna do is you're gonna wanna find part 18 from the backbone system, it's a little silver bolt with a thread lock on it, along with 22, which is the flat washer. And you're gonna wanna install these inside the feet down through the mounting feet into the platform. That way these are gonna be locked into place so that you can get your Allen wrench up there and tighten down your feet to the platform itself. It'll require a 10-millimeter wrench so that you can get into this hard-to-reach spot. All right, do the same to the other side.Okay. Now, that these are tightened down, the RCL legs to the backbone mounting plate, now you're gonna wanna use your included Allen wrench and tighten underneath the leg to the crossbar of the Pioneer platform so that they're secured to the top. And do the other side. Now that everything's tightened down, the RCL feet to the mounting plate and the feet to the crossbars, the last thing we need to do is just put the covers on it and lock it down so that nobody can tamper with it. And lastly, as you can see with the 56-by-72-inch platform, the freedom top is still very much accessible and easy to remove.Merideth: So, that is going to wrap it up for my review and install on the Rhino Rack Pioneer Platform with the RCL legs, fitting all 2018 and newer 4-door JL Wranglers equipped with that factory hard top.For more review and install videos just like this, remember to always keep it right here at extremeterrain.com.

    View Full Transcript

    Now Playing

    Jeep Wrangler JL Rhino-Rack Pioneer Platform with RCL Legs; 72-Inch x 56-Inch Review & Install

    Jeep Wrangler JL Rhino-Rack Pioneer Platform with RCL Legs; 72-Inch x 56-Inch Review & Install

    1H1:45

    Subscribe: New Wrangler videos daily!

    Subscribe to our YouTube Channel

    Product Information

    Features, Description, Reviews, Q&A, Specs & Installation

    Features

    • Pioneer Platform with RCL Legs
    • Boosts Your Jeep’s Cargo Capacity
    • Made with Aluminum and Fiberglass Reinforced Nylon Corners
    • Black Powder-Coat Finish
    • Exhibits a Stylish and Aerodynamic Style
    • Versatile, Modular Full Rack
    • With a Dimension of 72 x 56 Inches
    • Comes with an Integrated Measuring Strip and a Torque Limiting Tool
    • With Additional Accessory Channels and Integrated Wiring Capabilities
    • Offers Wiring Access When Corners Are Drilled or Cut Out
    • Installation Requires Drilling
    • Backed by a 5-Year Warranty
    • Designed to Fit 2018-2025 Jeep Wrangler JL 4-Door Models with Hard Tops

    Description

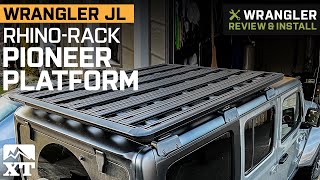
    Offers Extra Storage Space. If you have a lot of cargo to haul, then convert your Jeep’s roof into an additional storage space by installing this Rhino-Rack Pioneer Platform with RCL Legs; 72 x 56-Inch. This rack system measures 72 x 56 inches, allowing it to accommodate big and bulky cargo. So, if your Jeep’s compartment is already full, you can depend on this pioneer platform for your storage needs.

    With RCL Legs. Some Jeep owners don’t like the idea of installing racks on their vehicle’s roof because of the noise they create. But with this Pioneer Platform, you don’t have to worry about that. This rack system is equipped with RCL legs that help to minimize the noise and vibration of your new rack, especially when you’re driving.

    Sturdy Construction. This Pioneer Platform is constructed with aluminum and fiberglass-reinforced nylon corners. Even if your new rack system is hit by minor road debris, it won’t easily break. Furthermore, it is applied with a black powder-coat finish for superior corrosion protection.

    Installation. Installing this Pioneer Platform requires moderate mechanical expertise. This platform is shipped unassembled and you have to do a lot of drilling, especially when installing the backbone mounting system.

    Backed by a 5-Year Warranty. For your assurance, this Pioneer platform is backed by a 5-year warranty. For more warranty information, visit the official Rhino-Rack website.

    Application. This Rhino-Rack Pioneer Platform with RCL Legs; 72 x 56-Inch is designed to fit 2018-2025 Jeep Wrangler JL 4-door models with hard tops.

    CA Residents: WARNING: Cancer and Reproductive Harm - www.P65Warnings.ca.gov

    Installation & What's in the Box

    Installation Info

    Installation Time

    (approx) 3 Hours

    Difficulty Level:

    Light to Moderate mechanical skill required.

    Installation Guides

      No guide available for this part yet.

    What's in the Box

    • (1) Unassembled Pioneer Platform with RCL Legs
    • (1) Backbone Mounting System
    • Installation Hardware
    4.8

    Customer Reviews (6)

    Review Summary

    4.8 out of 5 overall ratings from 6 customers

    Jul 30, 2022

    Review shared from Rhino-Rack Pioneer Platform with RCL Legs; 72-Inch x 56-Inch (18-23 Jeep Wrangler JL 4-Door w/ Hard Top)

    5
    2021 Rubicon - Trios63c
    Installation Time: Afternoon

    Very nice addition to my Jeep

    I'd done loads of research for a rack/platform to hold my iKamper RTT and I kept coming back to the Pioneer Platform. I must admit that I was a little nervous about installing it, but after watching several videos online I had no problems. In total it took me about 2.5 hours from start to finish and was fairly straightforward if you follow the instructions. Pros: It looks awesome and can hold a great deal of weight, more than many of the other options that I looked at. It has a very low profile. The spacing between the slats was perfect for my iKamper 3.0 RTT. Cons: A bit pricey.

    Fit 5/5
    Appearance 5/5
    Quality 5/5
    Bang For Your Buck 3/5

    May 15, 2022

    Review shared from Rhino-Rack Pioneer Platform with RCL Legs; 72-Inch x 56-Inch (18-23 Jeep Wrangler JL 4-Door w/ Hard Top)

    5
    2021 Rubicon - rubirunner
    Installation Time: Weekend

    Rhino rack

    Nice product. Legos for adults. Lots of parts to install/configure, but infinite flexibility. It is not entirely clear all the fixtures you need until you acquire all of the things you want to carry on the rack (which itself is dependent on how you want to carry them), so needed to set aside time to figure this all out and get stuff ordered.

    Fit 5/5
    Appearance 5/5
    Quality 5/5
    Bang For Your Buck 4/5

    Apr 9, 2022

    Review shared from Rhino-Rack Pioneer Platform with RLT600 Legs; 72-Inch x 54-Inch (07-18 Jeep Wrangler JK 4-Door w/ Hard Top)

    5
    2014 Wrangler - MannyZ

    The perfect rack

    Was looking for something that would hold added weigh if an awning and a tent and this fits the bill. Amazing quality and is super solid. Here’s to adding some adventures!

    Fit 5/5
    Appearance 5/5
    Quality 5/5
    Bang For Your Buck 3/5

    Mar 21, 2022

    Review shared from Rhino-Rack Pioneer Platform with RCL Legs; 72-Inch x 56-Inch (18-23 Jeep Wrangler JL 4-Door w/ Hard Top)

    4
    2021 Rubicon - GiuseppeM
    Installation Time: Weekend

    Pioneer Platform install

    Installed the Pioneer platform w/ short profile feet and back bone system. What I love about the product; great look, low profile design, high load capacity (both static and dynamic). What I didn't like; total install for platform assembly, and install of back bone system took 11 hrs (platform 2 hrs and backbone 9 hrs)! Plan a weekend to be safe! Drilling the fiberglass top gets messy so I highly recommend wearing a high end mask or respirator, at minimum an N95 with a good tight fit. Also having someone vacuum as you drill helped keep dust/ debris down. The RCL legs look great but was a pain to install due to low/ tight clearances. If you have big hands, or no patience, I recommend going for the quick mount legs. Stands a tad taller, but I suspect a much easier install and gives you a the ability to easily remove rack from top if need be. Since it was so difficult to adjust and install the platform on the RCL feet, I dont ever see myself ever taking it off! If you have the black noise/ thermal pads on the inside of your cab, I highly recommend removing them and then tracing out the cutouts (on top) to accomodate the back bone supports before the install. After the insulation is cut/ notched out, you can replace the insulation and proceed with the back bone install. Otherwise following Rhino Rack's installation procedure will have you taking off the installed backbone on and off too many times, unnecessarily.

    Fit 4/5
    Appearance 4/5
    Quality 3/5
    Bang For Your Buck 3/5

    Mar 3, 2022

    Review shared from Rhino-Rack Pioneer Platform with RCL Legs; 72-Inch x 56-Inch (18-23 Jeep Wrangler JL 4-Door w/ Hard Top)

    5
    2018 Rubicon - PhillipV
    Installation Time: Afternoon

    Exceeds my demands and expectations

    The backbone and pioneer platform is everything I needed for added space and utility. I was concerned about add wind noise but it has been nominal at best. The install was straight forward and can be done in a few hours by yourself (although it’s nice to have an added set of hands to lift and mount the platform on the roof). The instructions to assemble the platform could be a bit better, but all the rest of the instructions were clear and easy to follow.

    Fit 5/5
    Appearance 5/5
    Quality 5/5
    Bang For Your Buck 5/5

    Jan 30, 2022

    Review shared from Rhino-Rack Pioneer Platform with RCL Legs; 72-Inch x 56-Inch (18-23 Jeep Wrangler JL 4-Door w/ Hard Top)

    5
    2021 Rubicon - MskStudios
    Installation Time: Full Day

    Well Built and Well Supported by Rhino-Rack

    This is my first "Overland" mod to my JLU. I am really pleased with the construction and the look. The backbone system was so well made to fit, with the exception of one missing nut. I emailed Rhino-Rack USA in CO and they immediately responded and I had replacement parts within a week. I primarily bought this because the fiberglass top cannot bear much weight and this increases with the install, plus you can "Modify", with attachments, to basically get what you need to lock down your load. My only con is the price, but ET definitely had the best price I could find.

    Fit 5/5
    Appearance 5/5
    Quality 5/5
    Bang For Your Buck 3/5

    Questions & Answers

    No questions about this product yet. Ask the First Question

        Wrangler Wheel & Tire Gallery

        Wrangler Wheel & Tire Builds
        See Wrangler Wheel & Tire Gallery ( photos)