
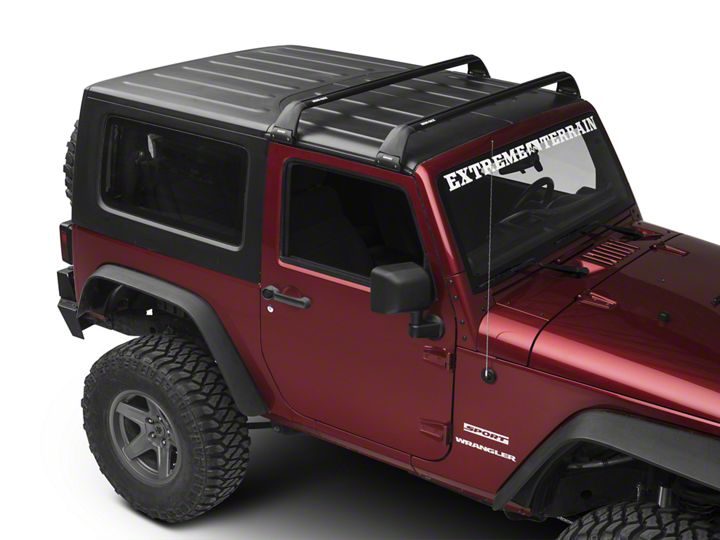
How to Install Rhino-Rack Vortex SG 2 Bar Roof Rack - Black on your Wrangler
Installation Time
1 hours
Tools Required
- 5mm Allen key
- tape measure
- Phillips head screwdriver
- Rubber mallet
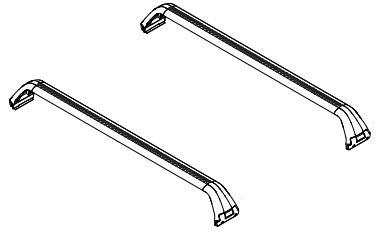
Shop Parts in this Guide
Jeep Wrangler JK 2011- SG59 4dr & SG60- Rhino Sportz Gutter Mount
Important Notes:
Please read these instructions carefully prior to installation. Check the contents of the kit before commencing fitment and report any discrepancies. Wash vehicle prior to fitting Rhino roof racks.
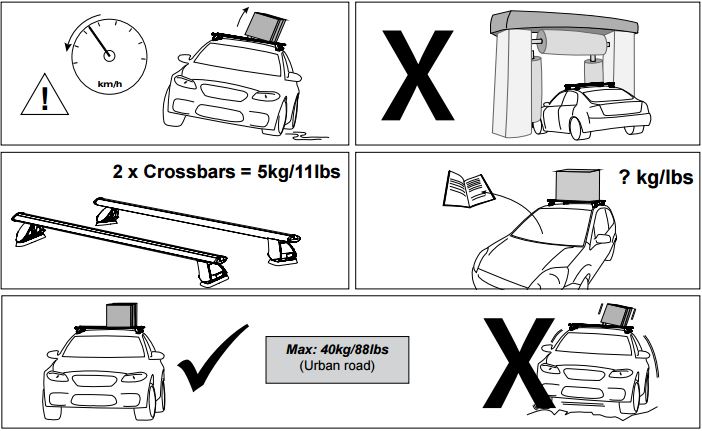
Maximum carrying capacity: 40kg (88lbs) evenly distributed over the crossbars. Refer to your vehicles manufacturers handbook for maximum roof loading. Always use lower of the two figures.
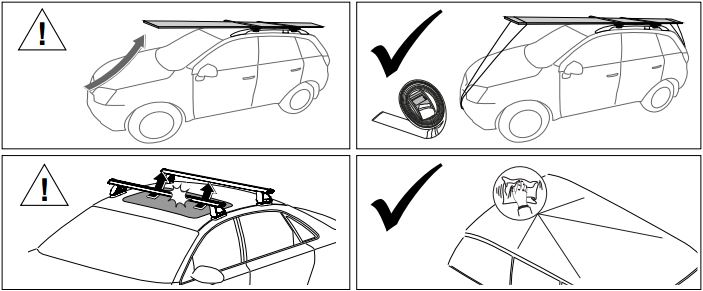
Recommendations: It is essential that all bolt connections be checked after driving a short distance when you first install your crossbars. Bolt connections should be checked again at regular intervals (probably once a week is enough, depending on the road conditions, usage, loads, and distances travelled). You should also check the crossbars each time they are refitted. Make sure to fasten your load securely. Please ensure that all loads are evenly distributed and that the center of gravity is kept as low as possible.
Use only non-stretch fastening ropes or straps.
Caution: The handling characteristics of the vehicle changes when you transport a load on the roof. For safety reasons, we recommend you exercise extreme care when transporting wind-resistant loads. Special consideration must be taken into account when cornering and braking.
Please remove crossbars when puttin vehicle through an automatic car wash.
Load Ratings:
Maximum permissible load is 40kg (88lbs) for two crossbars including the weight of the crossbars, 5 kg (11lbs). Roof racks are not to be used off sealed roads. Although thte crossbars are tested and approved to AS1235-2O00, off road conditions can be much more rigorous. However, increasing the number of crossbars does not increase the vehicles maximum permissible roof loading.

Jeep Wrangler SG59 & SG60
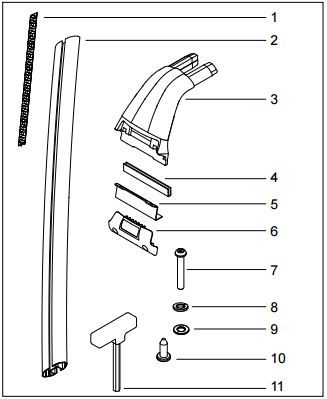
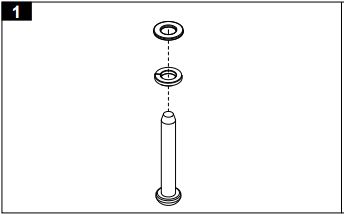
1. Assemble spring washer and flat washer onto M6 x 40mm security screws.
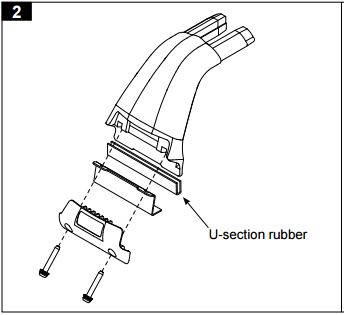
2. Insert security screw assembly through the cover strap, and fasten to the dowel nuts which are located in the support leg. Turn the screw so that it just engages into the dowel nut.
Attach the U-section rubber.
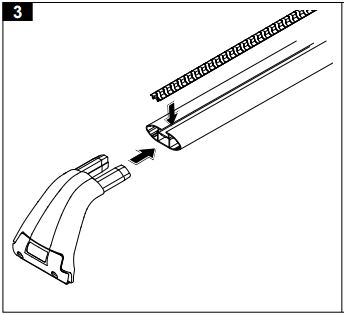
3. Locate support legs into the crosscar, a rubber mallet can be used to knock the legs in.
Insert the vortex buffer strips into the top of each crossbar. Trim off excess.
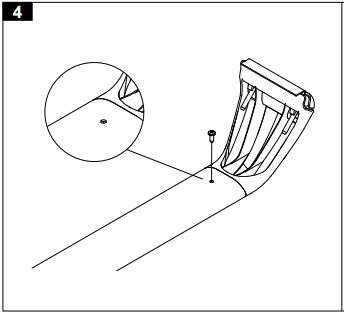
4. From underside of the crossbar, fasten the 10G self tapping screw through the crossbar and into the leg. Reapeat this process for all four legs.
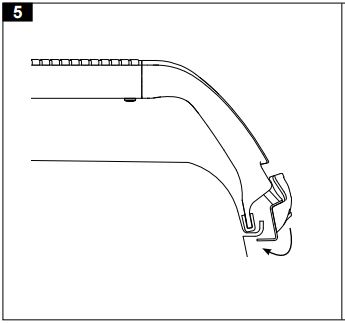
5. Swing the support leg strap under the gutter. Make sure that the strap is fully located under the gutter.
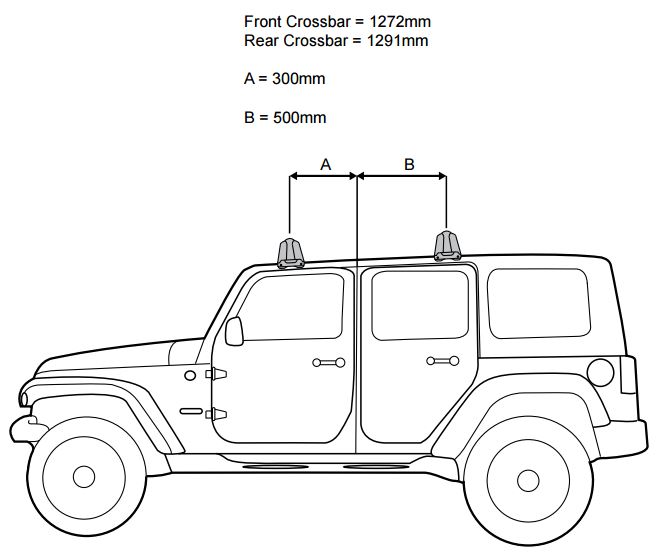
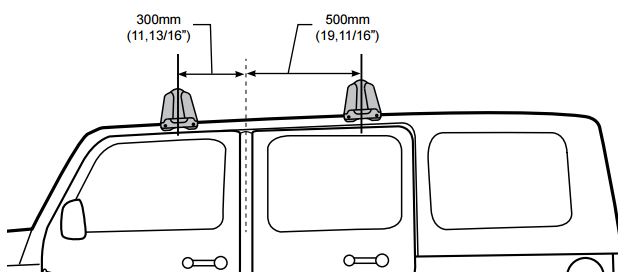
6. Measure forward 300m (11, 13/16") from center of door jambs to center of front leg. Measure rearward 500mm (19, 11/16") from center of door jambs to center of rear leg, see diagram below. Progressively tighten each of the M6 screws. Tighten to 3-4 Nm (2-3 lbs/ft). Do not over tighten.
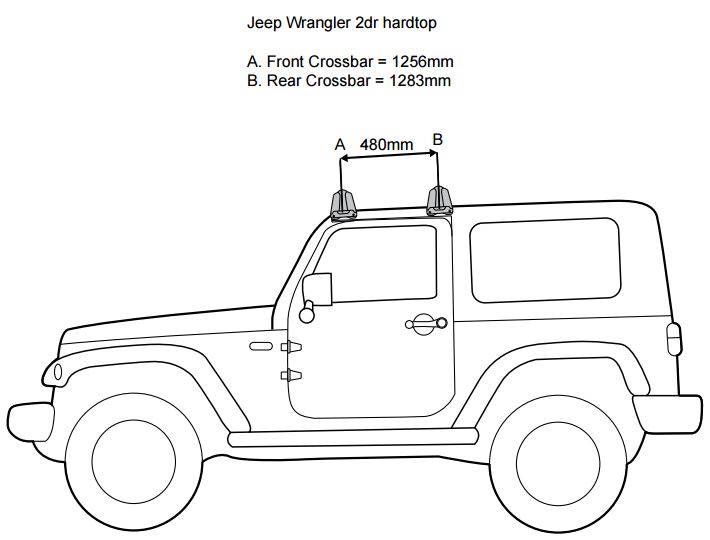
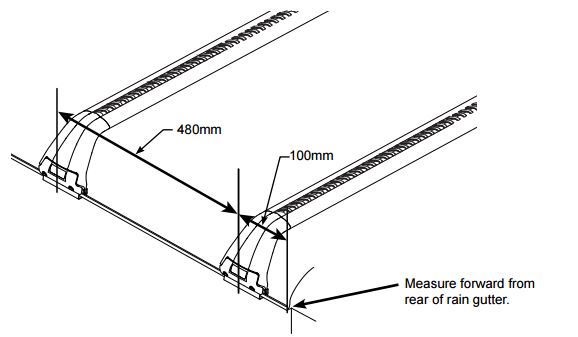
7. Measure forward 100mm (3, 15/16") from the end of the rain gutter to the center of the rear leg then a further 480mm (18, 29/32") forward to the center of the front leg, see diagram below. Progressively tighten each of the M6 screws. Tighten to 3-4 Nm (2-3 lbs/ft). Do not over tighten.
