2018-2025
 2007-2018
 1997-2006
 1987-1995
 1976-1986

Installation Time
(approx) 2 Hours
Difficulty Level:
Light to Moderate mechanical skill required.
Installation Guides
 FREE 1 to 3-Day Delivery on Orders $119+ Details

Add Details


Change Vehicle Color In Photo
Select Your Color
Verify parts fit & get product recommendations
M-F 8:30A-11P, Sat-Sun 8:30A-9P
 500+ Reviews
7 Answers
500+ Reviews
7 Answers
$299.99 pair
Will this fit your Vehicle?
Saved - View your saved items
We're sorry. We couldn't save this product at this time.
or use
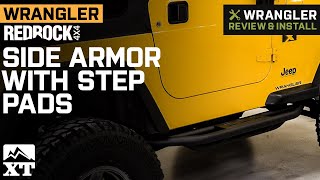
Hey guys. So today we're checking out the RedRock 4x4 Side Armor with Step Pads fitting all 1987 to 2006 YJ and TJ Wranglers excluding the unlimited models. So if you're searching for some side steps to fill up that wheel-to-wheel space, you're looking for something stylish and also something that's gonna do a good job of protecting your rocker area, then this is gonna be a great choice to take a look into. Now, this is going to attach to the frame and provide some outward protection as well as some protection underneath with the tubular construction. What I really like about this is the fact that this is going to have a large stepping pad up on top to help you get in and out of your Jeep a whole lot easier. So, in my opinion, this is gonna be great for somebody who's looking for a good balance between protection for off-road and also better accessibility for their Wrangler. This will be especially great for the YJ and TJ owners who have added a lift to their Jeep and are looking for better access, again, for not only them but their passengers as well. Now, like I said before, these will be great for protection on the trail especially with the underbody protection here.These will be made of a tubular steel construction so they will be able to hold up and they're gonna have a nice texture black powder coat finish on top, of course, to protect that steel underneath but also to match with any other heavy-duty accessories and to give the side of the Jeep a more off-road look. Now with all that being said, these are gonna come in at right around $350, and in my personal opinion, I think that that's a great price point for what you're getting. Not only will you get better accessibility, you're also getting that better protection with minimal modification. Now some other options that are gonna focus a little bit more on protection are usually going to require a lot of modification especially to the side of the rocker area. They may mount up directly to the body of the Jeep and mount on the body points and then some other choices are usually going to be for that lighter protection and more focused on accessibility which will usually consist of a step bar instead of a tubular construction like this that's reinforced and also has a stepping pad. So, again, in my opinion, I think if you're looking for a good balance of protection and also accessibility, you're also looking for something stylish in the meantime, then this is gonna be a great choice.Now when it comes to install, again, you will have to do a little bit of modification in order to get these mounted up. We will be drilling some holes in the frame so I would keep that in mind, but I'm gonna give this a two out of three wrenches. Nothing you can't do in about two hours with some pretty basic hand tools. So speaking of the install, let's jump into that now. The tools that I used for my install were a pneumatic impact, a pair of safety glasses, a ball peen hammer, a 13-millimeter socket, a 13-millimeter swivel socket, a 3-inch extension and a 10-inch extension, a center punch, a paint marker, a can of PB B'laster, a drill bit set ranging from 5/16 of an inch down to 9/64 of an inch and a drill.So our first couple of steps are going to include getting the side step up and positioned and we need to mark where we are gonna drill our holes. We're gonna have to drill eight holes into each side of the frame in order to mount up our side step. So for this step, you're gonna need a paint pen or something to mark the frame with and you're also going to need some support for the side step to hold it up in place. I'm gonna use a couple boxes. You could also use jack stands or grab a friend for this step. So, like I said before, you will need to support the side step in order to line it up against the frame so we can mark for the holes that we are about to drill.I would like to mention that the angled mounting location is gonna go towards the front and the one that is level is gonna go towards the rear. We are at the back mounting location right now. What I'm gonna do is take this paint marker and make a mark on the four mounting locations for the side step. This may be a little bit difficult to see but once I have the side step out of the way and we drill, you'll get a better look. So as you can see, the front mounting location is angled up because the frame does angle up as well. So we're just gonna continue the same process and mark our mounting location.So at this point, now that our mounting locations are marked, we can go ahead and drill and for this, you will need a center punch. I have a center punch and a hammer here and you will need a drill index. We are gonna be working our way up to a 5/16-inch hole. You're gonna need a drill and also if you'd like to use a step bit, you can definitely do so. It may make it a little bit easier but at this point, we can mark the center of our mounting location and go ahead and drill. So first I'm gonna take the center punch. Just line that up with the center of the mounting location and take the hammer. Make a mark. So once we have the location of where we need to drill, what we can do is start with a smaller drill bit. I'm gonna be using a 9/64-inch bit. You can use, really, whatever size you need to. I'm just gonna work my way up. Really, this is just gonna be a pilot hole.So at this point, I'm gonna move up to a 3/16-inch. Like I said, we're just going to gradually work our way up to a 5/16-inch drill bit. So if you do have oversized tires, it may be helpful to take off the tire for these back two mounting locations just because you don't want to drill into the frame sideways. So I'm just gonna continue with my 3/16-inch drill bit. Work our way up to a quarter-inch and then last but not least, we can use our 5/16-inch drill bit. Once the rear is complete, we can do the same thing up front.So what we can do at this point is mount up our side step. So for this, we're going to line it up with the holes that we just drilled out. You will need your provided hardware which is the 13-millimeter self-tapping bolt. You're gonna need a 13-millimeter socket as well as an impact wrench in order to secure them in there and then what I would also recommend is to loosely secure each side separately. So I'm going to do the front and then we'll jump back to the rear and then we can go back and tighten everything down. You're gonna need support, whether that's a friend or the supporting box or jack stand that you used before on one of the sides in order to get everything lined up correctly.So we can take our supplied self-tapping bolt. I'm just going to loosely thread that into the mounting location then we can take our impact wrench and 13-millimeter socket and we can tighten that up. So after this bolt is tightened up, what I did was just backed it out a little bit after the threads were cut. So now that it has a thread through the frame, what we can do is just back it out so we can line all these other bolt holes up. So I'm gonna continue that process with the other mounting locations and this 13-millimeter socket. So after the front is complete, we can start on the rear. We're just gonna do the same thing. So for this top one, I'm also using that extension. So for this one, you may need a 13-millimeter swivel socket just because there is a curve on the side step here. Now at this point when everything is attached, what we can do is just make sure that everything is tightened down and then we can repeat that process on the other side.So at this point, we can take a 13-millimeter socket. I'm using a swivel socket and I'm also using a longer extension. May just depend on how much room that you have and I'm gonna use that 13-millimeter socket and tighten those up. So after everything is tightened down on this side, we can repeat that same process on the other side and you'll be all set to go. So that is going to wrap it up for my review and install. Make sure you like and subscribe for more videos and products just like this, and always keep it right here at extremeterrain.com.
View Full TranscriptNow Playing

1987-2006 Jeep Wrangler RedRock 4x4 Side Armor with Step Pads Review & Install
11:53
Subscribe: New Wrangler videos daily!
Subscribe to our YouTube Channel
Features, Description, Reviews, Q&A, Specs & Installation
| Brand | RedRock |
| Armor Type | Rocker Armor |
| Armor Finish | Black Textured |
| Armor Material | Steel |

RedRock J131128
CA Residents:  WARNING: Cancer and Reproductive Harm - www.P65Warnings.ca.gov
Installation Info
Installation Time
(approx) 2 Hours
Difficulty Level:
Light to Moderate mechanical skill required.
Installation Guides
What's in the Box
Review Summary


Installation Time: Afternoon
Installation Cost: $2.00
Mar 15, 2025
Better step
Stronger and sturdier than the original side steps. A great upgrade for my old tj, feel much more secure getting in and out and knowing the jeep is protected. Installing them took longer than expected, did have trouble with the self tapping bolts, would recommend tapping the holes after drilling once we did that the rest of the installation was quick and easy.
Mar 3, 2025

Red rock Steps
A little harder to install than I thought but they look great! Makes it a lot easier to get in my Jeep
Aug 5, 2024
Great side armor!
These steps exceeded my expectations. Easy to install. Looks great. Really love the looks!
Jun 3, 2024
Nice piece of protection
These checked all the boxes, protection, functionality, looks, workmanship, while still being budget friendly. The only downside is the self tapping bolts, kinda crappy. I stripped 3 out so just went down bought 3/8 x 1" flange bolts and tapped the holes in the frame. But what would you expect when you put the project on the back burner for a few months. All in all very happy with the purchase!
Jan 20, 2024
Nice rails
The steps themselves are nice and sturdy. Build quality is great. As far as installing them it sucks. Round off 3 bolts trying to get them installed.
Nov 5, 2023
Terrific Product!
Super easy install... all directions and parts were as advertised. Ultimately it's a super nice step pad that works functionally as a rock guard.
Oct 1, 2023
Great product
These are the best steps I have found. Definitely worth the money
Sep 12, 2023
Great project, crappy hardware
Steps are solid and look great, but I had to take off a star because the bolts are complete crap. At least half stripped (threads). These are not commonly stocked hardware and I had to improvise. Not the only one who experienced this either
May 20, 2023
Red rock side armor with step pad
This fits my 1997 Jeepi Wrangler sahara and looks grate made very well and not hard to in stall . I use on size bigger bolt makes it stronger so far so Google.
Mar 8, 2023
RedRock Step Pads
As a vertically challenged person,I feel for the price I will feel safer getting into my lifted Jeep Wrangler in the winter (snow season) with the step pad available on these rock sliders.
5 Top Rated Questions
Q: I have a 2006 Wrangler TJ Rubicon. If no drilling is required, how are they supposed to mount to the frame which does not have the 16 holes required for mounting? I've had 3 men look to see if I'm missing something, and they all said holes MUST BE DRILLED TO MOUNT THESE ROCKSLIDERS.
A: I do apologize, as the other answers to this question are incorrect. I have also asked that they be removed from the website. We have listed that there is some drilling required for installation if you look in the features and details section.
Q: OK I have the same question for the YJ. Is any drilling required? I'm guessing the statement "Straight Forward Bolt on Installation" means no, but want confirmation that no drilling is required.
A: No drilling is required for installation.
Q: Are these really bolt on installation? They appear to require drilling. Can someone verify this for the TJ?
A: We have verified that there is no drilling or cutting required for a clean straight forward installation on the TJ.
Q: I have a 2006 Wrangler TJ Rubicon. If no drilling is required, how are they supposed to mount to the frame which does not have the 16 holes required for mounting? I've had 3 men look to see if I'm missing something, and they all said holes MUST BE DRILLED TO MOUNT THESE ROCKSLIDERS. The instructions on page 2 and 3 say to drill into the frame as well, so not sure why your support is telling everyone there is no drilling required.
A: I do apologize, as the other answers to this question are incorrect. I have also asked that they be removed from the website. We have listed that there is some drilling required for installation if you look in the features and details section.
Q: What does the product bolt to? Is it the body mount bolts? Or to the frame?
A: These would attach to the frame not the body