2020-2025


Installation Time
(approx) 30 Minutes
Difficulty Level:
Light to Moderate mechanical skill required.
Installation Guides
 FREE 1 to 3-Day Delivery on Orders $119+ Details

Add Details


Change Vehicle Color In Photo
Select Your Color
Verify parts fit & get product recommendations
M-F 8:30A-11P, Sat-Sun 8:30A-9P
 25 Reviews
$53.52 kit
Will this fit your Vehicle?
Saved - View your saved items
We're sorry. We couldn't save this product at this time.
or use
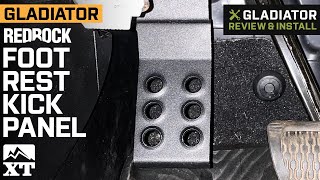
Noah: Hi, it's Noah with Extreme Terrain. On the table in front of me, I have the RedRock Foot Rest Kick Panel that fits the 2020 and newer Jeep Gladiator JT. Now this footrest is an awesome addition to your Gladiator if you're looking for a good dead pedal solution that's durable and low profile. Kick pedals and footrests are excellent things to have and quite frankly, I pretty much notice right away when the car I'm in doesn't have one. Now, I feel like they're one of those things that you take for granted and you don't know what you had until you don't have it. So if you've got a Gladiator, this is a huge upgrade in my opinion. It gives you a nice comfortable spot to rest your foot, and it's actually adjustable as well.There's also three positions that you can adjust this thing to sit at depending on where you want your foot or how long your legs are. Now, RedRock also suggests this as a great upgrade for putting your weight on when off-roading to look over the door sill to see your tires position. And then lastly, everything here is black, so it all blends under the dash really nicely for a clean OEM look. On to the construction aspect of this footrest, it's gonna be able to support a good bit of weight because it's made out of steel. The next tier of durability comes from the paint that's on it. It's actually a textured black powder coat, and that's gonna protect the steel underneath from any corrosion as well as give your foot some traction in the event that you put some weight on it.Now having a coating like this is really important on bare metal because sand, salt, and water come in on your shoe, and that's going to eat the metal underneath right away without this protective finish. Now, hand-in-hand with that, if your shoe is wet, having a textured surface is a must when you can easily slip off with a little bit of weight on here, just like that. Now all the hardware is included in the kit as well, and it's designed to drop right in without any modification too. This RedRock Foot Rest costs around $90 and that's something that I would put on my list for the small price tag, big difference upgrades. Now some things can be really wonderful to have on a daily basis and they don't cost much at all, and it's always great when it works out like that.Moving on to the install, you're looking at an install difficulty of only one out of three wrenches and 30 minutes for the install time. Now to show you how it's done, here's an XT customer and they're gonna walk you through that install process, step-by-step.Man: Tools needed for this install. We'll see the regular tape measure. I got a 10-millimeter open-end wrench, a 14-millimeter open-end wrench. The Allen key that comes with a set, got a 10-millimeter socket and an extension, and a small ratchet driver.First, the step they ask is that you kind of find a suitable area or a suitable distance for the pedal to mount to the bracket. So what I'm just doing is basically putting my foot in a comfort position. And I'm just gonna hook a tape measure onto the bottom of my shoe and measure to the seat. And this should gimme a pretty decent idea of where to go with the bracket. So I'm measuring about 20 inches. So I went and measured from my seat to basically my foot for kind of like where a comfort position would be. And I'm gonna go ahead and just install my footrest. There's two tabs that fit right in, and I'm gonna go ahead and just kind of put a flat washer and a lock washer and a nut on that and just loosely finger tight.And then what I'm gonna do is I'm gonna go underneath, hold it in place, and then try and shoot a quick measurement to make sure that I'm close. So here's this tab under here where this plate fits into. And what this does is goes right up in there and follows the same contour. I don't know if you can see because that light is kind of glaring, but if you'll see once you look under yours, you'll notice it right away. You can see that is the same contour as the bracket itself. So it fits right in there nice. Okay, you're gonna notice there's four holes drilled in that bracket underneath. The holes that we're going to use is the forwardmost. So towards your grille, those two holes are the two that you're gonna use with this bracket.Okay? It'll fit in either of the two, but the two forwardmost or grille side, you know, toward the grille holes are the ones that will mate up with your bracket. Okay? So it comes with this cool little bracket. It's got some 3 M-type body tape, really strong tape. Little tricky, just be careful you don't drop it behind there, otherwise, you'll have to take your kick panel off and dig it out. So we're just gonna go and peel off these two pieces of tape. The protective side, we're gonna slide it in from the backside and just squeeze it on there so it kind of is in place for our bracket. When you look at the directions, it kind of does show you that they are the forwardmost holes that this needs to line up with. And that will line up when you go to install your bracket, it'll line up just right.Okay, so what I've done is earlier I showed you to go in and take a measurement from the sole of your shoe to the seat, which gave me about 20 inches, which seemed comfortable. I went in. I temporarily mounted the pedal itself to the bracket. Once I did that I realized that that's a little bit too far out for me when I measured holding it up. So I'm just gonna go to the forwardmost and that should give me right where I want to be. So to snug down my conical mounting bolt to the nut, the kit comes with an Allen wrench and you can just go anchor it, a 14-millimeter wrench and just flip, snug that down. Some will fit, some won't. If you can't adjust the wrench, if you can't spin the wrench, use the Allen to get it as tight as you can and then finish with the wrench. But you want this rather snuck. Now you got one solid piece.So back under here with our bracket and we've installed that. You can see the two studs protruding here and here with that two-sided tape bracket. And what we're gonna do is slide this up and over so it fits on those studs. It'll come through the holes on your mounting bracket here and we're gonna install flat washer, lock washer, and a 10-millimeter nut to lock it all together. Basically the two studs that you see, one there, one there, okay, are gonna fit through the two holes on this bracket. Okay? When you put it up there, it's gonna be this hole here and this hole here. Okay? Carefully do that. That two-sided tape is not really set in until you really tighten down these bolts. So try and get your fingers behind, hold that bracket in place, slide this over, and go ahead and then loosely install your flat washer, lock washer, and nut in that order.Once you get it snug down that tape should bond really well. That graphite body tape is super strong once it sets in. So I'll go ahead and install this. Unfortunately, I can't do it with the camera on, but I'll put it in place then I'll go back in and show you exactly what I did. I've got the bracket on and what I did is I took one 10-millimeter nut without washers or anything because it is a wrestling match. So I put this one 10-millimeter nut on this front mount and then snugged it down. This will hold it in place so I can get the rear flat lock and flat washer, lock washer, and nut on, and then snug it down tight. Then I can remove this front one and do the same. So it's just kind of indexes the pedal for me. And if you look, I have it at the forwardmost position, there's three positions on that bracket.There's the forwardmost and it's a little bit past my brake pedal, which, you know, for me would be a position of comfort. So just to make a note of it. I'm gonna go ahead now and install the rear mount. It's gonna be a flat washer, lock washer, then a 10-millimeter nut. And I'll use a small 10-millimeter socket with the extension to get back there to tighten it down. The plate what I did is I put the bracket in place and I used just the nuts, the 10-millimeter nuts with a 10-millimeter socket. And what I did is I tightened them down pretty snug. And what that did is it made that bracket with those two studs conform to the plate behind it and get that good sticky two-sided tape that came, you know, on the part to at least bond it long enough to where I could take the nuts back off, and then fit the flat washer, lock washer and the nut and then tighten it down. The dead foot pedals in. Nice, solid definitely, a nice add for the money.Eliminates that foot just kind of hanging out in outer space, which gets uncomfortable on long drives. Get your distance right away. If you're a taller guy, you're probably gonna want that farthest-out setting. You know, I'm five eight, I got as far forward as it goes. I kind of like that cockpit feel. Again, and then you have one setting in the middle. So if you make a measurement, it'll give you a general idea of where it should fall. It'll save you a really big step. Once you get it all set, tighten that pedal to the bracket, get that in there, tighten it down with just the 10-millimeter nuts so it snugs everything in nice. Then you can remove one, do flat washer, lock washer, 10-millimeter nut, then remove the other and do the same. Snug it down and you're done.Noah: That was the RedRock Foot Rest Kick Panel that fits the 2020 and newer Jeep Gladiator JT. For all things Gladiator, keep it right here at extremeterrain.com.
View Full TranscriptNow Playing

Jeep Gladiator JT RedRock Foot Rest Kick Panel Review & Install
11:28
Subscribe: New Gladiator videos daily!
Subscribe to our YouTube Channel
Features, Description, Reviews, Q&A, Specs & Installation
| Brand | RedRock |
| Door Accessory Type | Foot Pegs |
Fitment:
RedRock J154606
CA Residents:  WARNING: Cancer and Reproductive Harm - www.P65Warnings.ca.gov
Installation Info
Installation Time
(approx) 30 Minutes
Difficulty Level:
Light to Moderate mechanical skill required.
Installation Guides
What's in the Box
Review Summary


Installation Time: Less than 1 Hour
Aug 8, 2024
Dead Pedal Install
I had looked at other dead pedals but what sold me on this one was the bolt bracket and price. After watching many videos of various installs, using duct tape trying to hold seperate bolts in place in a very tight difficult spot, the one piece bolt bracket (which came with double sided tape to help hold it in place) was flat awesome. Tightend the first nut with washers to help hold in place and it was much easier. Still a tight and difficult spot.
Jul 27, 2024

Very Hard to install
This accesory it is really jard to install, screw studs should be longer, since itos really hard to put flat washer, lock washer amd nut, with a screw that short. It took me two hours to install it. It is not possible to install it as you read it in the intructions, in adition to this, thera four, not two predrilled holes on the kick side metal plate, and manual does not tell wich one to use. Once the foot rest it is installed, you can conclude its worth the hassle, and it is a sturdy and very well manufactured part.
Jun 30, 2024
Feels good
Great and sturdy foot rest. A little difficult to install due to location, but I got it done.
Mar 16, 2024
Foot rest
Pretty simple install took 15 minutes works great . Good place to park your left foot to rest
Feb 17, 2024
Pretty well built for what it is.
This is a pretty nice unit, and its construction is pretty stout. I did like the adjustability of the mounting bracket. The weakest point of this is the factory mounting location but other wise I do like it,
Jan 12, 2024
I cried. I sweat. I bled.
I read the instructions, I watched the video. This thing is a nightmare to put on. I had to leave and come back to it 3 times. I was about to give up and finally got it. The only advice I have is to use a clamp to keep the backplate on the jeep while you put the pedal on. My other advice is just don’t buy it. Works well once it’s on but not worth it.
Nov 26, 2023
Dead pedal
I was looking for a dead pedal since Jeep doesn't provide one from the factory. Most of the ones available ride on the floor mat and that was a feature I didn't like for removing the mat to clean it and I figured eventually it would wear a hole in the mat. This RedRock product rides above the floor with enough clearance to remove and replace the mat easily.
Nov 1, 2023
Foot Rest Install on 2022 Gladiator
The back bracket with the two threaded posts would not fit correctly per the instructions. The 2022 Gladiator has a half-moon ridge which happens to be in the same area where the back bracket needs to be mounted. Unfortunately I could not get both the threaded posts to evenly go through the holes(with the foot mount) and either post would end up be longer than the other. So I ended up cutting the back bracket in half, put on some double stick Gorilla tape, set each half so that the posts now had enough length to mount the foot rest and put on the washers and nuts. Love the foot rest and I would still recommend this foot rest. Time to install with the above modification was about 1.5 hours.
Oct 18, 2023
Foot rest
I waited to long to install this, but right before a 2000 mile road trip got it done and loved ot
Aug 1, 2023
Just what it needed
This was the thing missing from being able to relax on drives and having a place to rest your foot on, a must have