FREE 1 to 3-Day Delivery on Orders $119+ Details

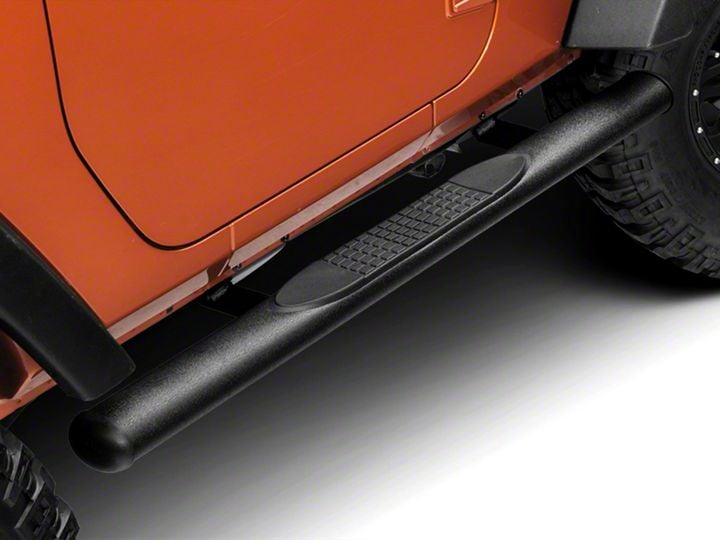
How to Install RedRock 4x4 4 in. Straight Oval Side Steps on your 2007-2017 Jeep Wrangler JK 2 Door
Installation Time
45 minutes
Tools Required
- Ratchet
- Extension
- 10mm socket
- 13mm socket
- 16mm socket
- 10 mm box end wrench
- 4mm allen head wrench (provided)
- Plastic scraper (if needed, see Step 3)
Shop Parts in this Guide
Installation Instructions:
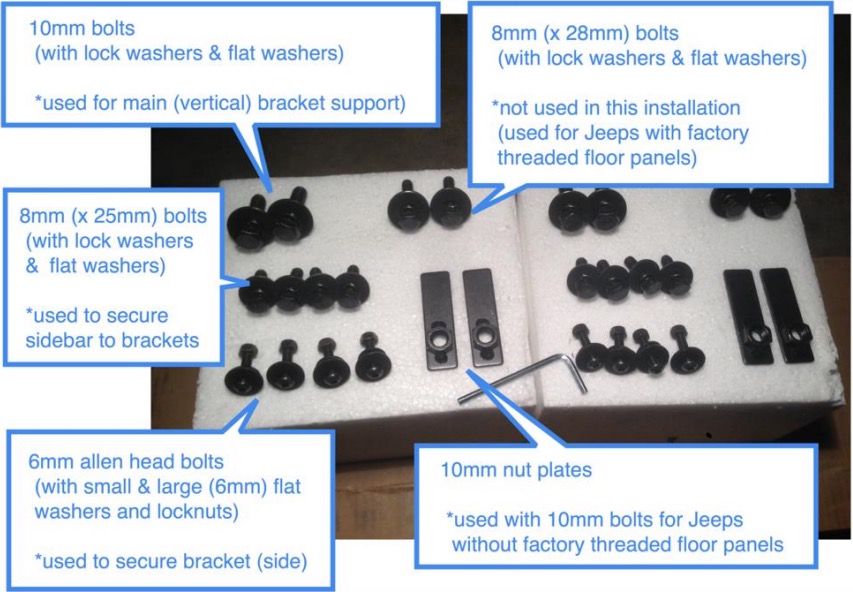
1. Separate hardware into 2 sets:
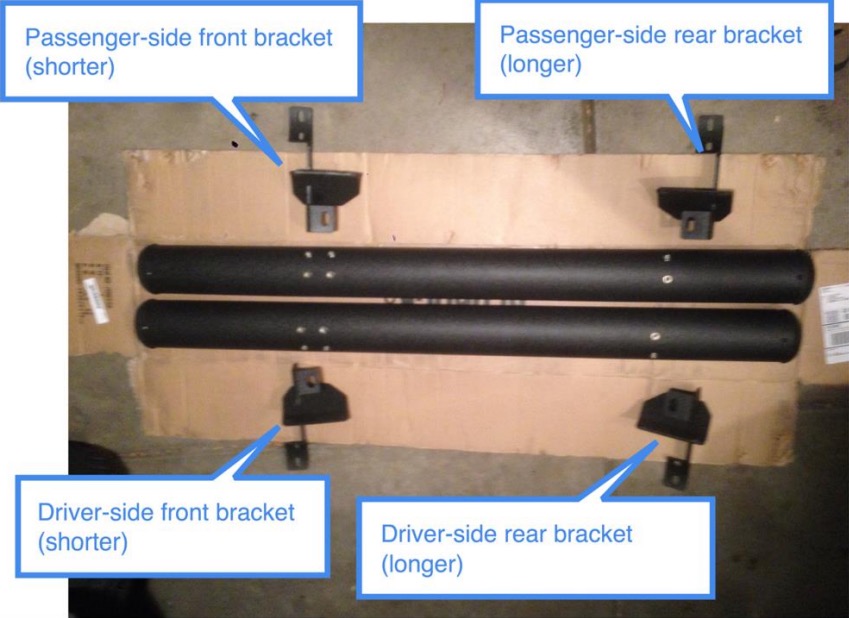
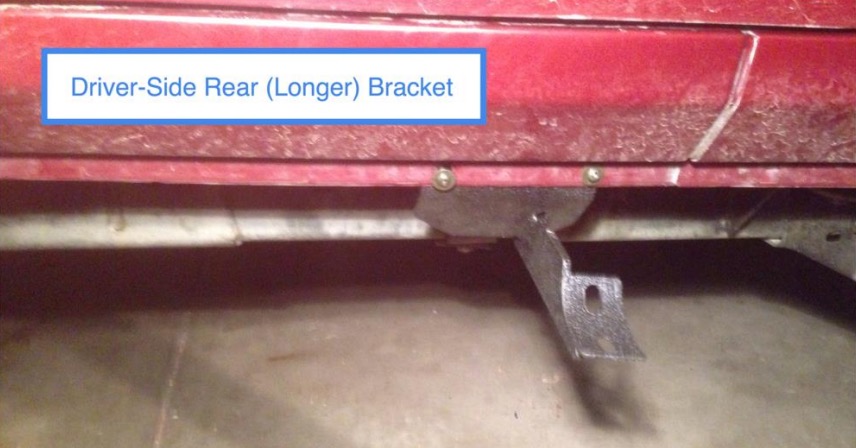
2. Identify passenger and driver-side front and rear brackets:
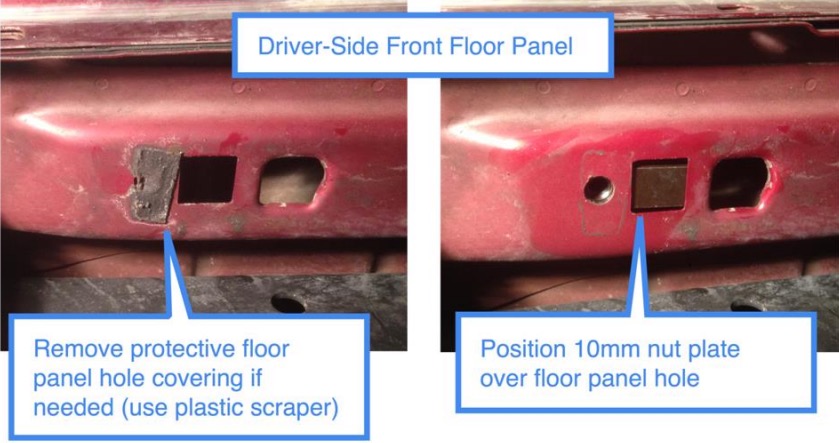
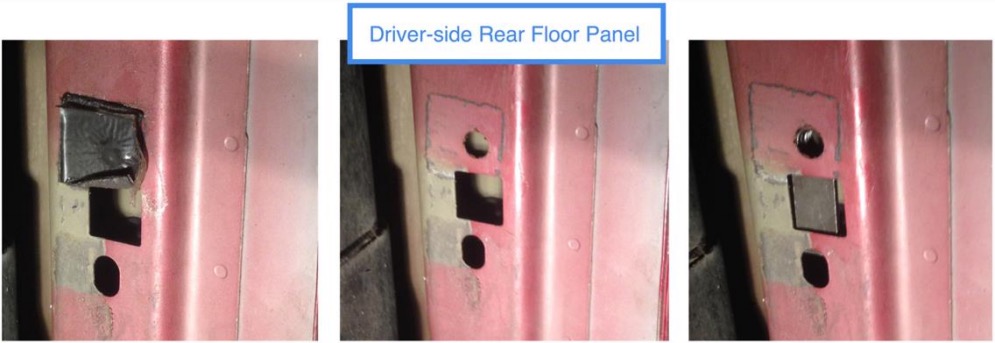
3. Starting with the driver-side front floor panel, remove protective covering as needed and position nut plate over hole as shown (nut plate used for Jeeps without factory threaded floor panels).
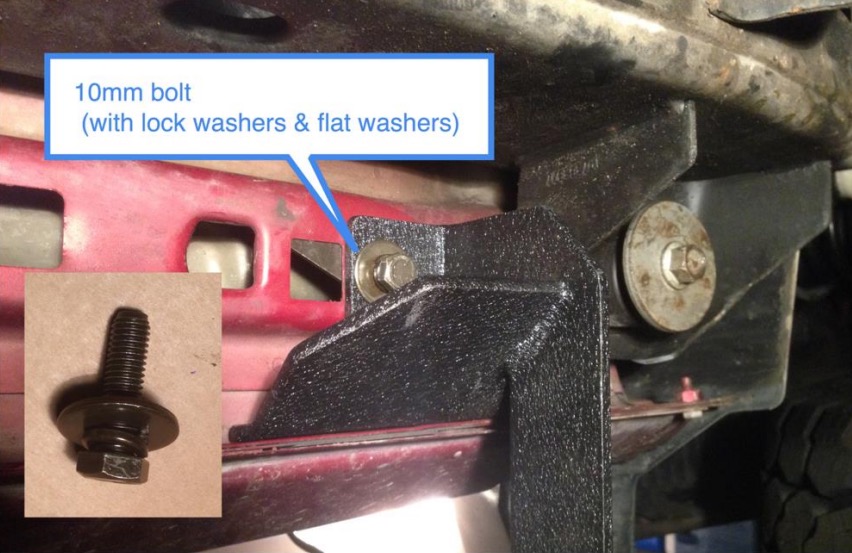
4. Hang the driver-side front (shorter) bracket by hand tightening the 10mm bolt (lock washer & flat washer) to the nut plate (or using the 8mm (x 28mm) bolts if installing on Jeep with factory threaded floor panels).
5. Align bracket holes with side-panel holes.
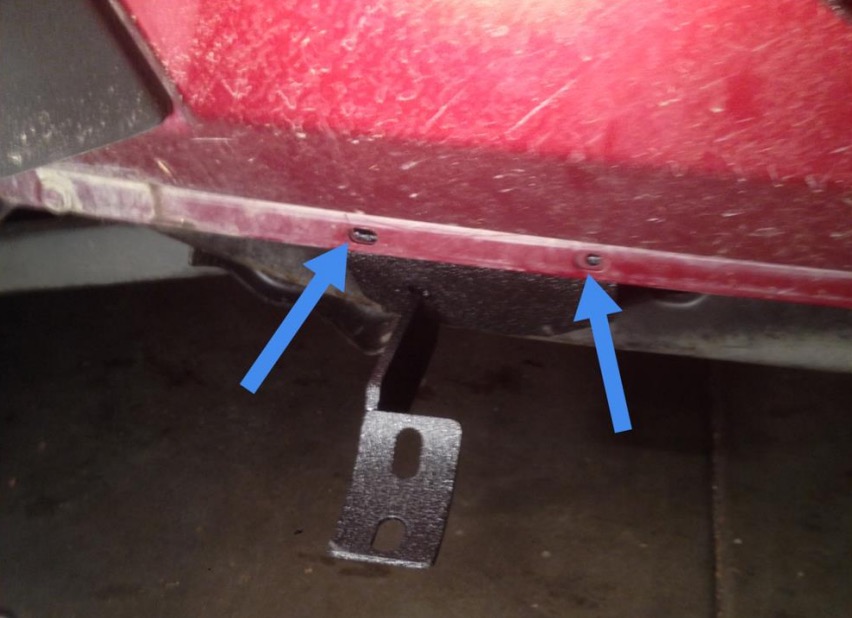
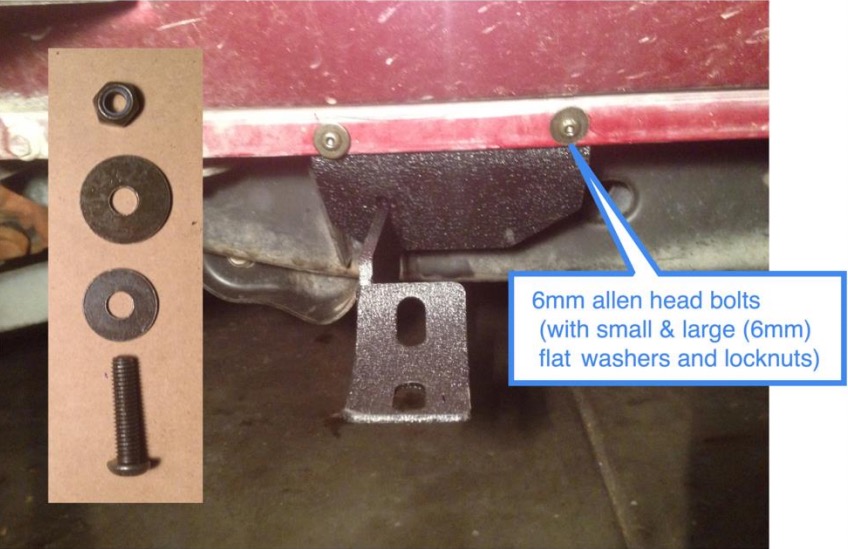
6. Secure bracket to side using 6mm allen head hardware [place small washer in the front (between nut head and Jeep pinch-weld) and large washer in the rear (between bracket and lock nut)].
Note: Do not tighten yet (it is beneficial to snug the nylon lock nuts prior to installing the sidebar)
7. Prepare driver-side rear floor panel in the same manner as Step 3 (for installations without factory threaded floor panels).
8. Hang driver-side rear (longer) bracket in the same manner as the front bracket (see Steps 4-6). Note: The number and position of 6mm allen head bolts used to secure the rear bracket to the side can vary depending on the model of the Jeep (this installation uses 2 allen head bolts as shown).
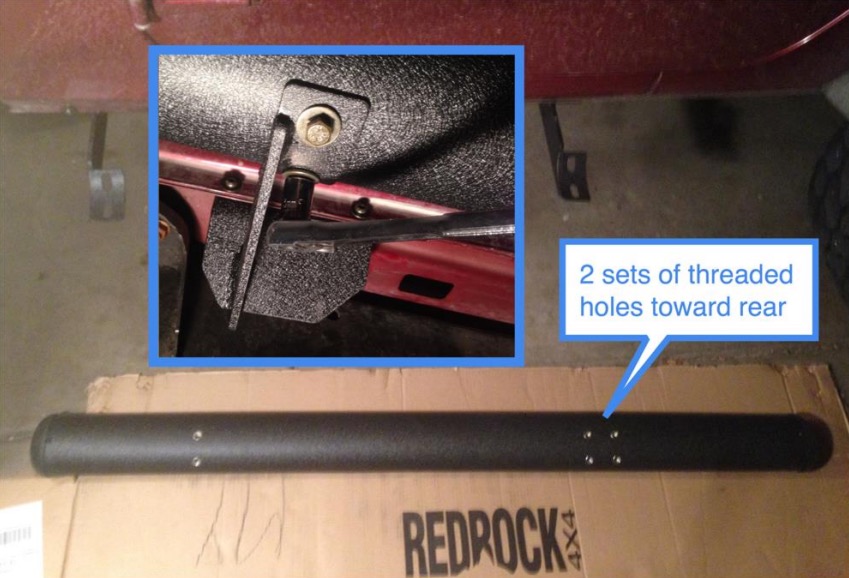
9. Place the driver-side sidebar on the brackets (the end of the sidebar with 2 sets of threaded holes goes toward the rear of the Jeep, use the set of threads that lines up correctly with the rear bracket; the forward-most set of threads is used in this installation) and secure the sidebar to brackets using 8mm (x 25mm) bolts (lock washers & flat washers).
Once the sidebar is in proper (level) position, tighten the sidebar to the brackets.
10. Tighten the remaining hardware; starting with the 10mm (or 8mm) main bracket support and moving to the 6mm allen head bolts securing the side of the brackets. Note: Be careful to not over-tighten the 6mm allen head bolts.
11. Repeat Steps 2-10 for the passenger-side sidebar.
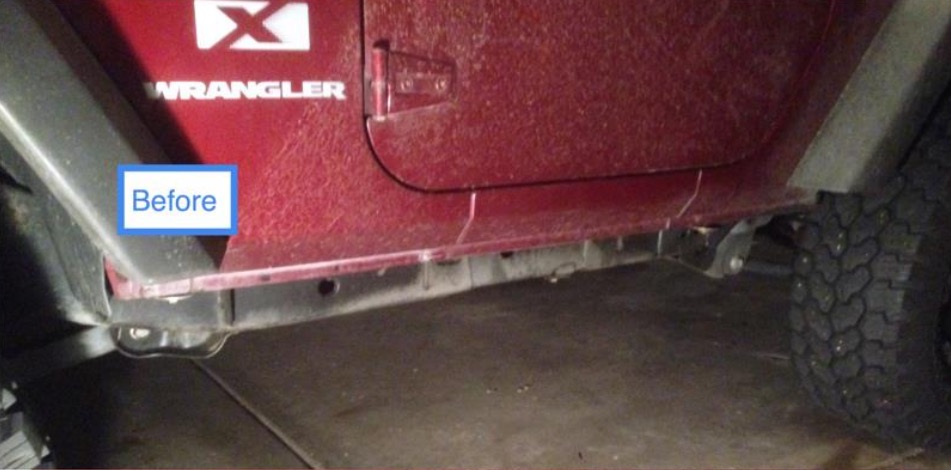
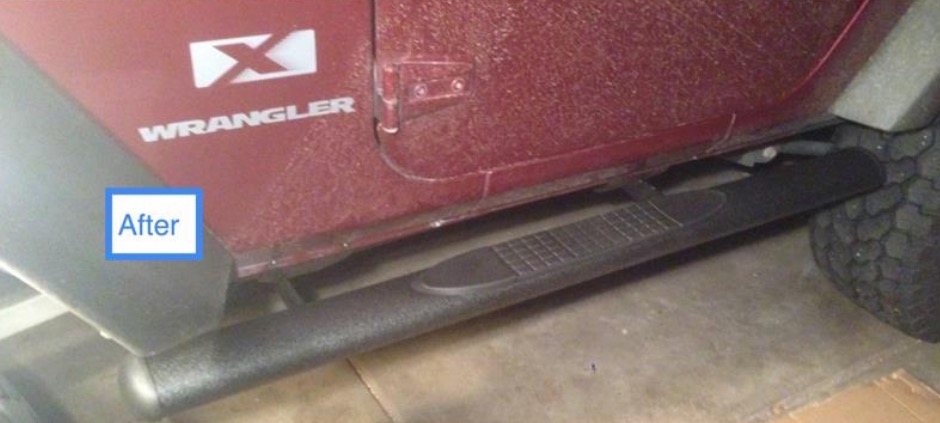
Before and After:
Installation Instructions Written by ExtremeTerrain Customer Forest Sutton 12/07/2014