

How to Install Raxiom Factory GPS Rear Back-up Camera Kit on your Wrangler
Installation Time
1 hours
Tools Required
- 7mm Socket & Driver
- 10mm Socket
- 10mm Open end wrench
- Knife / Razor blade
- Zip-ties
- Wire Cutters
- Needle nose pliers
- Electrical Tape
- Flat head screw driver
- T-30 Torx driver
- 5/16” Drill bit & Drill
- Plastic Splice clips (not included in kit)
- Plastic trim tool (optional)
Shop Parts in this Guide
Read the manuals/installation instructions for each component prior to use. The BCI-CH21 Interface has options that you can activate if desired. This install is being done on a 2014 JKU Sahara with the 430N radio. Also I recommend reading through this guide and hooking everything up to test it prior to full install.
Installation Instructions:
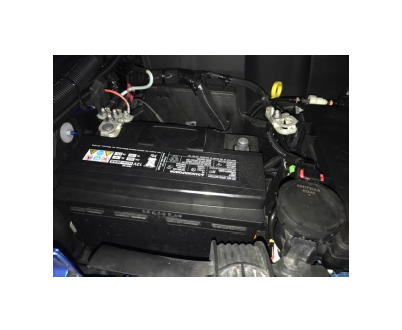
1. Disconnect Negative terminal on battery using the 10mm socket.
2. Dash removal:
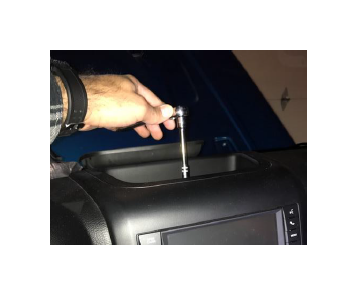
a. 7mm Socket on top of counsel under plastic tray. Tray pops out to access.
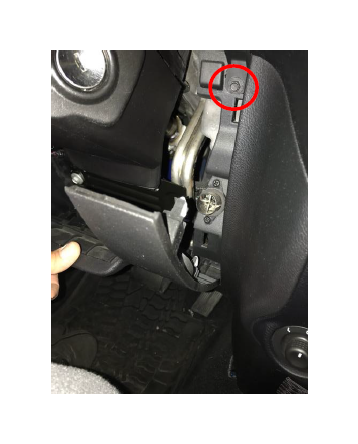
b. Remove the plastic kick panel below the steering wheel by pulling toward the driver seat and down from under the steering column. There are 4 tabs in the 4 corners & hinges at the bottom holding it on. Then Remove the two 7mm bolts located at the top on both sides of the steering wheel (circled)
c. Gently pull back on center counsel above the stereo to pop the clips free. There is still one screw holding the bottom behind the window switches so carefully work the top free across the dash so you can see the back of the window switch panel. Once you can see the back of the window switches, reach behind it and push toward the inside of the vehicle to pop the panel out.
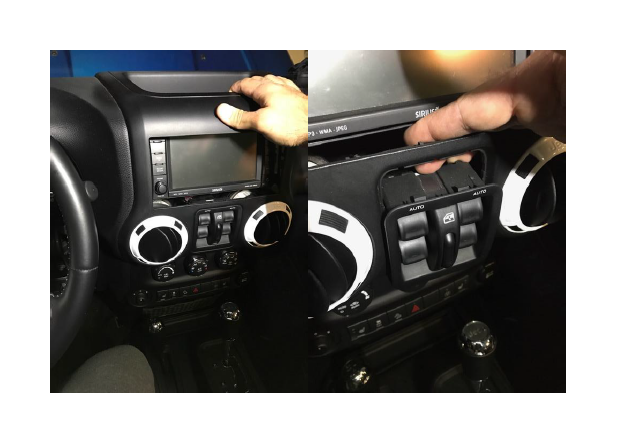
d. Turn the switch panel counterclockwise and unplug the harness by first sliding the red lock all the way to the left as pictured. Then depress the plug tab and remove the plug. Then remove the remaining 7mm bolt and remove the dash. (Tip: Lower your steering wheel as far as possible to help remove the dash)
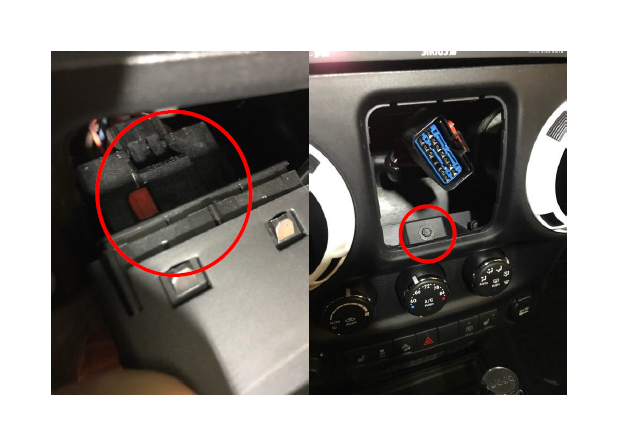
3. With the dash removed, Remove your stock radio by removing the 4 – 7mm screws at the four corners and pull the radio toward you. You will need to remove the plugs from the back. Then carefully pry the HVAC panel toward the center of the vehicle to pop it out. Once free you will need to reach in and remove all of the harnesses attached.
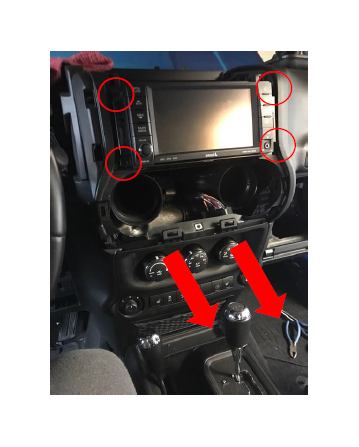
4. With that panel removed, go to the back of the vehicle and remove your spare tire. (not pictured) Remove the black plastic panels on the tail gate.
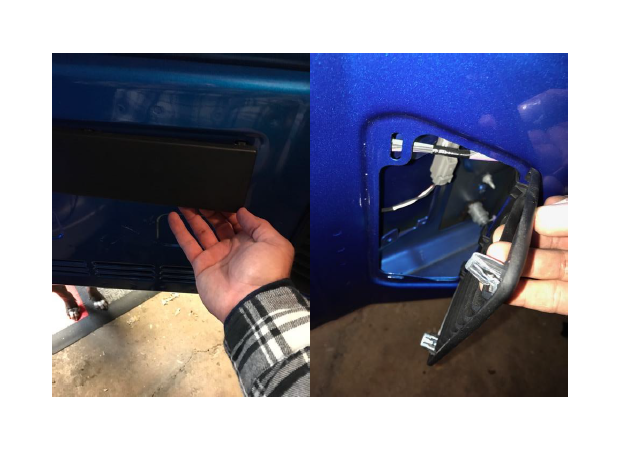
5. My vehicle is equipped with the factory subwoofer so that panel needed to be removed. Two T-30 Torx bolts & and 10mm bolt near the seat belt/ roll cage to tub on top. Once free remove the plug.
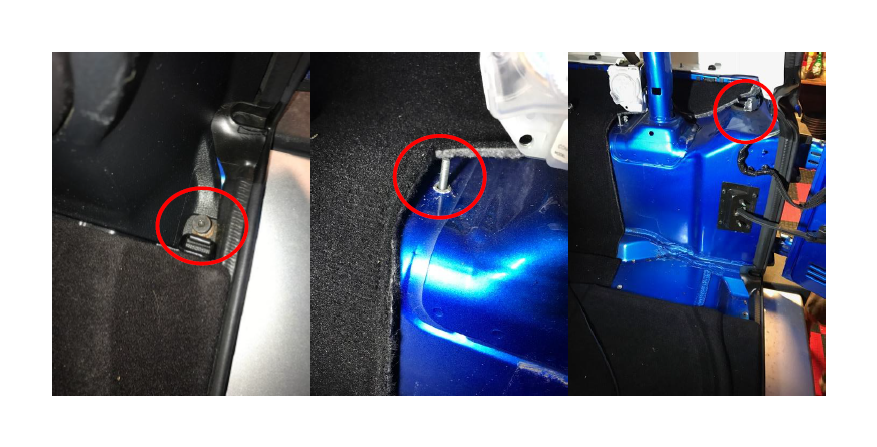
6. I chose to remove some of the zip tie/ Christmas tree fasteners that are used to keep the wires in place. If you cut them off and remove the loose piece and extra tab, you can feed your own ziptie through it and reinsert the Christmas tree fastener into the hole!
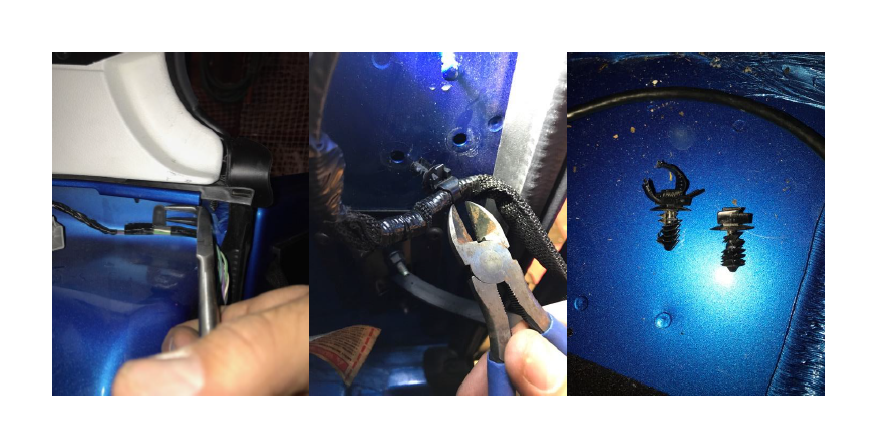
7. Pull back the carpet from the rear corner of your passenger side and then work forward removing the B pillar plastic clips (4). My angled needle nose worked best for these. You don’t have to remove the bottom of the B pillar, there is enough room to safely run the cable and sneak the passenger floor panel out from underneath it.
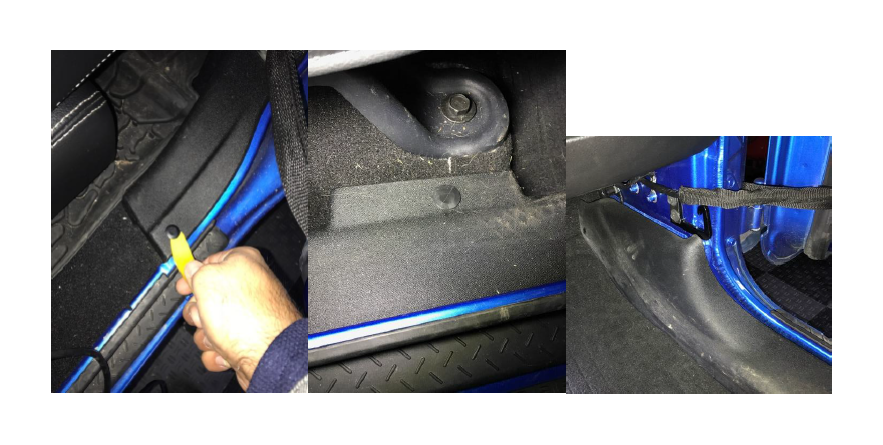
8. Now with the pathway opened up for your cable routing, go back to the tail gate and begin running the cable starting with putting the camera through the Raxiom mount bracket (DO NOT PUSH IT ALL THE WAY IN!!!) Grab two lug nuts and spin them on to hold the bracket in place. Tape might be necessary as well. Then pull the grommet that your third brake light runs through and cut a slit almost the entire way to the wires. The brake light wires are molded in a plug so you will be able to cut into the outer grommet without damaging if you are careful. I tried to make a little notch in the center for the wire to sit in. Reinsert grommet.
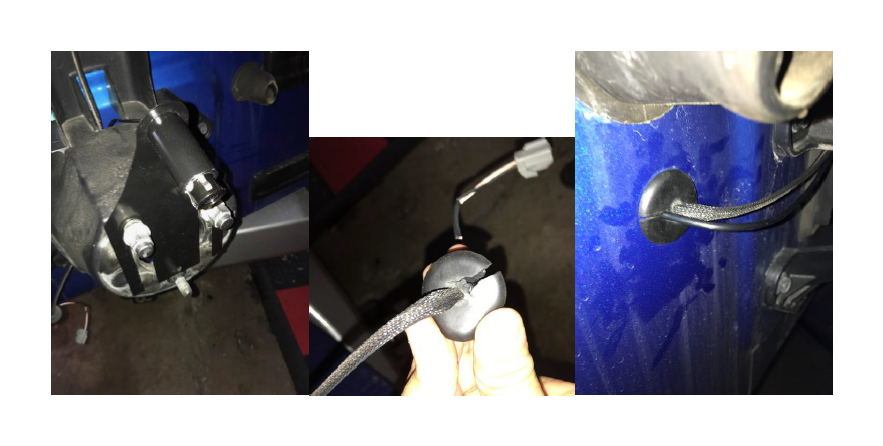
9. Zip tie the camera wires to your third brake light plug & run through the hole along the brake/lock lines. Take the RCA/ Power cable the kit came with and select the end with the yellow RCA & Black power plugs. (The side with the Yellow RCA & small Red and black wires will run to the front) I taped the RCA (yellow) & power (black) wires individually then together to hold them in place & Ziptied along the factory wiring.
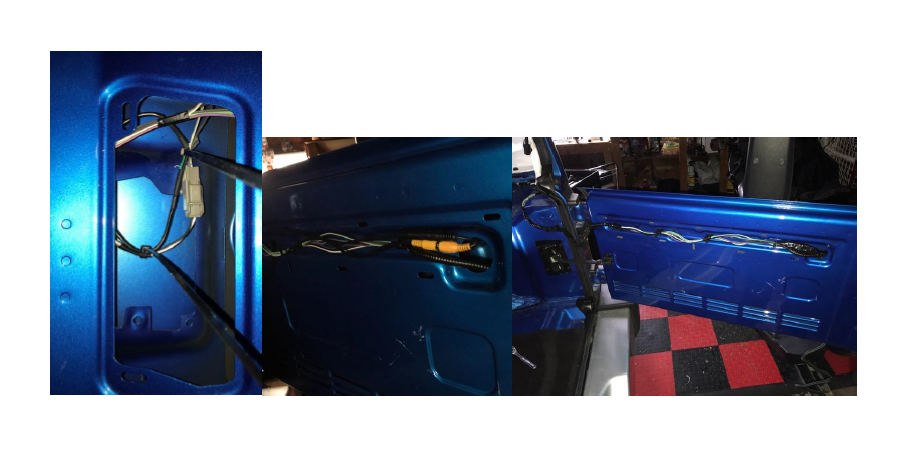
10. Follow the factory harness placing zipties every 6 – 12 inches. Keep the cable tight to factory harness (there isn’t a lot of extra slack for the 4dr!) Once at the front passenger footwell, bring the cable up underneath the glovebox. Ziptie the cable to one of the ground wires there. Don’t ziptie it to your door plug, or you will have issues next time you remove your doors! Remove glovebox by pressing on the sides.
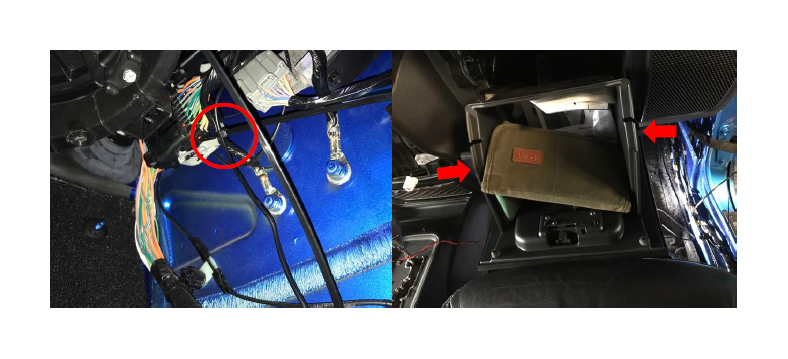
11. Bring the cable through the glove box toward the center counsel. There is a small passage you will be able to feed the yellow RCA & small black and red wires through. Route the Yellow RCA wire behind the plastic panels up to where the window switches are (3rd pic).
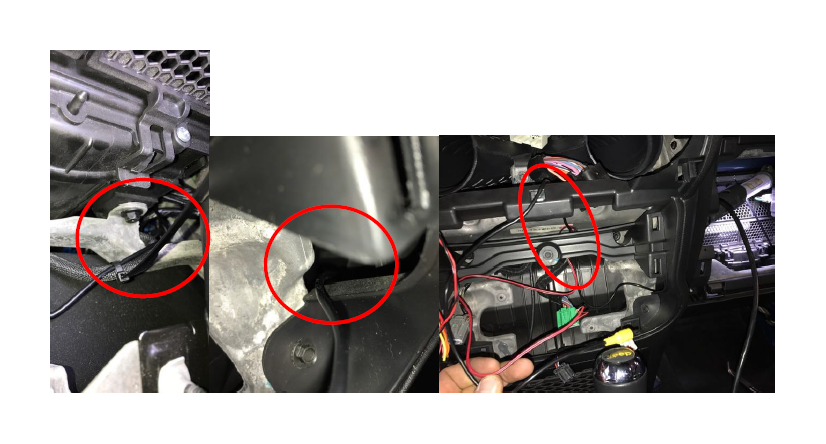
12. Now take the harnesses that came with the kit & attach them to the radio. BCI-CH21-AUX harness will have two yellow RCA Cables labeled “camera” plugged into eachother. Unplug them, your camera RCA will plug into the female that goes toward the radio. I decided to put the other harness into the dash before plugging it into the factory plug first due to its large size. Run the bulk of its cables around the radio frame and down the front toward the driver side temporarily.
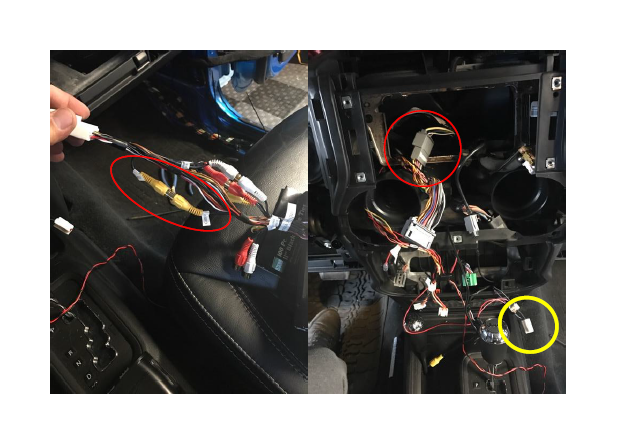
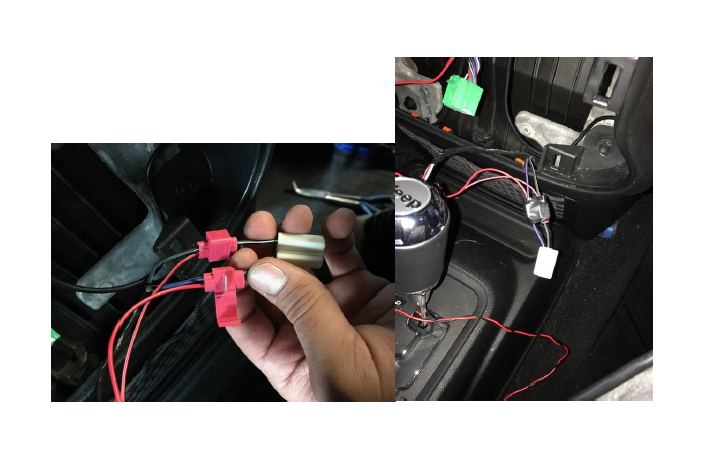
13. Now you will need to locate the white cigarette outlet/ 12v plug (Circled in yellow in the above pic). You will tap power and ground for the camera right here. Using the plastic splicing clamps, tap the red camera wire onto the Positive (blue/red stripe on my car) and the red/black stripe onto the black Negative. I encourage you to reconnect the Negative terminal to test your wires for confirmation on polarities prior to doing this as our vehicles may be slightly different with the year changes. I taped the clips individually and then together.
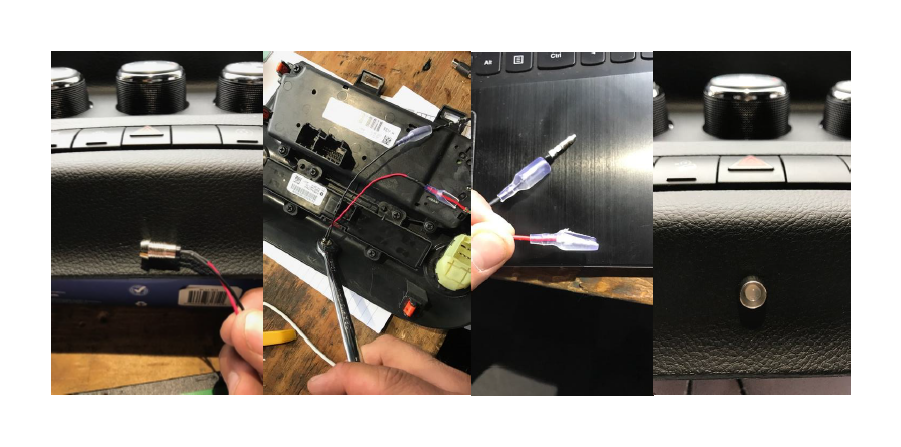
14. Next you will need to mount your LED. This LED will blink when you activate the NAV unlock so a passenger can enter an address while the vehicle is moving. Using the 5/16” drill bit select a location. I chose directly under the hazard button. It is out of the way but you can still see it flash off of the gear selector. The nut is a 10mm. I also cut the rubber covers in order to make it easier to slide the nut off of the LED.
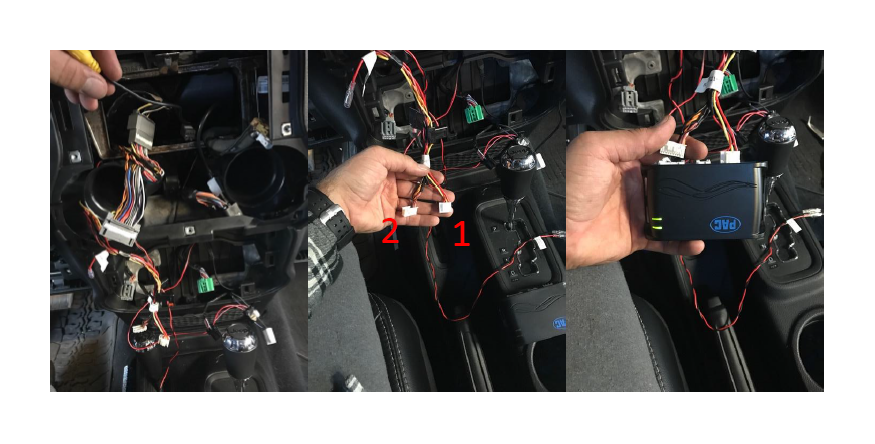
15. Once you have the LED installed, you are ready to put the radio back in. Double check your connections to ensure everything is plugged in as it should be! Be careful pushing everything back in. Leave the BCI-CH21 Harness wrapped around the driver side corner and hanging down. Be sure to check top and bottom to make sure you are not pinching any wires on the rear metal frame that the radio sits on. The first picture below shows how I ran the Yellow RCA wire from the camera. With the radio in, locate the two white plugs pictured in the second pic & Follow these steps
a. Select Dipswitches/ features you want to run (I am using 1 & 2)
b. Reconnect the negative terminal
c. Place key in the ignition & turn key to on position
d. Plug in #1 – Both lights should start blinking
e. Plug in # 2 – Radio should boot up, and the top light should continue to blink Green
f. Turn Key off. Wait 5 minutes and turn key to on position again & confirm single blinking green light.
g. Test your back up camera by placing in reverse.
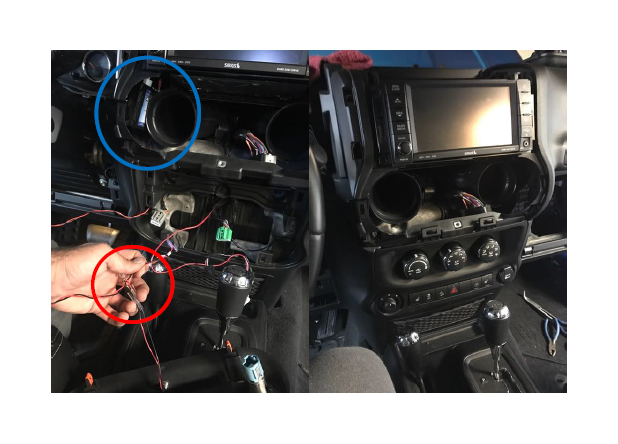
16. With everything working, tuck the BCI interface module into the open space next to the driver side vent (Blue circle) Then connect the black and red wires to the LED (they are clearly labeled. I taped them as well. I did not use the small red wire labeled “Camera power output”. Then carefully tuck the camera power wires and LED wires down and out of the way then replace the HVAC panel. Be sure to reconnect all of the plugs!
17. Replace your dash and all side panels. The last thing you will have to do is adjust the camera. I suggest pulling your jeep into a position with landmarks around (house or garage) for reference. Activate the “forced reverse camera” by holding the Preset button (center button on the back left of the steering wheel) with the jeep in park. Then with the rear glass open, I was able to see the screen and adjust the camera until it looked good.
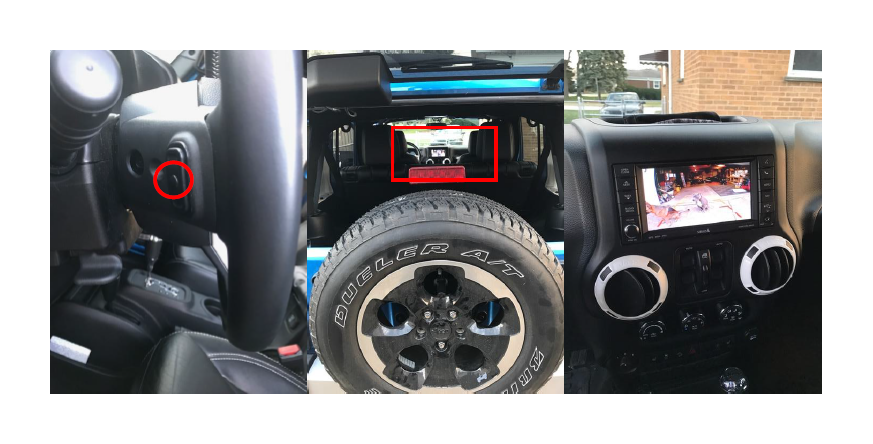
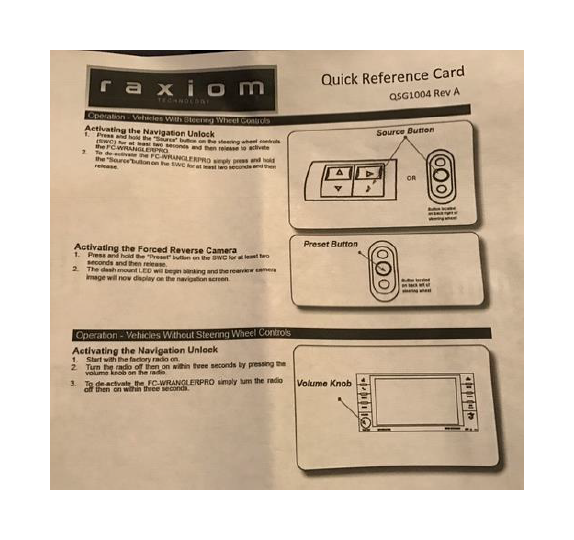
18. To activate the Navigation Unlock, Hold the Source button (behind the right side of the steering wheel). Your LED will begin to blink. Press it one more time to confirm “passenger presence” – LED will go solid and Nav will be unlocked. *If you do not have Steering wheel controls, you will need to use the volume knob. Instructions will be on the quick reference card included the packaging.
ENJOY!!!

