Installation Time
(approx) 2 Hours
Difficulty Level:
Simple installation for anyone.
Installation Guides
FREE 1 to 3-Day Delivery on Orders $119+ Details
Add Details
Change Vehicle Color In Photo
Select Your Color
Verify parts fit & get product recommendations
M-F 8:30A-11P, Sat-Sun 8:30A-9P
Saved - View your saved items
We're sorry. We couldn't save this product at this time.
or use
Add Local Installation
Merideth: If you're in search of a better-looking way to protect the front end of your JK, and get some added benefits in the meantime, this Officially Licensed Jeep Adventure HD Front Bumper with the Jeep Logo will be a great pick for your 2007 to 2018 JK Wrangler. Now, this is gonna be a good option if you're missing that off-road aesthetic and off-road function, and want a front bumper that's going to bring that to the table, whether you're an avid off-roader or only go once in a while. Now, the bumper will also be a bit more compact in design if you're looking for more of a high clearance and minimal aesthetic, while getting all of the benefits that a heavy-duty front bumper has to offer. Now, not to mention, if you're a fan of the Jeep logo or the Jeep brand as a whole, and want a way to add it to your build, this is going to be a good way to sneak it in in a very sleek and stylish way.This will feature multiple benefits, including good mid-width protection to the front end, as well as grille protection, with the integrated bull bar on top and the support tubing over on the sides. Now, recovery is also integrated into the design, with two welded D-Ring mounts and included D-Rings capable of a 9500-pound pulling capacity, each of those for those just-in-case moments. Now, you can also be the rescuer, or one to pull your buddy out, thanks to the winch plate that's going to be compatible with winches, with up to a 12,000-pound pulling capacity, and that have a standard bolt pattern. I do also like that it's more of a drop-in winch plate that's going to give you some better cooling capacity when it comes to airflow into your grille, and give a little bit of protection to the winch itself. Now, last but not least, this is going to allow you to swap over your factory fog lights, so you don't have to sacrifice them when upgrading, and will include light mounting tabs on top of the bull bar, to add any additional lighting of your choosing.So, this will be made of a heavy-duty 5/32-inch steel plate construction, with 2 by 0.12-inch tubing, offering a robust build, and this is going to have the Jeep logo embossed right in the front, for that added style. Now, on top, this is going to have a two-stage black powder-coat finish, which uses an epoxy pre-coating and high-grade textured black powder coat, for optimal protection to the steel underneath. Now, not to mention, this will also be completely bolt-on, so you don't have to worry about modifying your rig. Now, this will come in at about $575, and I think you're definitely getting your money's worth at that price point, considering all the options that you're getting, including recovery, light mounting choices, protection, and a compact and sleek style. Now, again, I do like, in comparison to other top-mounted winch options, that this is going to drop in a little bit, give it protection, and, like I mentioned, it's going to offer a little bit more airflow to the grille. Now, the embossed Jeep logo is also something that you don't see very often, and will allow you to rest assured that this bumper is going to be up to the Jeep standard.Install couldn't get any easier for a front bumper, at a 1 out of 3 wrenches on the difficulty meter, taking you about two hours to get the job done with some pretty basic hand tools. At this point, we can head over to the shop and check out a detailed breakdown of the install process step-by-step, so that's gonna wrap it up for me. Let's go ahead and get into it.Man: The tools you'll need for this install are a 1/4-inch ratchet, a 3/8 ratchet, a 3/8 extension, I used a 3/8 18-millimeter socket, and a 1/4-inch 7-millimeter socket, as well as a Phillips head screwdriver, the included Allen key that comes with the bumper, and, in my case, we needed to extend the fog light harness, so I got some wire and I used some wiring connectors, male and female, to make some lengths. There's not a right or wrong way to do this, so you can do it however you'd like, but this is how we did it.Hey, everybody. Today we're gonna be installing a front bumper on our Wrangler. But before we dive right into that, check out this video that's going to explain the uninstall process, and then you can meet me right back here, and we'll get started putting the new one on.Merideth: So, the first step to taking off our bumper is disconnecting our fog lights, and then we can go ahead and get underneath the bumper, so we can start disassembling all of that hardware. You will need a 18-millimeter deep socket and a ratchet, as well as something comfortable to lay on.So, just disconnect the fog lights. All you have to do is push down the tab, and we can take that off and set that aside, and we're gonna do the same thing for the other one. So, you're gonna have four studs, with four nuts on either side of your frame rail. We are at the innermost bolts here. You're gonna be using an 18-millimeter deep socket to remove the nuts, and I am also using a 3-inch extension. This is just gonna help me clear the bumper down here.So, the outer portion will be a lot easier to see. So, what we're gonna do now is remove the 18-millimeter nuts that are holding on to the studs on our bumper. You're gonna have two on the outer portion of the frame rail, and two on the inner portion. The inner portion is gonna be a little bit hard to see. So, you will have two here. We're gonna use an 18-millimeter deep socket to remove those. I'm also using a 3-inch extension, just to clear this bottom portion of the bumper.So, now we're at the innermost driver's side bolts. You will have this vacuum pump here if you have a 2012 to 2018 JK, so I wouldn't recommend the extension. But if you have a 2007 to 2011 JK, you can use that extension to help you out. So, after all the hardware is disconnected, we can take off our front bumper.Man: So, we have a couple things to do before we put the new bumper on the Wrangler. Now, first of those is going to be transferring these fog lights from the original bumper over to the new bumper. So, we're gonna start by pulling those fog lights out of this bumper. To do that, it's actually really easy. Just gonna turn it around so you can see here. There are four Phillips head screws in each fog light assembly, and I'm just using a Phillips head screwdriver. We're just pulling them out, and we can set them to the side and move on to the new bumper.So, we got four of them to take out, like I said before. There's one, two, three, and on to the fourth, just like that. Now that we have this pulled, you can go ahead and do the same thing and take the four out on the other fog light, and then we can move on to the new bumper. Now we have the new bumper on the table and we're ready to start putting the fog lights into it. So, I'm gonna flip this over here, and we're gonna take a look at what we're working with. Let's spin it around so you can see a little bit better. So, as you can see, we've got the flanges here where the brackets on the end of the frame rail will bolt to. Now, you see there's holes here. That's because there's some flanges we're gonna need to attach there that have a bolt sticking out of them that go through the bracket on the end of the frame rail, as well as mounting those fog lights inside of here.Now, you'll also notice that if we were to just drop a fog light into the fog light hole here, there's a gap here. It doesn't quite fit all the way in. That's because we need to install one of these brackets on both sides to make that fog light sit in there nice and level, and we can bolt it down. So, let's go ahead and get started by installing these brackets on both sides, so we can get our fog light fitted into the new bumper. So, like I said before, if you just set this fog [inaudible 00:08:44] in here, we're gonna need to put a bracket there to get that height to the same level as this flange on the side of the fog light.So, it's going to be a lot easier, rather than trying to install this to here and then install the fog light, to put this on the fog light first, and then install this as one unit. So, that's what we're gonna go ahead and do. And to do that, I'm gonna be starting with one of those Allen bolts that are included with the kit. There's a whole bunch of these, they're pretty small, and what's even smaller is the lock washers that go on them. They're really tiny. You might lose a couple of these if you're not careful. I'm gonna put that on the head of the bolt. And then I'm going to use one of these flat washers, just like that. So, that's the basic assembly for pretty much all of the hardware we're going to use for the fog lights and attaching them to the bumper. So, just assume you're gonna need a lock washer and a flat washer for every one of these bolts. What I'm gonna do is actually bring these up through the bottom, like this, just so I can set that fog light on over top. Then what goes on top of those is another one of those flat washers.And then, included with the kit as well, we have 7-millimeter nuts. I'm gonna thread that nut on to start by hand, just to get it started here, just like that. And then we have a hole on the other side, the same way. We're gonna do the exact same thing, getting one of those bolts, with a lock washer, and then a flat washer, passing it up through the bottom, just like that. Then another flat washer, then 7-millimeter nut, following suit with the other side, just like that. Now, I'm not gonna tighten them down. I'm just going what I can with my hands here, so we can still have a little bit of adjustment to get the bolt holes lined up on the bottom of the bracket.So, I'm good to set this in here now, and that'll sit...and you can see those brackets line up pretty well. Then we're gonna do the same thing with the two holes over here on this side. Here, I'm gonna take one of those bolts, a lock washer, and a flat washer. I'm actually gonna start with this one here on the end and I'm gonna pass it up through the bottom as well, just like the first one. Now, it might be easier to kind of lift this fog light up and out of the way a little bit, fish this through, so you can see what you're doing a little bit better. It's kind of a tough angle to get to, but you can do it just like that. And I'm going to set the fog light down. And again, we're using another flat washer on top of that bolt, and another one of those 7-millimeter nuts, just like that.So, I have the assembled bolt stuck onto the head of the Allen that comes with the kit. And I'm going to very carefully dangle this underneath this bracket and try to get it through the hole here and up through the fog light tab, like that. Now what I can do is hold it with one hand while I get the hardware I need, which is gonna be another flat washer and a 7-millimeter nut. And I'm just holding it there with my finger underneath the bracket. Putting those on, with the flat washer and the 7-millimeter nut, and I'm tightening it down by hand.Then all that's left are the two here at the bottom of that bracket. Those are just gonna follow suit with the rest of the bolts. They get a crush washer, then the flat washer, and put them in the long end of the Allen key, and dangle them down. And those guys luckily thread into the bumper. They don't need a nut. So, very carefully get them started, keep them from stripping. Then you work them all the way down. There's one. I'm not gonna go all the way tight right away because I wanna make sure we can get this last one in the hole before we tighten them all down. Again, have a lock washer and a flat washer on one of those bolts. And I'm going for the last hole here. I'm glad we left that loose, because I'm gonna push it over a little bit, to make that easier to get to. There we go.Now, since this is my last one, I'm good to tighten it all the way down, which I'm going to do, all the way to the bottom. Snug that up. Do the same with the one under it, tight as I can go. And I'm taking a 7-millimeter socket that is a 1/4-inch, and kind of hold the head of that bolt with my one finger, like that, until the crush washer gets compressed, which is nice. It's gonna hold that bolt still. I don't need to fish that Allen underneath the bracket. I can tighten this down without having to hold it. I'm gonna do the same for the one up here. Holding the head with my finger, switching to 1/4-inch ratchet, tightening that down. Then I could do the same thing for these here. Compressing that lock washer, and then snugging them up.Once you have that fog light installed like I have it here, you can do the same steps on the other side for the other fog light. Then we take these included brackets and we're gonna fish these through the hole right there. They're gonna sit and receive the bolts, a bolt, actually, and a nut, through the flange on the front of the frame. Just gonna let them dangle there. Do the same on the other side, just like that. Once you have those in place, you can do the same with the other two brackets on the other side of the bumper.In our case, the vehicle we're doing this on would need them extended, so what I ended up doing was cutting the fog light plug off of the harness, and I used some wiring connectors here and I put the male ends on the plug end, and then female ends on the harness end, just like that on both sides. What I made quick was just a set of extensions that you could take on and off. If you ever put your bumper back to stock, you don't need to splice anything ever again. These just have a male end on one side and a female end on the other, and they just act as a bridge between the original harness and the plug harness.So, all you need to do is just pick a color. In this case, I'm putting blue to black, just like that, and yellow to white. And then, on the extension, I'm just making sure I'm getting yellow to white again for that plug side, and blue to black. And now I have an extended wire harness, so that I can get to the fog light that's on the wing of the bumper, since they're not in the center anymore. Then I have these for the other side as well, and that's gonna be the same thing, just making sure that we don't mix up the colors as they go to the plug end, just like that. Then I have the plug. We did yellow to white, and blue to black. Now, this isn't necessarily the only way you could do this. It's kind of up to you. But this is the way we went about it, and it makes a nice, clean, and simple install and uninstall if you ever need to do it again.Now that we have these extended, we're good to go ahead and put the bumper back on. So, we have the bumper on a little bit of a rolly cart here, just so we can get it pushed in. This can also be substituted out for a friend if you have one that's able to give you a hand and help you hold the other side. Just gonna guide that in place. Seems to be right about there. I can feel that the bolt bottomed out. And then I'm going to take big, flat washer, reach in there, find the bolt again. Somewhere. There it is. Flat washer on. Then a big lock washer, like that. And then one of those 18-millimeter nuts that's included with the kit on top of all that. Where is the bolt? There it is.Gonna go as far as I can by hand, so we can still have some adjustment. And then underneath that, in the hole below, we are going to be able to put a bolt through it. For this, I'm gonna crawl under the bumper so I can see what I'm doing a little bit better. Should be able to see that there's some adjustment in the bumper, since we don't have it secured down. I'm looking through the hole and just making sure that bracket is lined up where we want it to be. It's pretty close here. That's about right. Then I'm taking one of the 18-millimeter bolts, with a lock washer on that, and a flat washer as well. Gonna fish it through, try to get it started in that bracket. Can kind of hold the top one, get it started like that. Perfect. Once we've got those in like that, what I'm gonna do is move on to the other side, and just do the same step here on the outside of the bumper on the other side, so we can have the bumper in place and put the rest of the bolts in and tighten everything down.So, now that we have all of our bolts put in across the frame, we're gonna go ahead and start tightening. Now, to do that, I have an 18-millimeter socket, in 3/8, and 3/8 ratchet. I'm just gonna make sure that's going the right way, and gonna start tightening all my bolts down. There's one. Two. Once those two are tight, you can go ahead and tighten down the other six that are across the bumper.At this point, now that the bumper is secured, we're good to go ahead and plug our fog lights back in. Now, you can see that I have my extension harness. I'm gonna route up and over the frame rail, so it's out of the way and you can't see it. Then all I need to do is just plug the fog light in, just like that, and make sure the wire's tucked up and out of the way. If you'd like, depending on how you do it, you could zip-tie it to something. That's your choice, just as long as you can't see it from outside, and then you can go ahead and plug the other fog light in on the other side.Now we're good to go ahead and attach these guys. They came with the kit, and they're really easy to install, probably the most fun part of the install as well. We're just gonna slip them over, slide the pin through, and tighten them down. Once you have this side on, you can go ahead and do it to the other side, and then that is install complete.That was the Officially Licensed Jeep Adventure HD Front Bumper with the Jeep Logo for the 2007-2018 Jeep Wrangler JK. For all things Jeep, remember to keep it right here at extremeterrain.com.
View Full TranscriptNow Playing
Jeep Wrangler JK Officially Licensed Jeep Adventure HD Front Bumper with Jeep Logo Review & Install
20:50
Subscribe: New Wrangler videos daily!
Subscribe to our YouTube Channel
Features, Description, Reviews, Q&A, Specs & Installation
Brand | Jeep Licensed by RedRock |
Bumper Type | Full Width |
Bumper Location | Front |
Bumper Material | Steel |
Bumper Finish | Black |
Bumper Winch Mount | Winch Mount |
Bumper Fog Light Fitment | Factory |
Please Note. This Jeep Licensed by RedRock bumper supports up to 10,000 lbs. of flat-tow capability using the included D-Rings or integrated tow hooks.
Fitment:
Jeep Licensed by RedRock J164363
CA Residents: WARNING: Cancer and Reproductive Harm - www.P65Warnings.ca.gov
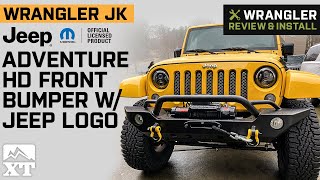
Installation Info
Installation Time
(approx) 2 Hours
Difficulty Level:
Simple installation for anyone.
Installation Guides
What's in the Box