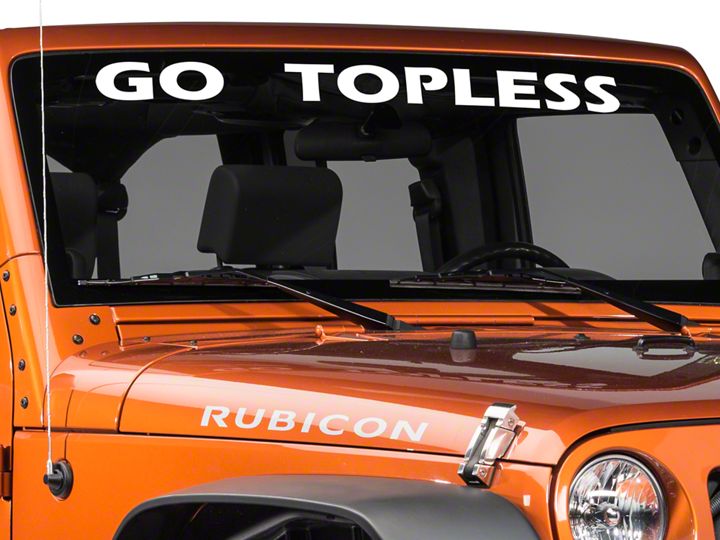

How to Install Go Topless Windshield Banner - White on your 87-18 Jeep Wrangler YJ, TJ, JK & JL
Installation Time
15 minutes
Tools Required
- Spray bottle with dish soap & water mixture or Window Juice
- Window Cleaner
- Plastic Squeegee

Shop Parts in this Guide
Prep:
Clean window well to ensure good adhesion of the Decal. Fill a spray bottle with a mixture of water and soap (we use baby shampoo), about 4 large drops per 32 oz. spray bottle of water. You can also use window cleaner if you choose. You may also use a product called “Window Juice”. This product is very good but not readily available, one may order it online. We prefer this for window applications but the others will work fine they just have a little longer dry time. Be sure to install decal out of direct sunlight.
Step 1:
Premeasure before you remove the backing to be sure you know the spacing of you decal. Once wet you will be able to slide or pick up and move the decal into position.
Step 2:
Spray window with a generous amount of the soap and water mixture or Window Juice.
Step 3:
Peel backing from banner exposing the adhesive.
Step 4:
For full window width decals use a partner, hold decal or over windshield and lay down as straight as possible. Once on the window, maneuver decal into desired position.
Step 5:
Once you have the decal in its final position, remove all air bubbles by pushing them to the outer edges with a plastic squeegee.
Step 6:
Spray decal generously with solution or Window Juice.
Step 7:
After letting decal dry for a bit, carefully peel back protective coating as shown. Pull the tape as flat on the car as possible this will help prevent the tape from pulling up the vinyl. One trick that may be helpful is to place a squeegee on the transfer tape and peel it back against the squeegee while holding the squeegee down on the decal keeping it tight on the tape that’s being pulled.
Leave several hours, depending on climate, of dry time before cleaning car. Use a quick detailer in a spray bottle for the initial cleaning then hand wash car waiting at least several days for the first time after drying. Do not power wash vinyl or wax vinyl.

