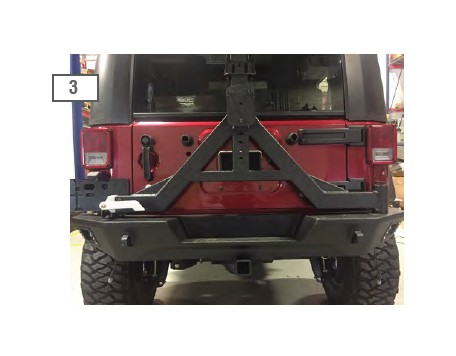

How to Install Deegan 38 Rear Bumper w/ Tire Carrier (07-17 Wrangler JK) on your Jeep Wrangler
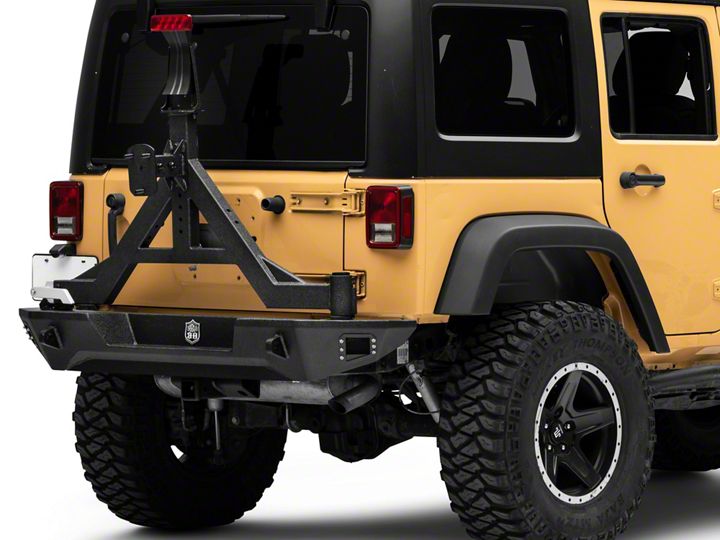
Shop Parts in this Guide
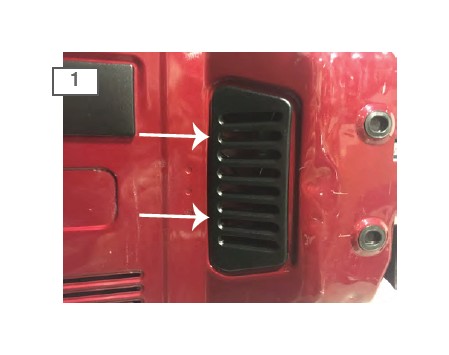
Open the tailgate remove the vent cover with a panel removal tool. Unclip the 3rd brake light electrical connector.
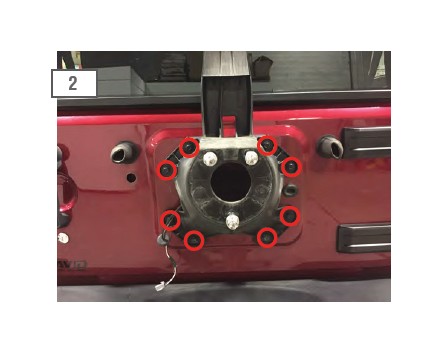
Remove the rear tire and the (8) 13mm bolts holding the tire carrier to the tailgate. Remove the 3rd brake light wiring harness.
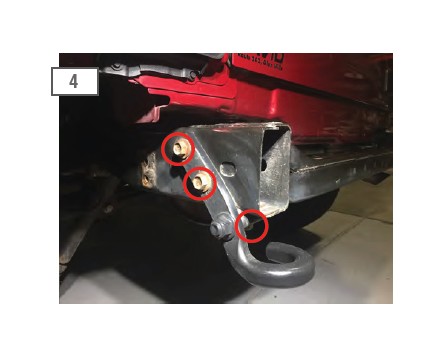
Remove the (4) 15mm bolts on the outside of each frame rail. Then remove the (4)15mm bolts securing the plastic bumper to the frame. Remove the bumper from the vehicle.
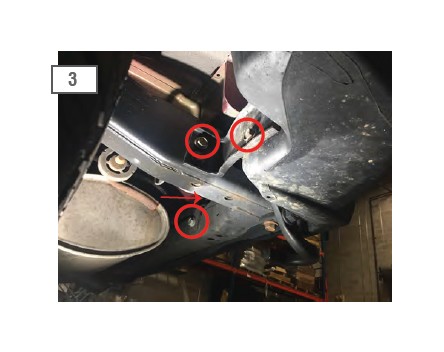
Remove the (3) bolts securing the tow hook to the driver side frame rail.
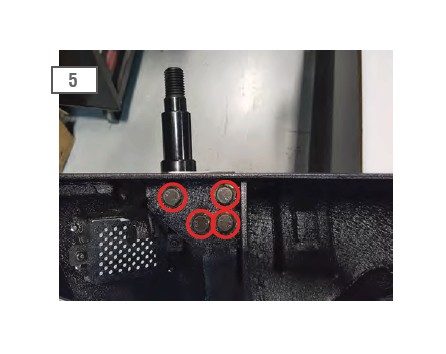
Install the tire carrier shaft through the bumper slot and tighten the (4) M12 x 1.75 x 80mm bolts. Torque to 64lb ft.
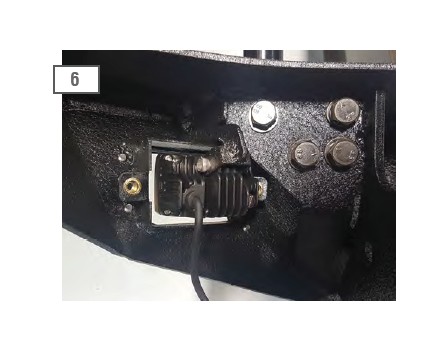
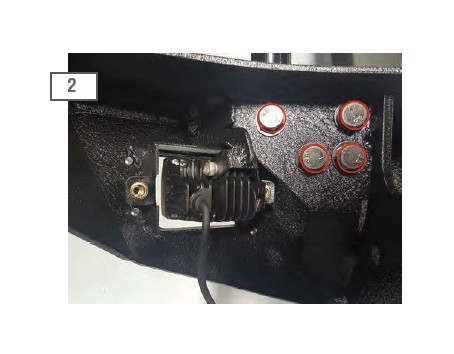
Install the optional Flood lights using the hardware provided in the light packaging. If choosing not to use the LED lighting. The bumper will include bolt on mesh covers. Secure the cover to the bumper using the provide (2) M6x1.0 20mm bolt and flat washer.
Next, slide the (2) C-Shaped mounting brackets into the frame rails with the nut backing up to the factory holes in the frame.
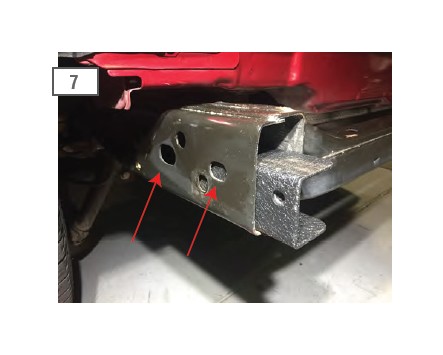
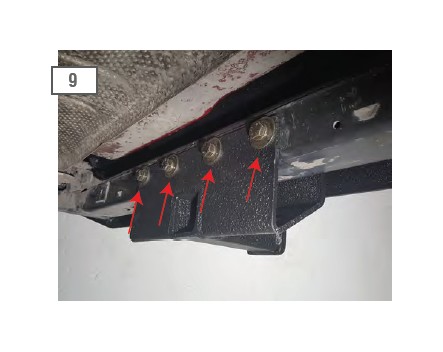
Slide new rear bumper into place, and tighten the (4) M12 x 1.75 x 40mm and (4) M10 x 1.5 x 30mm bolts.
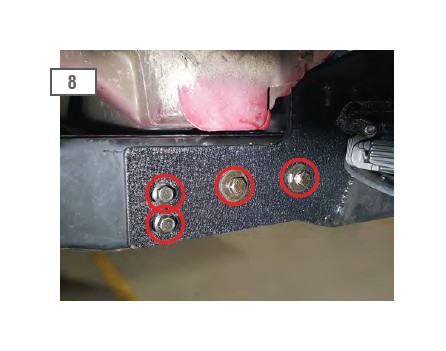
Optional: Secure the hitch receiver to the frame by using the (4) M12 x 1.75 x 120mm bolts, M12 Nuts, M12 flat and lock washers.
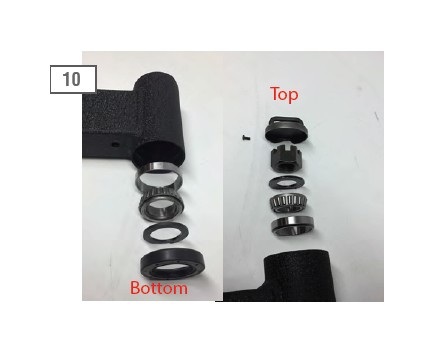
Install the larger bearing and race into the bottom of the tire carrier, and the smaller bearing and race on the top of the tire carrier. Make sure to pack the bearing with grease before installation. Then use the small washer for the top and the larger washer for the bottom. Install the seal on the bottom of the tire carrier. Also use a small amount of grease for the seal.
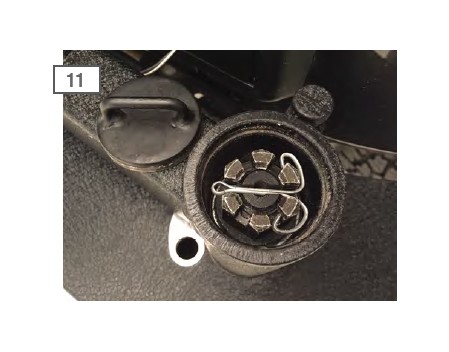
Install the tire carrier. Be sure to add a little extra grease for good lubrication. Use the supplied castle nut and cotter pin and a 35mm socket to seat the tire carrier to the tire carrier shaft. Then install the dust cover and small phillips set screw.
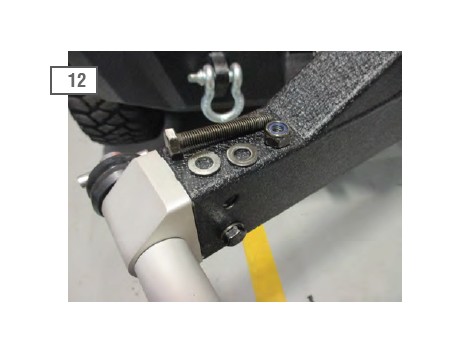
Install the carrier latch handle using (2) M10 x 1.5 x 65 bolts, washers, and lock nuts.
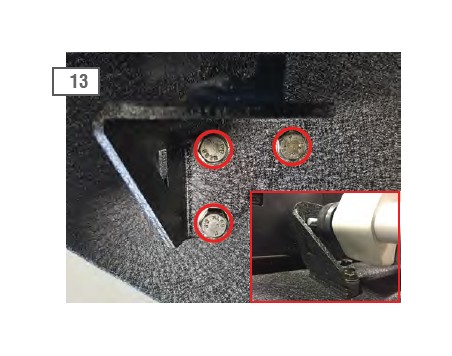
Install the latch bracket using the (3) M10 x 1.5 x 40mm bolts, and M10 nuts. Do not fully tighten until tire carrier is fully installed. Some adjustment may be needed. If necessary, use the supplied shims to space the handle receiver upwards. **If carrier needs further adjustment, see the last page of this guide for further instructions.
Install the rear tire mount and secure it to the rear swing arm at the desired height using the (2) M12 x 1.75 x 60mm bolts.
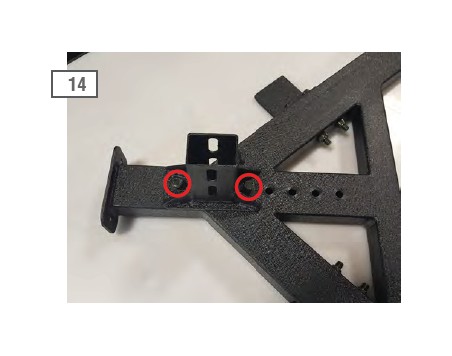
Install the carrier bump stops using the (4) M12 x 1.75 x 110mm bolts. With the carrier latched to the bumper, tighten the brackets so that the brackets are making contact with the rubber bumpers on the tailgate.
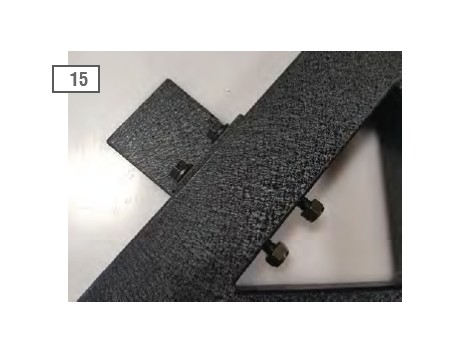
Measure the backspacing of your wheel and tire by placing a straight edge across the tire. Measure from the mounting hub to the straight edge. Subtract a half inch from the previous measurement, and set the carrier to the new measurement. This ensures the tire sits tight against the carrier.
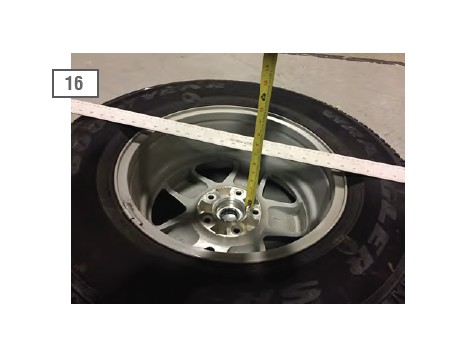
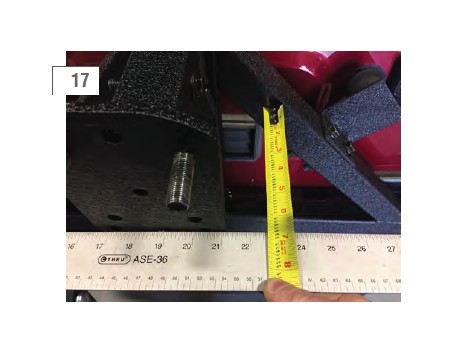
Use the same method to set the spacing on the tire carrier hub mount. Place the straight edge on the hub and set the spacing to match the measurement from step 16 using the (2) M12 x 1.75 x 80mm and (1) M12 x 1.75 x 30mm bolts.
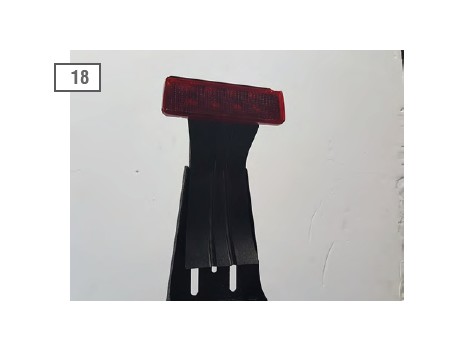
**Note: If using a Third Brake Light with your tire carrier you will need to extend the wiring harness. Remove the screws holding the 3rd brake light to the factory tire carrier. Transfer the 3rd brake light to the Deegan bracket. Carefully tighten the factory torx screws. The screw bosses are plastic and can strip out easily.
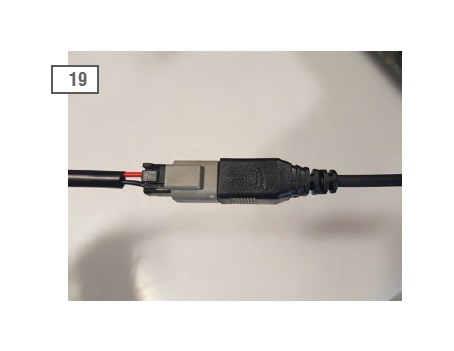
Optional Flood Light Wiring: Connect the (2) LED Flood lights into the supplied harness. Zip tie the excess wiring away from any hot/and or moving parts.
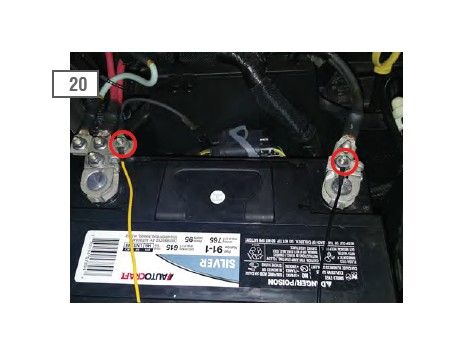
Optional Flood Light Wiring: Install the yellow 12 volt wire to the positive battery terminal. Connect the black ground wire to the negative battery terminal. Zip tie the excess wiring away from any hot/and or moving parts.
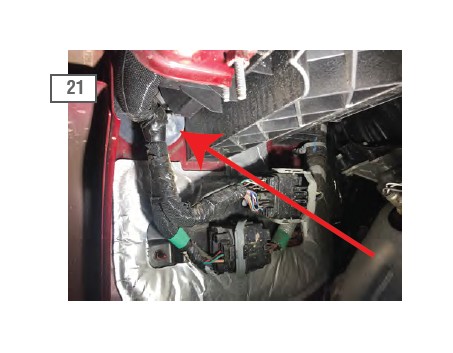
Optional Flood Light Wiring: Route the on/off switch to the interior of the vehicle. Mount the switch in the desired location. Zip tie the excess wiring away from any hot/and or moving parts.
Contents:
(1) Rear Bumper
(1) Tire Carrier
(1) Tire Carrier Stud Mount
(1) Tire Carrier Handle
(2) Spare Tire Mounts
(2) Third Brake Light Mounts
(2) Rear Bumper Mounts
(1) Handle Latch
(1) Hitch Receiver Mount
(1) Tire Carrier Stopper Mounts
(1) NSK Bearing L44649/10 - 402
(1) NSK Bearing L68149/10 - 506
(1) Seal
(1) Castle Nut
(1) Cotter Pin
(1) Dust Cap
(1) Dust Cap Retaining Phillips Screw
(3) Lug Nuts
(2) Bearing Washers
Optional:
** (2) KC LED Flood Lights
** (1) Light Harness
Rear Bumper Hardware:
(4) M10_30 Flange Bolt
(8) 12mm Lock Washer
(4) M12_40 Hex Bolt
(4) M12_120 Hex Bolt
(12) 12mm Large Washer
(4) M12 Hex Nut
(12) 6mm Lock Washer
(12) 6mm Flat Washer
(12) M6_12 Button Head Screw
Tire Carrier Hardware:
(7) M10 Nylon Lock Nut
(1) M24 Slot Nut
(1) M4_8 Cross Head Screw
(8) M12 Nylon Lock Nut
(4) M12_80 Hex Bolt
(3) M10_40 Hex Bolt
(20) 12mm Flat Washer
(2) M6_20 Button Head Screw
(14) 10mm Flat Washer
(4) 6mm Flat Washer
(1) Allen Wrench
(2) M6 Nylon Lock Nut
(2) M10_30 Hex Bolt
(4) M12_110_80 Hex bolt
(1) D4_36 Cotter Pin
(4) 12mm Lock Washer
(1) M8_8 Hex Screw
(1) M12_30 Hex Bolt
(4) M12_60 Hex Bolt
(2) M10_65 Hex Bolt
Carrier Arm Adjustment
If the tire carrier arm sits to low on the tire carrier latch, adjustment of the tire carrier post will be required.
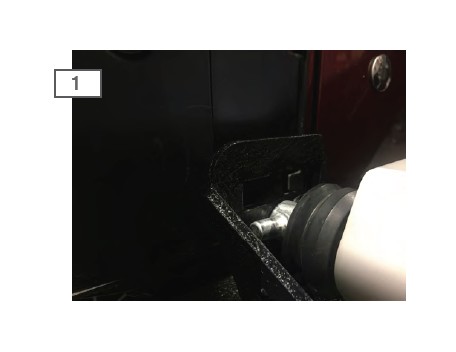
Begin by removing the spare tire from the carrier arm. Then loosen the carrier arm post from below the bumper.
Lift the carrier arm until the latch is aligned. **Note: Depending on the weight of the spare tire, it may be necessary to align the carrier arm slightly above the latch opening. The weight of the tire will create proper alignment. Once aligned re-torque the carrier post mounting bolts to 64lb ft. Install the spare tire and test latch alignment. Adjust the post mount as needed.
