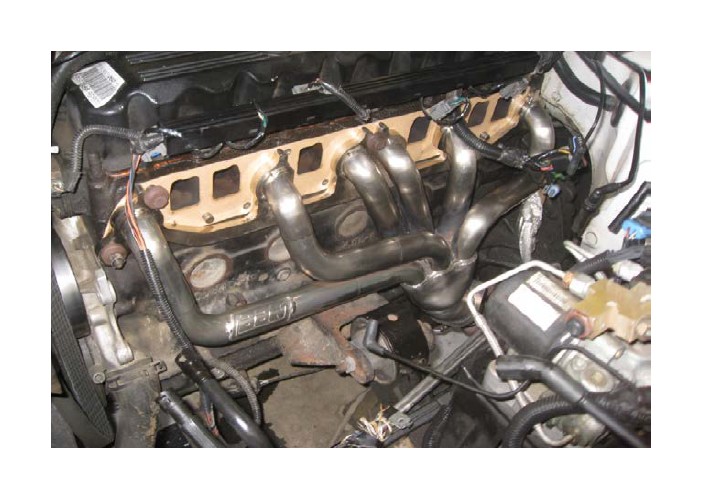

How to Install BBK 1-1/2 in. Ceramic Tuned Length Shorty Headers (91-99 4.0L Wrangler YJ & TJ) on your Jeep Wrangler

Shop Parts in this Guide
Follow these instructions carefully to ensure correct fitment and operation.
STEP 1: Disconnect the negative battery terminal.
STEP 2: Loosen the clamp at the throttle body by pulling the locking tab up.
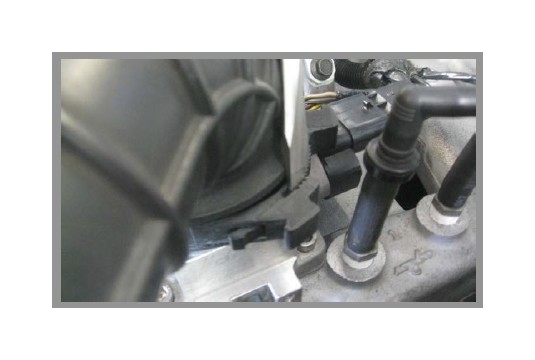
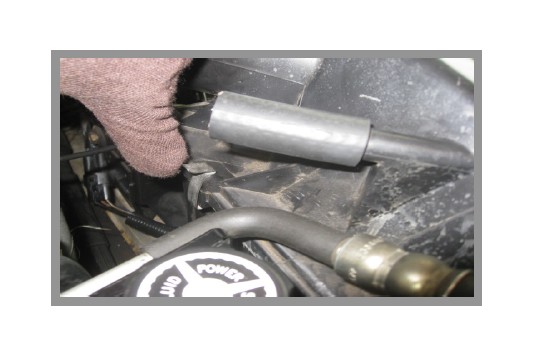
STEP 3: Remove the clips holding the top half of the stock air box assembly together to the bottom half, and also remove both vent hoses going to the air box.
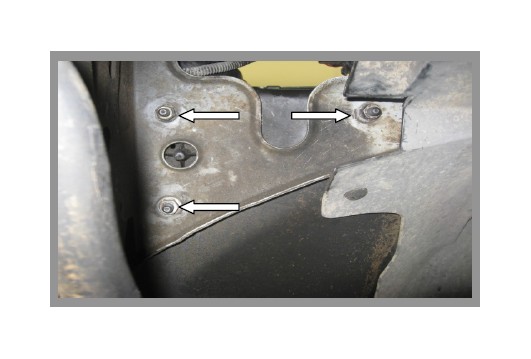
STEP 4: From underneath the vehicle remove the 3 nuts that secure the stock air box assembly.
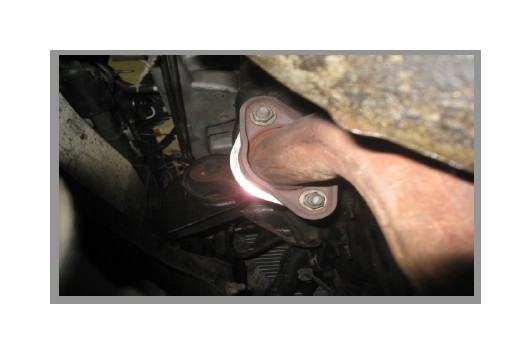
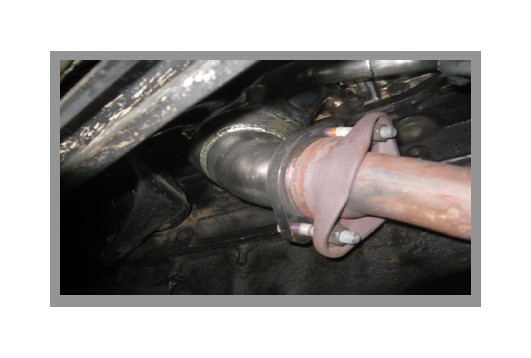
STEP 5: While still underneath the vehicle, remove the hardware from the collector to the head pipe.
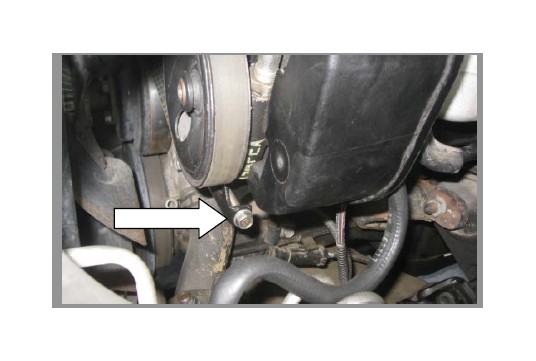
STEP 6 (Removal of the Steering Pump): Remove the long adjusting bolt from underneath the steering pump.
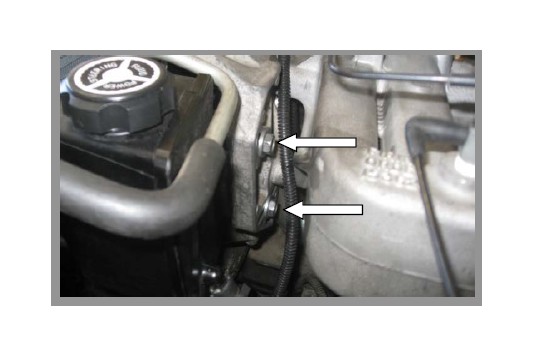
STEP 7: Remove the 2 mounting bolts on the back of the steering pump.
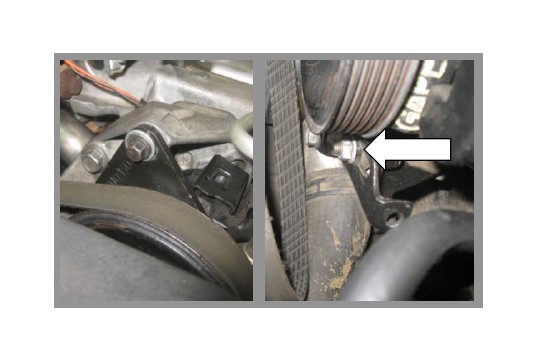
STEP 8: Remove the top bolt on the black bracket above the pump and the nut on the bottom of the steering pump.
STEP 9: After removing the belt and un-mounting the steering pump, move it off to the side to aid in Header installation.
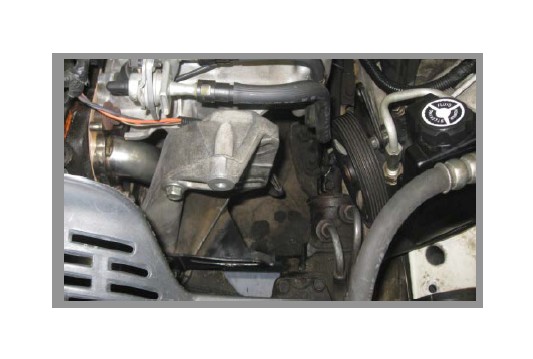
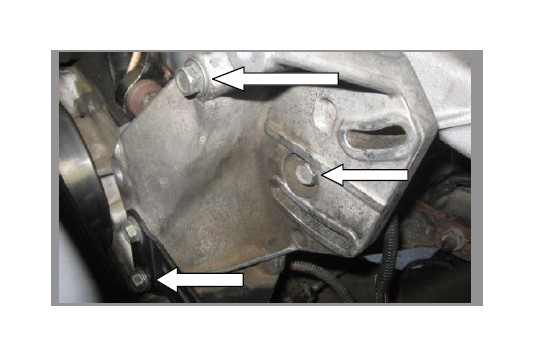
STEP 10: Remove the 3 bolts holding the steering pump bracket to the intake manifold.
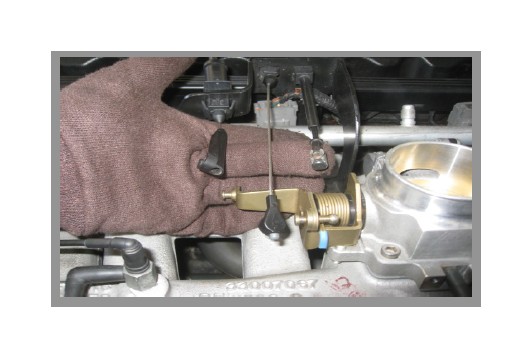
STEP 11 (Removal of the Throttle Body): Unclip the cable attachments from the throttle body linkage.
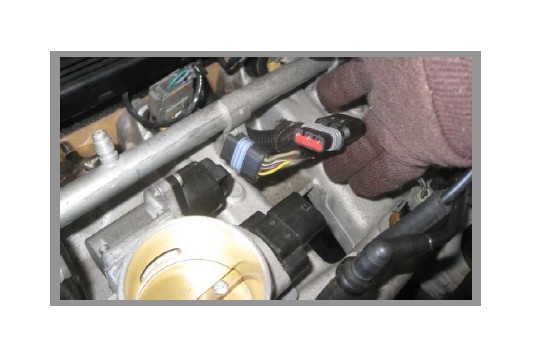
STEP 12: Unplug all the electrical connections going to the throttle body. Unbolt and remove the throttle body.
STEP 13 (Removal of the intake Manifold): Unbolt the bracket holding the throttle body cables and move to the side.
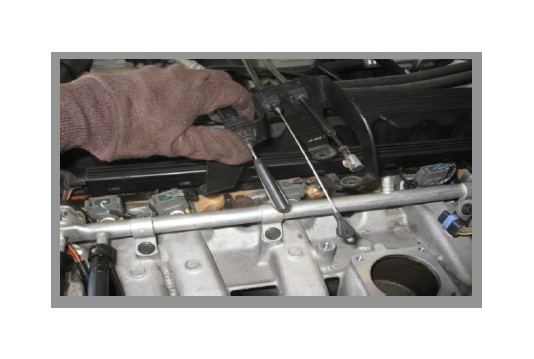
STEP 14: Disconnect all the fuel injector connections (6 total) and any other electrical connections for the intake manifold.
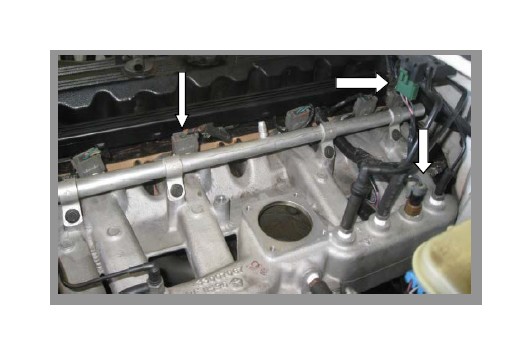
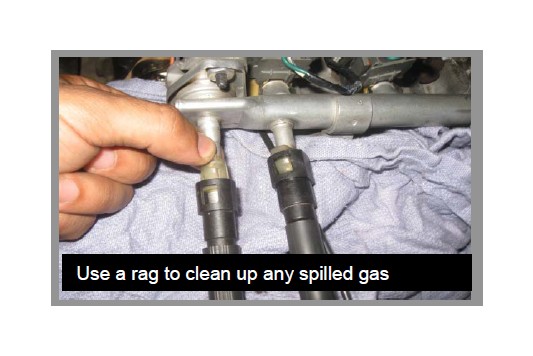
STEP 15: Be sure there is no pressure in the fuel system and disconnect the 2 fuel lines going to the fuel rails by squeezing the tabs and pulling back on the lines.
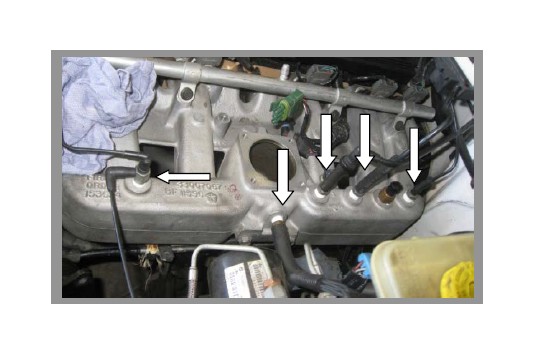
STEP 16: Remove all air lines (6 total) going to the intake manifold.
STEP 17: Remove all the bolts holding the intake manifold to the cylinder head.
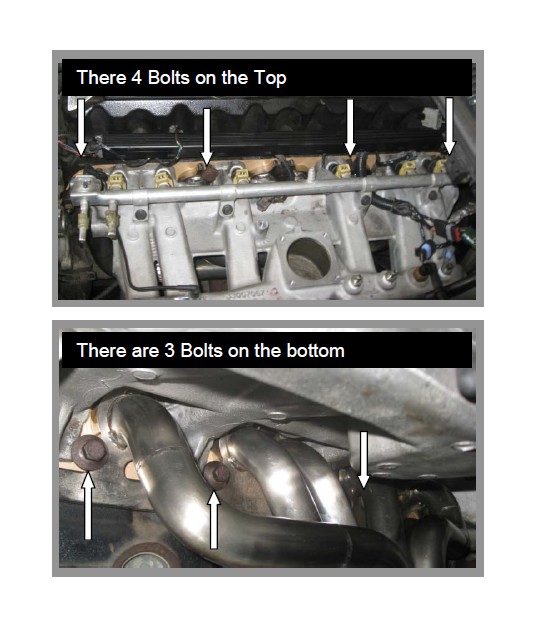
STEP 18 (Removal of the Stock Exhaust Manifold) : Remove all the hardware and remove the stock exhaust manifold from the vehicle.
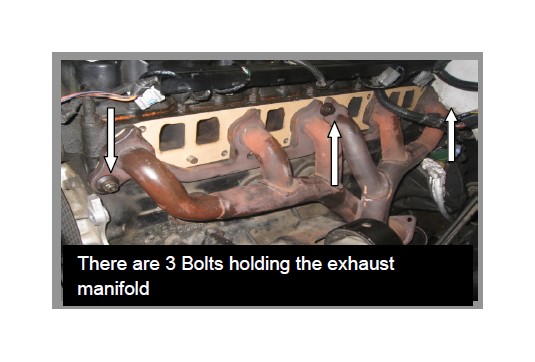
STEP 19 (Installing the BBK Header): Place the BBK Header into position and tighten the header down using the stock hardware.
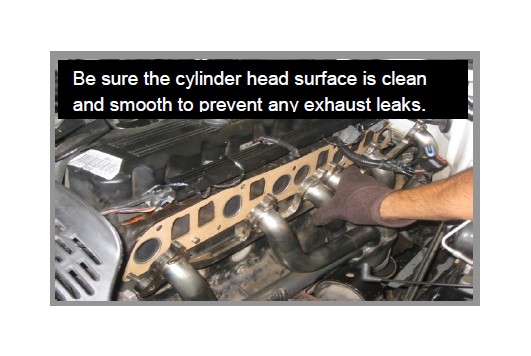
STEP 20 (Re-install the Intake Manifold): Re-install the intake manifold by repeating steps 13-17
STEP 21: Tighten the intake manifold by starting from the middle bolts and going outwards.
STEP 22: Re-install the throttle body and steering pump. When tightening the belt adjuster (long bolt on bottom of the steering pump) there should be no more than ¼ inch of total play in the belt.
STEP 23: Re-install the Air Intake Assembly and tighten the header to the head pipe using the supplied hardware.
STEP 24: Reconnect the negative battery terminal
NOTE!!!
Be sure to re-torque the intake manifold and header bolts after the initial start up and after 100 miles of driving.
Installed on the Vehicle
