2024-2025
 2016-2023
 2005-2015


Installation Time
(approx) 2 Hours
Difficulty Level:
Simple installation for anyone.
Installation Guides
 FREE 1 to 3-Day Delivery on Orders $119+ Details

Add Details

 423 Reviews
2 Answers
423 Reviews
2 Answers
$529.99 each
Will this fit your Vehicle?
Saved - View your saved items
We're sorry. We couldn't save this product at this time.
or use
Add Local Installation
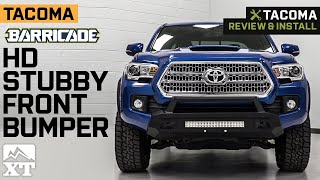
Merideth: If you're looking for some more heavy-duty and off-road appeal for the front end of your 2016 or newer Toyota Tacoma, this Barricade HD Stubby Front Bumper with the 20-inch Dual-Row LED Light Bar will be a great addition to your build. Now, this front bumper will be for the Tacoma owner who's looking for some solid front-end protection on top of their factory front bumper at a pretty affordable price compared to others like it. This will also be a great pick if you don't want to completely eliminate your factory front bumper, and like the look that the stubby front bumper achieves in addition to your factory one. Now, the integrated light bar will also be a great addition to your build if you're looking for some better visibility integrated into the bumper for dark back roads and trails at night.And this will feature a boxy and robust build, with the mesh paneling, to offer some aggressive appeal to the front end of the truck. The bumper will also feature a bull bar, for looks, as well as lower grille protection while integrating light mounts for the 20-inch LED light bar right in the center of this bumper. Now, speaking of the light bar, the light bar will have a dual-row design, with a spot and a flood beam pattern, to offer length and width for the beam, which will offer the best visibility, and a bright white 6,500K color temperature, for a very modern appearance.Now, this will be durable and able to take a hit that will save the front end when it comes to any front-end obstacles on or off road, made of a strong steel construction. On top of that, you're also getting a black powder coat finish to protect the steel and, of course, assist in that rugged look while matching any other textured black accessories that you already have on the Tacoma. Now, in addition to those mounting points, you'll also see two on the front bumper that will allow a front plate, so you don't have to worry about any modification if your state requires a license plate in the front.When it comes to pricing, this will sit at roughly $600, making this one of the more affordable choices for a front bumper. Now, comparing this to other choices, this will give you the basics of a heavy-duty front bumper in the look, the lighting, and the added protection. The price will start to rise when adding certain features, like a winch plate, recovery points, and especially when you're looking at those full-width options. Now, if you don't necessarily need all those extra bells and whistles, you're just in search of a front bumper, it's gonna offer you the solid protection, and complement your factory front bumper, while giving you some lighting in the meantime, then this one is gonna be for you.Now, install will be a straightforward 1 out of 3 wrenches on the difficulty meter. Again, this is going to be completely bolt-on to your factory front bumper, using basic hand tools, so no drilling is required, taking you about two hours to get the job done. Now, at this point, we can head over to the shop and check out a detailed breakdown of the install step-by-step. So, that's gonna wrap it up for me. Let's go ahead and get into it.Male Speaker: Tools required for this install include an impact gun, a ratchet, a 13-millimeter ratcheting wrench, a 13-millimeter wrench, an 18-millimeter wrench, an extension, a pry tool, a 10, 12, 13, 16, and 19-millimeter socket, a 4-millimeter Allen bit, and a swivel adapter.What's up, guys? Today we're installing a front bumper on our Tacoma, so let's get started.So, our first step is to remove our splash guard down below our bumper. Now, we have a bunch of 10-millimeter bolts holding that in place. We have two on the inside, in the wheel well on either side, and the rest are just right across the front. So, we'll get a 10-millimeter socket on a ratchet to get all of those out. So now, coming behind our bumper on our passenger side front wheel well, we have our two bolts here that we have to remove. They're both 10 millimeters, so we'll get a 10-millimeter socket to take these out. And then we can do the same thing on the other front wheel well. So now, coming to the front side of our bumper, we can use that same 10-millimeter socket to remove the rest of our bolts. And just like that, our splash guard will come off with it.Our next step is to remove this front portion of our bumper. Now, this piece is held in with clips, so I've got a couple pry tools here. We can pop our clips out and remove this. And now we just have to pop our last couple remaining clips on the underside, by pulling it forward. So now, we've popped the hood, and we're looking through right behind where our grille is. We have these two nuts on the outside of our crash bar, on either side, that we have to remove. We can do this with a 14-millimeter socket. And then we can do the same thing on the other side. So now, coming back underneath the bumper, right in the middle, we have these two 10-millimeter bolts that we need to remove, so that way, it'll be easier to fish our brackets into our bumper. So, we'll take a 10-millimeter socket and get these out.So, now we can begin to fish our brackets into our bumper. Now, the one for the driver's side is gonna have those two holes on the outside of the frame, where we removed our two nuts. So, we're gonna slide it in from the backside here, and then we can start to get our nuts back installed. So, now we can just move our bracket into position, and then we'll reinstall our two 14-millimeter nuts. And then we can take that 14-millimeter socket to tighten these down. So now, back underneath the car, we have a little gap here between our frame and our bracket. So, we have this little spacer. We can slide that right in there. And then we're gonna be grabbing our long bolt and our large washer. Now, there's a hole right back here that that's gonna go through, and then through our spacer and our bracket. And then once we get our bolt through, we can take the smaller of our washers, slide that on, and then take our locking nut, thread that onto our bolt. And then we can grab a 19-millimeter wrench for our bolt side and an 18-millimeter socket for our nut side, excuse me, I've got 18-millimeter wrench and a 19-millimeter socket, and tighten this down. And then we can repeat that same process on the other side.Now, once we have our brackets on both sides installed, we can reinsert those two 10-millimeter bolts that we took out from under our bumper, and then we'll tighten those down with a 10-millimeter socket. So, next up, we can run our wire harness. Now, I've got it kind of laid out where everything's gonna go. This is our connector for our light bar. So, this is gonna go down through the grille, down towards our bumper area. Then up here, we have our relay, and our connectors that we're gonna hook up to our battery, with our inline fuse. And then, on the back, this is our connector that our switch is gonna hook up to. So, we're gonna run that through this grommet down here, through the firewall, into the cab of the truck, and then we can hook up our switch to this piece. And then once we have everything run, we can zip-tie up all of our excess, and make it look nice. So, now we can take our switch connector, and we're just gonna push it through the side of the grommet here, into the cab, and then we can go inside the cab and pull that through.So now, coming inside the truck, we can fish out our harness here. And now we're gonna take the harness from our switch and connect that up. Now, our switch has a double-sided tape backing. You can put this wherever you'd like. We're gonna throw it right here, just so it's nice and accessible. So, we'll peel off that backing, and then just stick it down. And then we can grab a zip tie to zip up the excess of our wire. So next, we can mount our relay. So, you're gonna wanna find a bolt that's nice and long. We've got this one here on our radiator fan shroud. You can see we have some extra threads there. So, we're gonna remove this bolt, install our relay, and then put our bolt back in. So, we'll grab a 10-millimeter socket to take this off. And now we can grab our relay, and thread our bolt through. Start to thread that back into place. And we'll finish snugging that up with a 10-millimeter.So next, we can connect our power and our ground wires. Now, our power's gonna go straight to our battery terminal, so we can get a 12-millimeter socket to take this nut off, and we can pop our power wire on. Gonna thread our nut back on top, and I'll tighten that down with the 12-millimeter as well. So, for our ground side, we don't have a nice, flat mating surface on our terminal, so we're gonna follow that over to where it hooks up to our body. Now, it's gonna be a 10-millimeter bolt that we can remove, with a 10-millimeter socket. And we can just put that bolt through our ground, then we'll tighten that down with our 10-mill.So, now that we have everything set up on the truck, we can begin to assemble our bumper. So, the first thing we're gonna do is mount the brackets for our light bar. These are gonna go right down in the little light bar cutout. We have a bolt with a flat washer that's gonna be coming from the bottom up. And then on the top, we're gonna be putting another flat washer, a locking washer, and a nut. So now, the longer side of our bracket is gonna be facing down. That way, we can put our bolt for our light bar through it. So, we're gonna take our bolt with that washer and slide it through the bottom, and then take another washer, a locking washer, and the nut on the backside. Then we can get our bracket lined up, and we'll tighten that down using a 13-millimeter socket and a 13-millimeter wrench. And then we can do the same thing on the other side. And then, once again, we'll get our bracket lined up and straight, and then tighten that down with our 13-millimeter wrench and 13-millimeter socket.So, now that we have our brackets installed, we can mount our light bar. So, we're gonna put that face down, and slide it in between our brackets. And now we're gonna be getting the smaller of our bolts, with a lock washer and a flat washer, and we'll thread those through our brackets and into our light bar. Next, we can grab a 13-millimeter ratcheting wrench to tighten those down. So, next up, we can install our mesh vents here. We're gonna be using our Allen head bolts with our captured washer and lock washer, and then we can just thread our bolts into the holes. And then we'll just center it up, and tighten it down with a 4-millimeter Allen bit. And then we'll do that same thing on the other side.So, now's a good time to grab yourself a buddy. We can raise up our bumper to our factory bumper, and then we're just gonna put a bolt through on each side, just to hold it for now. So, now we'll just thread our remaining bolt through our bracket and into the bumper. And now we can take a 16-millimeter socket on a swivel adapter to tighten these down. And we'll do that same thing on the other side. And now, once we have our bolts tightened down, we can install our mesh grille, using our Allen head bolts with our captured washer and lock washer. And then we'll take a 4-millimeter Allen bit to tighten these down. And then we can do that same thing on the other side.So now, once our bumper's installed, we can come back up to our engine bay and grab our wire for our harness, and then we can reach down behind the grille to grab our connector, and then plug these in. And then we can bunch up all of our excess, and zip-tie it up. And we can just tuck that excess right behind our headlight bucket.So, our last step is an optional step. We have these clips to install into these holes for our license plate. Now, if you're not running a front license plate, there's not really any reason to install these, but if you are, they just push right in.So, that'll wrap up this review and install of the Barricade HD Stubby Front Bumper with 20-inch Double-Row LED Light Bar for your 2016 and newer Tacoma. Thank you for watching, and for all things Tacoma, keep it right here at extremeterrain.com.
View Full TranscriptNow Playing

2016-2023 Tacoma Barricade HD Stubby Front Bumper with Double Row LED Light Bar Review & Install
17:07
Subscribe: New Tacoma videos daily!
Subscribe to our YouTube Channel
Features, Description, Reviews, Q&A, Specs & Installation
| Brand | Barricade |
| Bumper Type | Stubby |
| Bumper Material | Steel |
| Bumper Finish | Black |
| Bumper Winch Mount | No Winch Mount |
| Bumper Fog Light Fitment | Aftermarket |
| Bumper Location | Front |
Barricade TT13412
CA Residents:  WARNING: Cancer and Reproductive Harm - www.P65Warnings.ca.gov
Installation Info
Installation Time
(approx) 2 Hours
Difficulty Level:
Simple installation for anyone.
Installation Guides
What's in the Box