
Top Sellers for Gladiator
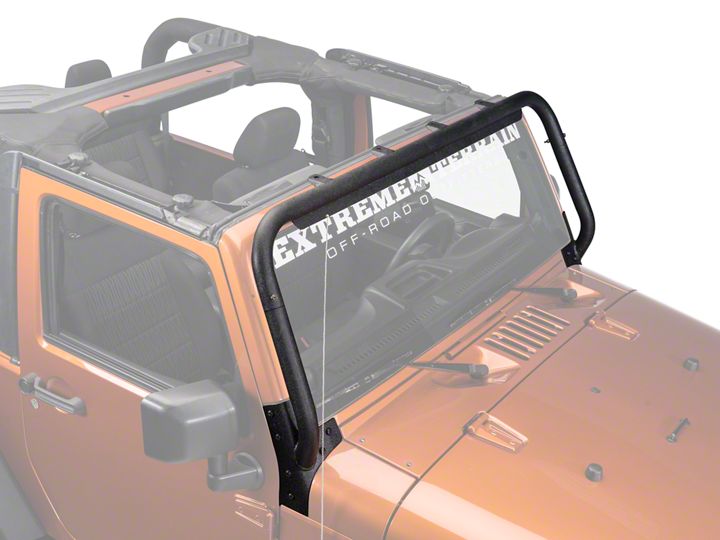
How to Install Barricade Light Bar (07-18 Jeep Wrangler JK) on your Jeep Wrangler
Installation Time
30 hours
Tools Required
- Socket Wrench with Torx T40 Socket
- Open Ended Wrench: 17mm
- 6mm Allen (Included in the hardware bag)
- Small Flathead/Standard Screwdriver (Optional)

Shop Parts in this Guide
Installation Notes: This installation guide will only go over how to install the Barricade Light Bar. It's recommended to install the off-road lights and run any wires needed before attaching the Center Light Bar Tube. Also, make sure that any of the hardware used to mount the off-road lights are checked for clearance between them and the paint or windshield. Make any modifications to allow for proper clearance of the lights.

Before Install
Installation Instructions:
1. Remove the six (6) T40 Torx bolts holding the factory windshield bracket from the passenger and driver side. Keep these blots as they will be reused.

2. Remove the factory windshield bracket from the driver and passenger side.

3. Clean any mud, dirty or bugs that maybe underneath each bracket.

4. Place the driver and passenger windshield pillar brackets where the factory brackets were. Then loosely place the six (6) Torx bolds to hold each bracket in place. Do not tighten these bolts yet.

5. Place the small supplied grommets into the pre-drilled holes on the Center Light Bar Tube. You may need a small flathead/standard screwdriver to assist with pushing the back end of the grommet into the hole.

6. Place a small supplied grommet into the pre-drilled holes of each windshield pillar brackets. Again, you may need a small flathead/standard screwdriver to assist with pushing the back end of the grommet into these holes.

7. Place a towel on the passenger side of the windshield before sliding the Center Light Bar Tube into the windshield pillar brackets. Starting on the driver side and slide the Center Light Bar Tube into the driver side windshield pillar bracket. Once the Center Light Bar Tube is in the bracket move to the passenger side and slide it in. Be careful not to pinch your hand between them.

8. Slide a washer onto one of the supplied Allen bolts. Then side the bolt through the windshield pillar bracket tube so that it exits through the other side.

9. Place another washer on other end of the bolt along with the 17mm nut. Using a 17mm open ended wrench on the nut and the supplied 6mm Allen on the bolt. Tighten the nut and bolt to the pillar. Once this is done then tighten all the T40 Torx blots on each windshield bracket.


After Install
Installation Instructions Written by ExtremeTerrain Customer Brian Voelzke 01/06/2019


