2021-2025


Installation Time
(approx) 2 Hours
Difficulty Level:
Simple installation for anyone.
Installation Guides
 FREE 1 to 3-Day Delivery on Orders $119+ Details

Add Details


Change Vehicle Color In Photo
Select Your Color
 419 Reviews
$734.99 each
Will this fit your Vehicle?
Saved - View your saved items
We're sorry. We couldn't save this product at this time.
or use
Add Local Installation
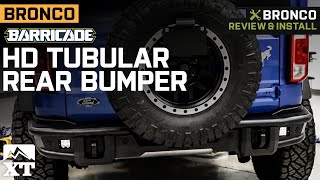
Merideth: If you need to up the function for the rear end of your 2021 or newer Ford Bronco, excluding the Raptor models, this Barricade HD Tubular Rear Bumper with the LED Fog Lights will be a great way to do it.Now, this rear bumper will blow the factory one out of the water when it comes to utility, making this great for the off-roader who needs those added recovery points and better protection, but also for the daily driver who wants that heavy-duty look and feel to the back of their Bronco. Now, this is also great if you're in search of a bumper that will come with rear end lighting to support your tail lights when backing up at night or just to use as a work light when you're camping or in any off-road scenario.Now this will feature that hybrid tube and plate styling, which I think sets it apart from a lot of other standard rear bumpers with more of a unique style. Now the bumper, again, will also feature many functional benefits, including a full-width coverage design with angled up ends for better clearance. It's also gonna have a cutout in the middle for a hitch as well as a larger wheel and tire for the back, and it's also gonna have high-strength D-ring mounts for recovery.Now this will also, of course, come with the lighting on either side and have cutouts for the included 3-inch five-watt Cree LED cube lights that put off an impressive light output with the spot beam that'll reach far behind the Bronco and come with a 6000K color temp for that bright white appearance.Now the bumper will also carry over and accommodate for some factory features here, including your license plate relocation, and it also comes with a mount for the light as well. And you also get the cutouts for the rear sensor, so you can rest assured that you won't have to do any DIYs or sacrifice those creature comforts.This will be tough, made of a heavy-duty tubular steel plate and tube construction like I mentioned before, able to take a hit on or off-road, and will be protected by a two-stage epoxy pre-coating and textured black powder coating finish. Now the lighting itself will also be strong with an aluminum housing and impact-resistant polycarbonate lens, and it's also going to have an IP67 dust and waterproof rating, so you won't have to worry about trail dust or rain or water just kicking up and harming the LED lighting inside or having that lens fog up. Now the package here will also come with a full wiring harness, filler plates for either side that's going to complete the look, and all the hardware needed for a straightforward install.Now this will come in at about $800, and I think for what you're getting compared to some other options, that's going to be very reasonable, and you're getting what you pay for here. Now the bumper design speaks for itself in the quality of the build and the overall layout being incredibly functional and stylish at the same time. It also just really stands apart from the rest of the other plate-style rear bumpers, which will set your Bronco apart from the rest, and adding the fog lights into the mix will just take it to a whole new level. Now I think if you're looking for a bumper that's going to give you all those extra bells and whistles that you're looking for and you don't want to completely break the bank, then this is going to be a great pick.Install will be a one out of three wrenches on the difficulty meter, and should only take you about two hours to get the job done with some basic hand tools. At this point, we can head over to the shop and check out a detailed breakdown of the install and what it looks like step by step. So, that's going to wrap it up for me. Let's go ahead and get into it.Man: For this install, you will need an impact, ratchet, 10, 13, 15, 16-millimeter sockets, 16-millimeter swivel socket, and an 18-millimeter socket, your provided Allen wrench, a 4-millimeter ball end Allen wrench, trim tool, angle cutters, and some tape. What's up, guys? Today we're going to be installing a new rear bumper on our Bronco, so let's get started.So, our first order of business is going to be to remove our spare wheel from the back here just to give us more room to work with for our bumper, and we're going to use our specific lug key for our aftermarket wheels, use whichever one you need for your wheels, and our impact. We'll go ahead and set our spare wheel aside.So, now that we've got our wheel off and our Bronco up in the air, our first step is going to be to remove two 13-millimeter bolts located on the outside of the back of your frame rails, one on each side. And to do that, we're going to use our 13-millimeter socket on our impact to get those off. We'll go ahead and remove this 13-millimeter bolt. And we can go ahead and do the same thing on the other side.Next, we can go ahead and remove our two lower 18-millimeter mounting bolts located on the bottom side of our frame horn here. And we can do that with our 18-millimeter socket on our impact. Then we'll go ahead and do the same thing on the other side. For this side, we'll go ahead and remove the same two 18-millimeter bolts along with our tail hook. We'll just go ahead and put a hand on our bumper just to hold it in place. Go ahead and remove our two bolts. And then we can go ahead and pull our tow hook off along with the little tab here.Next, we can go ahead and unplug our parking sensor harness from each side. Go ahead and unplug it here, and then do the same thing for your other side. Now that we have everything unhooked, we can go ahead and just pull our bumper straight out.So, now that we have our factory bumper off the car, there are a few things we're going to need to do before we're ready to put our new one on. And the first of which is going to be to remove these four 15-millimeter bolts for these brackets on each side of our bumper. So, to do that, we're going to use our 15-millimeter socket on our impact and go ahead and get those off. We'll remove our bracket, and then we can go ahead and do the same thing for the other side.So, next, we can go ahead and grab our clip removal tool and remove all of our retaining clips for our parking sensor and proximity sensor harness along our bumper. We'll just go ahead and pop that in and just get right along your whole harness.Now that we have all of our clips out, we can go ahead, back through, and unplug all of our sensors. You just push down on your connector and give those a little tug and it should come right out, as well as your tag light connector here. Go ahead, set your harness out just like that, and you want to keep it laid out just as it is because we will be reusing it on our new bumper.So, next, we have to remove our parking and proximity sensors from our bumper itself. And to do that, you'll notice it has kind of a clear plastic shroud around the outside and then an inner black plastic piece holding the actual sensor in place. And these two tabs here, you notice those are already kind of spread up. You can go ahead and grab a pick or a flathead screwdriver. But do exercise caution around your sensor because you don't want to damage them. So, you just kind of want to wedge your flathead in between the black plastic part and kind of push that out to release the ears on your sensor. Once you do that for the top and the bottom, they come right out. You do want to kind of keep these in line so you put them back in the same spot they were on the new bumper. And just want to be very gentle in this process.Alrighty. So, now that we have everything out of our factory bumper, we're ready to go ahead and start assembling everything back into our new bumper. And we're going to start with our parking sensors. And for that, ours are already prepped, so you're going to see stuff already on here. But the first thing you're going to want to do is remove the rubber grommet on the front of the sensor and replace it with these foam stick-on inserts. So, you just pull the rubber one off, stick the foam ones on that come with your kit.And then on the backside here, you're going to add the stick-on foam pads to kind of create a buffer zone/seal for your retainers for the backside to hold your parking sensors in place. So, we already have those on. They come with your kit. Very easy to stick on. And then we'll go ahead and start installing our sensors. So, we'll flip our bumper over here.So, to install your sensors into your new bumper, they have these retaining clips on them. So, we're just going to slide them right in here. And the ears on your sensor will clip into the retainers. And you just want to make sure they come out flush with the front of your bumper. Then we'll go ahead and do the same thing for all of our sensors. And you do want to orient the plugs facing in towards each other, especially in the center because they are spaced out farther than on the factory bumper. We'll go ahead and insert those.And another good tip is you want to leave them exactly in the same orientation that they came off of your factory bumper so everything is still in sync the way you want it. All right. So, now we can grab our retaining clips for the backside here and put them on. Now we can go ahead and get our backside clips into place. And notice they are half-round with a recess for your connectors. And they simply just slide on and clip into the ears, again, on the retaining clips. We'll go ahead and do that same thing for all of our sensors, and that'll lock them into place.So, next, we're going to install our mounting bracket onto our fog lights. And to do that, we're going to grab our provided hardware kit, our lights, and our brackets here and go ahead and start assembling these. Now these lights do have recesses down in here where our nuts... So, this is a bit tricky, but you want to just take your nuts, slide them down into that and they will drop down into the retainer inserts that are on your lights. We'll go ahead and do the same thing for the other side here.Notice it doesn't have enough room to actually come all the way out there, so you can tip it over and then slide your other one into place as well. They may drop like that but you can kind of fiddle with them and get them back. Now it's not a horrible idea to have a flathead screwdriver on hand just to kind of get down in there and maneuver them back if you need to. A magnetic one is even better. Just take your time with this and get them in place and not get frustrated with it. You can hold your other one. You may have to track it down if it comes flying out like that.Now we have them both in and we're going to orient our plug facing down and go ahead and install our bracket. That simply slides in the middle here. And again, you may have to fidget, get one side in. You want to line your brackets up with your mounting holes here and then take your provided Allen head bolts. Go ahead and install those. Grab your provided Allen wrench. You may have to jiggle it a little bit back to get the nut to start landing on the bolt. and then go ahead and begin tightening that into place. Now we're not going to tighten them on the way, just get them snug so they don't move for now so we can adjust once we mount them to the bumper. And we'll do the same for this side here.Again, once that nut begins to seat on your bolt, we can go ahead and thread that in. Again, we're just gonna go a little snug. We're not gonna tighten them down all the way just yet. So, now our bracket's in place and it still can move so we can adjust everything. Now we're ready to mount it onto our bumper. And we're going to go back into our provided hardware kit and grab our bolt, lock washer, and flat washer. Go ahead and get that slid into place. We'll leave a little bit of room here and grab our nut. And again, this is tight quarters and a little bit tricky. Go ahead and get that threaded on.So, we're going to tighten this mounting bolt down using our 13-millimeter ratcheting wrench and then a 13-millimeter wrench for our nut. You need to go ahead and get that hand-tight first. And as we're tightening, we can go ahead and start to line up our fog lights. And then we can come back and do a final tighten down on our side Allen head bolts here using our provided Allen wrench. And then we can go ahead and do the same thing for the other side.So, now that we have our fog lights installed, we can go ahead and route our parking sensor harness into our bumper. We have these cutouts here under the deck, and we're going to fish our harness through that, and our connector for our outer sensor through. We can go ahead and plug our first sensor in. We'll go ahead and plug our middle sensors in. Do the same thing over here and route our harness through the other cutout, just like on our driver's side, and then go ahead and plug our last sensor in. And we're going to leave these hanging down so we can access them once we install our bumper.So, next, we can go ahead and install our outer accent pieces to our bumper. And for that, we're going to grab our pieces, and we're going to grab our 4-millimeter Allen head combo bolts and go ahead and thread those into our accent piece. We'll get our second one threaded in here, and then our third and final one. Once you've got these hand-tight, you can go ahead and adjust them to where you want them to sit. I have ours flush to the end here. We're going to tighten these down using our 4-millimeter ball end Allen wrench. Now, your kit does come with a 4-millimeter Allen wrench as well. It's just a little bit easier to access some of these with a ball end if you have it. Once we have that tightened down we can go ahead and do the same thing for the other side.So, our next step is going to be to mount our nut plates inside the end of our frame horns here. So, we'll go ahead and get those in place. And sometimes it's difficult to keep these nut plates lined up, so a good little trick to do is just to grab a piece of tape and just go ahead and tape it in place just to keep everything lined up so you don't have to fiddle with it while you're trying to put the bumper on. And then we'll go ahead and do the same thing for the other side.So, one last thing we need to add before we can actually install our bumper is our tag light extension harness for our new license plate mounting location, and that is provided in your kit. So, we'll go ahead and grab our connector and plug that into our factory tag light connector. So, now we're ready to go ahead and mount our bumper. And this is where if you don't have a mounting table or jack stands or something like that to help hold your bumper in place while you're working, it is a good idea to go ahead and grab an extra set of hands to help you out with this because you don't want to injure yourself, drop the bumper, or mess up your car.So, with that said, we're going to go ahead and grab our first side mounting 16-millimeter bolt with lock washer and flat washer and we're going to go ahead and get one of these in place on each side. And once we get that threaded in, go ahead and do the same thing for the other side. So, once we have our first side mounting bolts in, we'll come underneath with our 18-millimeter bottom mounting bolts, lock washers, and flat washers, and we'll start threading those in first from hand-tight. Go ahead and get our other one in for this side. Then we'll go ahead and do the same thing for the other side.Now we can go ahead and install our upper 16-millimeter side mounting bolt, again, with lock washer and flat washer. And we can go ahead and do the same thing for the other side. So, now you can go ahead and make any final fitment adjustments or tweaks you want to make, and we'll go ahead and tighten down our bottom two 18-millimeter bracket bolts using our 18-millimeter socket on our impact. Then we'll go ahead and do the same thing for the other side. Once we have those tight, we can come back and tighten down our side mounting bolts using our 16-millimeter socket on our impact. And you may need to switch out to a swivel adapter for this one. Then we'll go ahead and do the same thing for the other side. Next, we can go ahead and reconnect our parking sensor harness to our connectors on the vehicle. Go ahead and do that for both sides.So, now we come to the front of our vehicle so we can begin installing our fog light harness. And to start, we're going to go ahead and come right to our battery and install our positive and negative ring terminals for our power supply. And to do that, we're going to go ahead and grab our 10-millimeter socket on our ratchet and remove one of these nuts here so we can put our positive one in. Go ahead and remove that nut, add in our positive ring terminal here, and go ahead and reinstall that nut. And then we'll tighten that back down with our 10-millimeter socket on our ratchet.And then we can come over to our negative terminal. And again, use our 10-millimeter socket to go ahead and remove this nut. Then we'll go ahead and install our negative ring terminal and reinstall our nut. And again, we'll tighten that down with our 10-millimeter socket on our ratchet. So, this is a fused harness as well as a relay and it comes with a mounting tab here. And you do have many options on the way you can mount it. You could find somewhere to put it, maybe on the side of your fuse box or something like that. You could either add a threaded clip to go ahead and screw that in or whatever you may want to do. For demonstration purposes, we're not actually going to mount it.So, our next step here is going to be to route our switch through our firewall so that we can mount it onto our dash. And for that, Bronco actually has a conveniently placed grommet right here on the firewall that actually has nothing else going through it. So, we can easily take our switch, and we've already cut a cross hole through it. So, we can just go ahead and push our switch directly through the grommet. And you can do that, you can either mount it through the side and unplug your switch from the connector and route it through that way, but just as easily do it this way. We'll go ahead and thread our wiring through for our switch. We'll clean up any excess near our brake booster here. Then we'll show you where we're going to mount that under the dash in just one second.But our next step before we move on is to grab the rest of our harness here. And it's going to route under through your fender liner here, and then we're going to send it to the back of the vehicle to plug into our fog lights. So, to start, we're going to find some daylight through the back of our brake booster here, down behind our fender liner, and we're just gonna start pushing our connector side of our harness down through there just to get it to a point where we can grab it from underneath the vehicle. You want to get as much of it down in there as possible so you don't have to keep coming back up and pulling your harness off of any snags or anything like that. You'll have all your wiring down there where you need it. So, I'll just keep feeding that through. It may start to bunch up and get a little bit tough. Once you reach the end of your harness, that's okay. And like I said, we'll just get as much down in there as possible.All right. Now, next, we'll show you where we're going to mount our switch to our dash and then how we're going to route the rest of our harness here under the vehicle. So, now we've got our switch through our grommet and our firewall and it's come up under the dash. And it comes with an adhesive backing, just to make it easy to mount anywhere. And you can choose wherever you would like to put this on your dash. Now, for ease and convenience of demonstration, we're simply going to mount ours directly next to our regular light switches just so it's right there and we can go ahead and access that. And then if you choose you can tuck your wiring up off to the side and clean up this look however you want it, you know, the choice is yours, but we're just going to make it easy like that.So, now we can move on to the rest of our harness and get that back to our fog lights. So, now we've come to the back of our fender liner where we put pretty much all of our harness before and we're gonna go ahead and grab our connector side and start pulling this down and getting our hardest ready to go to the back of the car. So, once we have our harness down, we're gonna go ahead, pretty much come behind our crash bar here. I'm just going to tuck it up where our factory harness is running along our frame rail.So, as we're following our factory harness down, you'll notice it crosses over the frame rail here towards the back of the vehicle. And we're going to go ahead and do the same thing with this harness and just route that up and in. So, we're pretty much following this harness all the way to the back of the vehicle and it's going to go over our rear crossmember here on our frame as well. And I can't do anything else.So, now that we have our harness routed to the rear of our vehicle, we can go ahead and plug in our fog lights to our harness here and then we'll tuck these up out of the way, and then we'll go ahead and do the same thing for the other side.So, it's now time to install our tag light tag bracket relocation kit. And to do that, we're actually going to come back to our factory bumper and remove our factory tag light. And to do that, all you need is a flathead screwdriver. You just get in here to these two little ears. So, what we're gonna do is pop these two little ears like this and go ahead and just push your tag light out the side, and there you go. And that will slide right into here on your new bracket by just reversing the process and snapping that right into place.So, now we can go ahead and get ready to route our license plate relocation harness. And to do that, we're going to come to our back door here and remove this trim panel using our trim tool. I'll just slide right underneath it and go ahead and pop our tabs off here. You want to be firm, but you definitely want to try not to break any of your tabs, and set that aside.We can go ahead, get our harness. Now you do want to make sure it's on the outside part of your air ram here and then it's going to go through this hole and backside here. And you'll want to drop it down to your flaps inside of your spare tire carrier, and then go ahead and fish it through to the other side, giving yourself enough room for the bracket. And then we can go ahead. And if you want to zip-tie your harness up out of the way on your factory harness here you can, or you can clean it up however you'd like. And we can go ahead and reinstall our trim panel here. And then you want to leave yourself enough room so you know it's not going to bind. And then again, you can clean this up however you like, zip-tie it up, whatever, to keep it out of the way. And it does go on the outside of your seal, so don't worry about trying to fish that under or anything like that.So, now we're just going to go ahead and have our connector here accessible. And we'll leave that sitting there like that. Now we can go ahead and remount our spare wheel. We'll go ahead and get our spare wheel in place. Now we are going to reuse our regular lug nut for the bottom here. We'll get that on for now. And then for your top two lug nuts, you're going to use your supplied M12 full-thread lug nuts and get those in place. And then we'll tighten our bottom one down using our regular lug socket. And then our top two are going to be an 18-millimeter socket on our impact.Now we can go ahead and grab our harness, fish that through our wheel. And we can grab our license plate bracket and go ahead and plug that in for our tag light. And then we can go ahead and mount this to our full-thread lug nuts using our two short 18-millimeter bolts, lock washers, and flat washers. And we'll get our other bolt threaded in place here, again, with the lock washer and flat washer Then we can go ahead and tighten these down using our 18-millimeter socket on our impact. And you have your threaded inserts here for your license plate install.Alrighty, guys. That about wraps up our review and install of our Barricade HD Tubular Rear Bumper with LED Fog Lights for your '21 to current Bronco, excluding the Raptor. Thanks for watching. And as always, for everything Bronco, keep it right here at extremeterrain.com.
View Full TranscriptNow Playing

2021-2023 Bronco Barricade HD Tubular Rear Bumper with LED Fog Lights Review & Install
40:07
Subscribe: New Bronco videos daily!
Subscribe to our YouTube Channel
Features, Description, Reviews, Q&A, Specs & Installation
| Brand | Barricade |
| Bumper Type | Tube |
| Bumper Location | Rear |
| Bumper Material | Steel |
| Bumper Finish | Black |
| Bumper Winch Mount | No Winch Mount |
| Bumper Fog Light Fitment | Aftermarket |
Rugged Styling and Protection. This Barricade HD Tubular Rear Bumper will give your Bronco a rugged off-road appearance with its classic tubular styling. Designed to replace the stock factory bumper, this heavy-duty Tubular Bumper features two high strength D-Ring mounts.
LED Fog Lights. This Barricade Rear Bumper includes (2) 3-inch square LED Fog Lights. The fog lights are equipped with 5 Watt CREE LEDs to provide an intense 6000K light temperature. Each light is rated IP67 providing reliable waterproof performance, thanks to a tough aluminum housing sealed with a polycarbonate lens.
Heavy-Duty Construction. Fabricated from heavy-duty tubular steel and steel plate, this Barricade HD Bumper can take on anything the trail throws at it. This HD Tubular Bumper is then completed in a 2-stage epoxy pre-coating and high-grade, textured black powder coat finish for durability and long-lasting corrosion resistance.
Bolt-on Installation. Barricade's HD Tubular Rear Bumper was engineered to be a direct bolt-on upgrade to your factory bumper using basic hand tools, there is no drilling required for a clean, straight forward install. Installation can normally be completed in about 2 hours with just basic hand tools and the help of a friend.
Application. This Barricade HD Tubular Rear Bumper with LED Fog Lights is designed to fit 2021-2025 Ford Bronco models This Rear Bumper is designed to work with models that are equipped with or without rear mounted backup sensors..
Barricade FB14612
CA Residents:  WARNING: Cancer and Reproductive Harm - www.P65Warnings.ca.gov
Installation Info
Installation Time
(approx) 2 Hours
Difficulty Level:
Simple installation for anyone.
Installation Guides
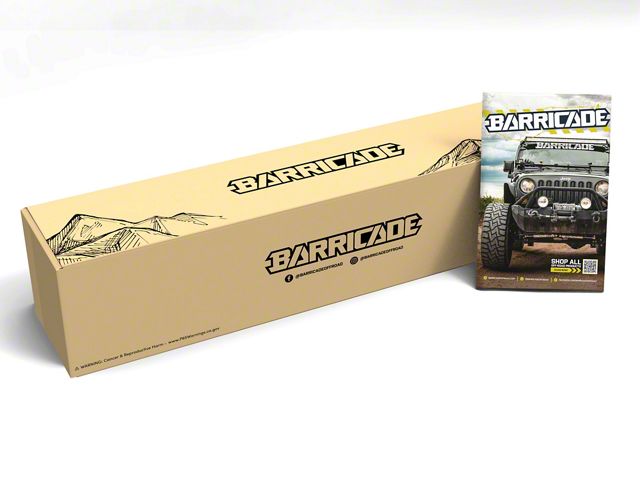
What's in the Box
Sponsored