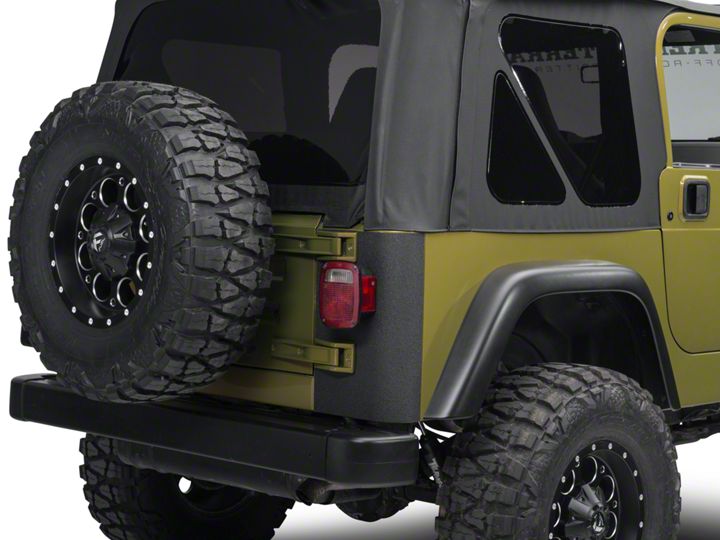

How to Install Barricade Rear Corner Body Shield Decal - Black on your Wrangler
Installation Time
15 minutes
Tools Required
- X-acto knife
- Spray bottle with dish soap & water mixture
- Surface cleaner– such as Mequiars Deep Crystal System paint cleaner

Shop Parts in this Guide
Step 1:
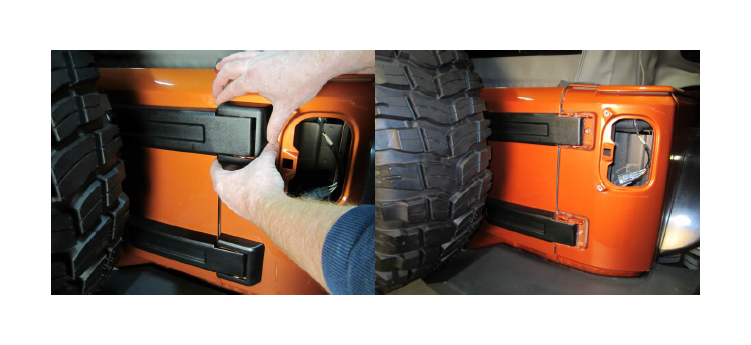
Remove rear tail light. On the TJ you will remove the lens to gain access to the mount-ing bolts. On the JK remove the 2 inner screw to remove the whole taillight. Disconnect wiring harness connector on both models. Remove the license plate mounting bracket. On the JK remove the Hinge cover trim. Do this by gripping the trim on top and bottom near the hinge pin. Gently pull it out and away from the hinge.

Step 2:
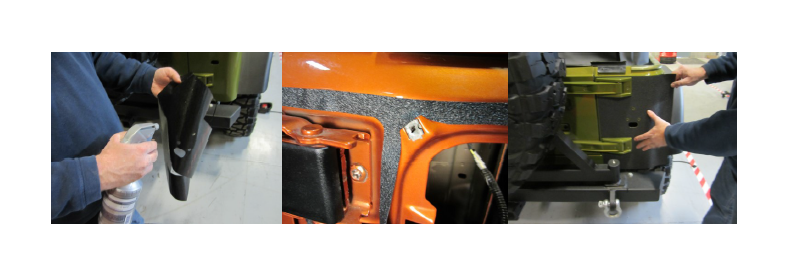
Once all hardware has been removed. Mist the material with the shampoo solution. Place material on vehicle. On the JK align the material starting with the upper tail-light mounting clip. The material should just touch this bracket. On the TJ use the taillight mounting holes and wiring har-ness opening.

Step 3:
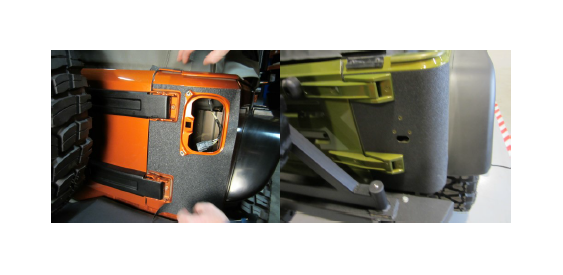
Maneuver the rest of the material to fit . On the JK you should start at the center and word down then in towards the hinges. If any thing misaligns peel back and read-just. On the TJ start at the center where the light mount is and work to the left then right. Then up and down. Again if it is not aligned peel back and readjust.
Step 4: After installing you may use a hair dryer to dry the material . Re install the lights and license plate bracket. Be sure to allow to dry before use
Dry installation:
You can install the material if you use very light pressure when applying till you get it in the proper location. You can peel back the material and reposition it. Once in place you can apply full pressure to the material. For this products this technique may be the diffi-cult approach.
After installation you would do best by leaving ample dry time before driving or washing the vehicle, if you installed the recom-mended wet method. This is a permanent adhesive on this product. Great care should be taken if it is needed to be removed later.


