2018-2025
 2007-2018
 1997-2006
 1987-1995
 1976-1986


Installation Time
(approx) 3 Hours
Difficulty Level:
Mechanical expertise or professional installation required.
Installation Guides
No guide available for this part yet.
 FREE 1 to 3-Day Delivery on Orders $119+ Details

Add Details


Change Vehicle Color In Photo
Select Your Color
Verify parts fit & get product recommendations
M-F 8:30A-11P, Sat-Sun 8:30A-9P
 26 Reviews
1 Answers
26 Reviews
1 Answers
$2,299.99 pair
Will this fit your Vehicle?
Saved - View your saved items
We're sorry. We couldn't save this product at this time.
or use
Jeep Licensed by TruShield Waterproof Pet Guard Seat Cover with Jeep Logo (Universal; Some Adaptation May Be Required)
 171
171

MP Concepts Sequential Turn Signals; Smoked (18-25 Jeep Wrangler JL w/ Factory LED Turn Signals, Excluding Sport)
 31
31

Rugged Ridge All-Terrain Door Entry Guards (18-25 Jeep Wrangler JL 4-Door)
500+
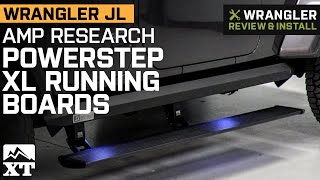
Meredith: If you're looking for the ultimate convenience when it comes to getting in and out of your 2018 or newer 4-door JL Wrangler, these Amp Research PowerStep XL Running Boards will be a great addition to your build. Now, this will be perfect for the JL owner looking for an all-in-one step that'll change the game when it comes to protection and accessibility. This set will be great if you want a premium option for running boards, and need better accessibility to your Wrangler, especially if you've added a lift or bigger tires, but also need the added durability and clearance for more-technical off-road trails.These will feature a dual design, meaning that when they're tucked up, these will take on the appearance and even similar functions of a rock slider, and almost mimic the factory Rubi rail, with the compact and high-clearance build. However, when the door does open, the step will flip down, featuring a wheel-to-wheel 6-inch wide running board, which is going to be incredibly large, and it's also going to offer you a much lower stepping surface compared to the factory-style step. Now, that's going to help you easily get in and out of the Jeep, and the surface of the running board is also going to feature a treaded design for better traction, and the brackets will also feature LED lights, to easily see the step at night.These will have a durable build, made of 6063 marine-grade aluminum, which will balance strength and weight of the sidestep and the kit as a whole incredibly well. This kit will also come with an integrated bracket system, with precision stainless steel pivot pins, which offers incredible stability and be able to support up to 600 pounds. Now, on top of the steps, this will also feature an anodized PTFE-coated military-spec black finish that will protect the aluminum underneath from any corrosion, but of course, assist in that off-road appearance.As you can probably assume, these will be set at a premium price point, coming in at roughly $2,200. Now, other options for PowerSteps may have different designs, including a heavy-duty steel material or a swing-down step instead of this flip-down running board option. Now, where this does have the one-up on some of the other choices is that LED lights are included in the kit, which will help you with accessibility and styling just that much more. I also like the fact that this balances a lightweight design while also boasting a tough build. So, not only are you getting a lot of weight savings for your Wrangler, but you will be protected when you're taking your Jeep off-road. Now, I think if you're looking for those benefits and you do have the extra cash to spend to get a lot of convenience and a good look, as well as some solid protection for your Jeep, then these are gonna be a great choice.When it comes to the install, because this is in-depth, and it is going to require wiring, there is a wiring harness, but it is going to require additional wiring, I am going to give this a 3 out of 3 wrenches on the difficulty meter. Now, if you have some experience, it should only take you about three hours to get the job done, though. Now, at this point, we can head over to the shop and show you a detailed breakdown of this install, what it looks like step-by-step. So, that's gonna wrap it up for me. Let's go ahead and get into it.Man: Tools used for this install, a 13-millimeter wrench, 13-millimeter ratcheting wrench, a 10-millimeter ratcheting wrench, some butt connectors supplied in the kit, a 3/8 extension, a 3/16 Allen head socket, 10 and 13-millimeter sockets, crimping pliers, cutting pliers, 3/8 ratchet, quarter-inch-drive ratchet, a 6-millimeter Allen head, and a 3/8 impact gun.Hey, guys. I'm gonna show you how to install our running boards here on our 2018 Wrangler. So, let's get started. So, the first thing we're gonna do, now that we have our side piece here for our running boards up on the table, we're gonna install these carriage bolts, there's six of them, and these two flanges right here, which are gonna hold our lights in place underneath, so when you drop your running boards down, the lights come on. So, we'll start by sliding these in, get them in place, putting these two in. We're gonna let them loose so we can move them around where we want our lights to be adjusted, and we'll get this on the vehicle then.So, now we have our side piece here in place. This is the front, this is the rear. We're gonna take six of these, slide these in. And now that we have these in place, what we're gonna do next is we're gonna take the first one, we're gonna take our bracket, stick it in place just like that. We're gonna take our nut, get it started. And we're not gonna tighten it up because we're gonna need to move it to adjust for our lights. And then what we're gonna do is go to our fourth one, stick this one in place, put our nut on also. And we'll get it started, just like that, and we'll leave this loose. These two are gonna go onto our brackets that are underneath the vehicle. And now we're ready to take this piece, and we'll get it ready to get put on the vehicle.Now we're at the middle of the vehicle. We're gonna install our brackets here. And you're gonna put one here and put one in the back. The front one doesn't get one. So, we're gonna be using our bracket. It looks like this. You can see it has the cut here, with the bolt hole through it. This is going to be the driver's side. On the front one here, what they're asking you on both sides is to use a shim. So, we're gonna put a shim in place here. Just say it like that. You're gonna use this 13-millimeter. And I'm gonna go up through here. And I'm gonna get this in place, line the holes up, and we're gonna get it started. I'm gonna run it in, get it snug. Once we have that snug, what we're gonna do is take these Allen head bolts here that they supply in the kit, stick these both through, with the nut. As you can see, that's what the nut looks like. That's a 13-millimeter nut. I'm gonna put that on the backside. Same thing on this one.So, now I'm gonna take my 13-millimeter open-end on this one right here, and get that started to hold the nut in place. I'm gonna take a 6-millimeter on this gun and run it in. I'm gonna change it out and put my 13-millimeter socket on my 3/8 gun, get underneath here, and tighten up our 13-millimeter underneath. So, now we're gonna install our rear bracket. Now, on this bracket, we don't need a shim. Manufacturer says you don't need a shim, only on the front ones. So, we're gonna put this up in place, take our 13-millimeter, get it started, and we'll do the same. We'll take our Allen head bolts. They give you a washer for them. And we'll get these started. Put the nut on the other side, get that started. On the backside here, get the nut started. Allen head socket on, with our 3/8 gun. Get on this one. Get underneath here and tighten our bolt up. Now you're gonna wanna just repeat this procedure on the opposite side.So, now that we have our brackets on our vehicle, we're gonna get ready to stick our arms on. I'm gonna show you how to install our motor onto our one arm that's gonna be driving our running board up and down, and then the other arm is just an idler arm that's gonna follow along with it. So, we'll get ready now, and I'll show you how to install this and get this in place. So, we're gonna take our motor, and then what I'm gonna do is just slide our cover off for now. And we're gonna line our gear up with this gear here, set it right into place. It drops right down over these dowels right here. We're gonna take these short 13-millimeters that are supplied in the kit. Gonna get these started here. And this one back here. And we're gonna run them all the way down by hand. I'm gonna take my 13-millimeter wrench and just tighten these up. Same on the back one here. Now, our cover, what we're gonna do with that for now is we're just gonna sit it in place, but we're not gonna attach it. There's two little push clips, little black push clips that go in place here. We're not gonna use them right now because we're gonna have to connect to, once we get this all bolted up, put our wires on to our motor, then we can slide this down, put our push clips in.So, now we're gonna install this bracket on the front here. And you can see we still have two holes here from our front bracket. I'm gonna use this back hole right here, take our Allen head that we had, with our 6-millimeter. Get this started. And what I'm gonna do is take my 13-millimeter ratcheting wrench, get on this, try to get it straight as I can there. And tighten that up. Now you're just going to repeat that same procedure on the opposite side.And now we're gonna install our side piece here, before we install our brackets. And what I'm gonna do is get one bolt started down here, one bolt started down there, and line these up right here. And I'm gonna hold it in place. Now we'll get underneath and start our bolts. So, now that we have this in place, we have all our bolts lined up, I was holding it, I'm gonna start a nut here on the backside. I'm gonna do the same on the front one here. And I have them started. And what I'm gonna do is take my 13-millimeter ratcheting wrench and tighten them up. Now, before you tighten them too much, you're gonna wanna make sure you move and adjust your side piece here. Make sure it's right. I'll get right back on here, and gonna tighten these up. Now you're gonna wanna just repeat this whole putting the nuts on and tighten everything up on the front one and the back bracket.So, now we're gonna take our 13-millimeter bolt and we're gonna slide it through right here, in between these two, and get these two together. And I'm gonna put a nut on the back side, and take my two 13-millimeter wrenches here, and tighten these up. And now you're gonna wanna repeat this same procedure on the back bracket. So, now we're gonna install our arm with our motor on it onto our middle bracket here. And we're gonna try to line our holes up here, get these two started. There's one. And this is the second one. I'm gonna run this in as far as I can by hand. I'm gonna take my 13-millimeter ratcheting wrench. Same with this one here. Now you're gonna wanna repeat that same procedure on the back bracket.So, now we're gonna take this bushing, slide it in place here, stick in our 10-millimeter that was supplied in the kit, just like that. Gonna get this started, run this in, and I'm gonna get it started on the threads there. And we're gonna run it in. And the manufacturer says to get it started and run it in. And I'm gonna get it to where it just about touches the bracket, just like that. They do not want you to tighten it, so it's able to spin and move. Let me just give it a little bit more. That's pretty good. It still spins and moves. So, they do recommend not tightening it. Now you're gonna wanna repeat this same procedure on the back bracket.So, now that we got our brackets all on and we have our side piece on, what we're gonna do is come back underneath the hood here and we're gonna install our wiring harness. We have our hot and our ground. We have our two plugs here. It's gonna plug into our control module. And what I'm gonna do is show you how to get that run. And I'm gonna show you how I would run all this harness down underneath the vehicle and then fish it over to the other side and go inside the vehicle. So now, the first thing I'm gonna do is I'm gonna loosen up our 10-millimeter here, and our 10-millimeter here on our positive cable. I'm gonna take my 10-millimeter on my quarter-inch drive ratchet. I'm gonna loosen this one up first. I'm gonna take that nut off just like that. And what I'm gonna do is route my positive wire here, and here, kinda get this in place, put our positive wire back on, restart our nut, and tighten this up.Now, once I get it down where I want it, we'll get that one in place there. And they do give you some wire ties with the kit, so you will be able to wire-tie your wires up. Then I'm gonna come over here to our ground. Gonna loosen this one up. So, the reason I'm loosening these up and not the top ones is because the eye hooks that they give us on this kit are very small, so they don't fit those. Now, you have the option to take them off if you want, put different eye hooks on, and you can go off of this post here and that post over there. But for demonstration purposes, I'm just gonna take this off, and hook it up this way. Just stick our ground wire on, and start our nut back in place. And now that we have those two tight, we have our wires run, I'm gonna run our wires over here to the side here, and we're gonna hook up our box, and let our box sit down inside here, and then we'll start fish our wires over across the other side to the driver's side.So, we're gonna take our box here and our connectors. As you can see, the smaller connector's gonna go there, bigger connector's gonna go here. So, we'll plug these in, like that. And we'll do the same with this one. And then what I'm gonna do is just fish this box down inside here. Now, if you want at this point, you can actually wire-tie all this up. And now what we're gonna do is fish these two harnesses, one down on this side and one down onto the driver's side. So, now we're gonna just route this wiring harness. This is the shorter of the two, and I'm gonna drop this down in the back here. And once we get underneath the vehicle, we'll be able to start wire-tying that along the frame. And I'm just gonna fish this one down, and drop it down along the back. Pretty much like that. And again, in the kit, they do give you a lot of wire ties, so you're able to wire-tie this along.Now we're gonna take the longer harness, which is this one here. So, now we're gonna take the longer of the two harnesses, and what I'm gonna do is do the same thing here. I'm gonna run it, and I'm gonna put it and fish it back behind the motor. And what I'm gonna show you is, once I get it over on the other side over there, what I would do is tie this all up, get underneath here, underneath the plastic back here, and you're able to tie the harness up, fish it along the back, and we'll drop it down on the driver's side over there. So, now what we're gonna do, now that we have our wires run around the back here and down here, I'm gonna take them down and go underneath the coolant tank here, the overflow, and I'm gonna fish this harness here, which is the harness for the motor. I'm going to drop this down inside here, and fish this down. And what you're gonna wanna do, they give you enough wire ties in the kit, you're gonna be able to start wire-tying things up to stuff. These two purple wires here, I'm gonna fish these down underneath here, like this. And what we're gonna do, we're gonna get these out of the way, I'm gonna run them around the master cylinder. Back here by the brake booster, there is a hole that leads inside to the passenger compartment. These two purple wires are gonna go to our OBD2 connector. So, we're gonna run these through, get these inside, and then I'll show you how to hook these up.So, now I'm gonna take these, stick them down, and get them here. I'll try to... Actually, just gonna tie these together. That'll just help me get them through that hole quick. A little trick to do. Sorry if my head's in the way, but I'm gonna just see where the hole is here. And then started. And now that we have those in there, we'll go inside and we'll start hooking them up. So, now that we have our purple wires run inside our vehicle here, we're gonna take this OBD2 port connector here with these two purple wires. Now, you'll notice that one's just solid purple. Another has a black stripe. Same with these two here. One has a solid color and then one has a black stripe. We're gonna connect these two together. They give you these posi connectors here in the kit that we're gonna be able to use to attach these two together. And then we have another wire right here, with a connector on it. That's gonna go to this wiring harness here that we have. And I'm gonna show you, we're gonna fish that underneath the dash over to the other side. We're gonna be removing our glove box inside there. There is a distribution block that we're gonna be plugging that into. That's gonna operate the running boards, to go up and down when you open the doors. So, we'll get started by hooking our two purple wires up here to the other two, getting this connected, plugging in our wiring harness, and running it to the other side.Now we're gonna put our connectors on. These are already stripped, both sets of wires. They come that way. So, what we're gonna do, slide this over top. And you'll see it'll get to a point where it stops. We'll take the other end. And basically, all you're gonna do is screw this on, and lock it like that. Same on this one. Get that to a point where it stops. Grab the other part of this connector there. I'll show you so you can see it. Screw that tight together. And we'll take the other end off here. Same with this one. We'll bring these up here, put our ends on, slide them over top, like that. And now you're gonna wanna pick, make sure that you put the solid purple wire with the solid purple wire. And that looks like that's the one here. And we'll screw this on. And that's that one. And now we'll take the other one. This is the one that has the black stripe. Get that one. Let's double-check. That has the black stripe. They go together. I'll screw this one fast here. Make sure our connections are tight. And now we're gonna take our OBD2 connector here and install it underneath our dash. Now we're gonna take our OBD2 connector, we push it in place. And once we get that done here, we're going to take our black connector here on the other end of this and we're gonna install this, like that. Now what we'll do is we'll fish most of this and wire-tie it up underneath the dash, and then we'll get ready to start fishing this through the other side, to go over to where our glove box is.So, now what we're gonna do is we're gonna take this plastic tube that's supplied in a kit. I'm gonna get down underneath here and in the back. You're going to see that there is an opening where you can fish this through. And what we're gonna do is get it over to the other side. I'm gonna take that wire that we connected with the two plug ends on it. I'm gonna tape that to it, pull it back through here, then we're gonna remove our glove box, and connect that up inside here. So, now we're down under here. We have our plastic tube pulled through. I'm gonna take some black electrical tape here and just rip off a piece, and I'm gonna tape this end with the green connector to the plastic tube. Make sure it wraps around one time. Make sure it's tight, just like that. Now we'll be able to pull our wire through the dash and on to the other side.So, now what I'm gonna do is pull the plastic tube, like that, and fish our wire through. And I'm gonna get all the slack out of it, and then I'll just take our plastic, or, excuse me, our electrical tape off. Disconnect it like that, and get that down out of the way. And then I'm gonna go on the other side, tie that wire up, and then come over here and disassemble and remove our glove box. So, now we're on this side. I'm gonna remove the glove box. Just gonna drop the door down, gonna reach up in here, pull down on the little lever like that. And you're able to pop the glove box door right off. I'm gonna move that and set that out of the way for now. And now we're gonna look inside here. You have this connected, a group of connections right here. This end one here is where the directions tell you to hook up this connector here to the last one. So, what I'm gonna do is reach up in here, fish our wire behind the vent tube here, till it comes out, and I see it in there. And then reach in, grab it like that, plug that into the last one, right there. And now we'll reinstall the glove box door, like that. Now we'll get ready to get underneath the vehicle, finish hooking up our wiring harness under there.So, now the first thing we're gonna do is we're gonna take our light wires right here, this red one and black one, and we're gonna take the butt connectors that they supply in the kit, and we're gonna get them in place here. I'm gonna take my crimpers and we're gonna crimp these and hook up our lights first, and we'll get that all done so we don't have to get it up in the air. Again, use my crimping tool here, crimp those two, then we'll take our light that's supplied in the kit. Going to just twist the wires a little bit, just like that, and get that in place. And crimp that one. And do the same with the red one. I'll hold it with my crimpers, actually, like that. Get it twisted. Get that in place like that. Crimp it down. And now if you have a heat gun, you're able to use some heat on here and heat shrink it. Now you're gonna wanna just repeat that same procedure on the opposite two.So, now we have both our lights hooked up here. Now, again, if you have a heat gun at home, you're able to heat this even with a lighter, it'll be heat-shrunk, which will make a good, solid connection. We're going to take and finish running our wiring harness. Now, we dropped it down through the, underneath the hood in previous steps here. And I have it run behind the inner fender well. And we're gonna run it along the frame. I'm gonna tie it up. Don't be afraid to use as many wire ties as you want. Make sure you route it so it doesn't touch anything, it doesn't melt, and tie it up very nicely. On our vehicle, I'm only gonna show a couple, because we're gonna be removing this. But, so, we're gonna hook these up to our pads that we installed previously. Then we're gonna hook our motor up. That's this connector here. We're gonna get this connector all hooked up. And then we will finish running it back here, and then start installing our running boards.So, now what we're gonna do is we have our harness back behind our inner wheel well. I'm gonna take a wire tie here, and I'm gonna tie this up, drop this through, to this. And this will hold this up in place here against the frame. And this is gonna go to our motor. Now, what I'm gonna do here with our light is we're gonna pull back on our plastic, our two-faced tape here. We're gonna stick this in place, like that, and that'll give us access to tie this up underneath here with another wire tie. It's nice that in this vehicle here we have some slots which will hold the harness up in place with some wire ties. So, now that we have those tied up, I'm gonna take my cutters, trim the excess of the wire tie. Same on this one. That'll tuck this up nice, and won't be in the way.Next, we'll install our harness for our motor. So, next what we're gonna do is plug our motor in. I'm gonna run our harness up in here, behind it, like this. Take our connector here. There we go. Like that. And then, our plastic cover that we talked about earlier, we're gonna slide that over the top of our harness here. And that's gonna go just like that. And they're gonna give you two of these plastic push clips that we're just gonna put in place, and push and pull that harness right out through there, like that. And then pop our push clips in place. Like that. And we'll have one up in this corner up here. You might not be able to see it. We have another one up in here. Now that we have our two push clips in place, we have our harness, we'll finish routing our other harness back to our other light, and then we'll be able to stick our running board on.So, now we have a wire tucked up along here, just like we did earlier. And what I'm gonna do is just remove the double-sided tape here, tuck my wire up in place, push our light on. And if you want, you actually can use another wire tie to get this up in place here. There is a clamp up in here I see. You might be able to tie to that. These are also bendable, depending on how you want your light. So, both of them, well, all four, I should say, on all sides. You're able to bend this metal and push this where you want it. I'm gonna leave it here for now. And we have our wire tied up. Like I said, the kit gives you a lot of wire ties, so feel free to use them very frugally, to just, you know, make your harness...Let's try...cut me in and I'll pick up from showing about bending this.So, now that we have our light in place, you're gonna be able to bend this, all four of them, actually, to where you want it. I'm gonna leave it right there. And again, you're gonna be able to use as many wire ties as you want to tie this up very nicely. We're gonna be removing it, so we put it in like this for now.Now we'll install our running boards. So, now what I'm gonna do is install our running board. What I'm gonna do is I'm gonna get it up in place here, so I know where it's going to retract at. And I'm gonna lower it down. And I lined up the aluminum spacers that are in here that hold the bolts into the slot. And I'm just gonna get it so where we can sit here like this. Now we'll get underneath and start our Allen head screws that are supplied in the kit.So, now we have our bolts started underneath. We have our aluminum brackets you'll see underneath there, that line up in the slots. So, what I'm gonna do is take my 3/16 here on my 3/8-drive ratchet. I'm gonna get up in here and tighten our bolts up. And tighten our second one up here. Now we'll go up to our front bracket, tighten them up. And again, we're gonna use my 3/16 here and my 3/8-drive ratchet. And the other one. So, now you're gonna wanna repeat this whole install procedure on the opposite side.That wraps up this review and install of our Amp Research PowerSteps XL Running Boards for '18 to '22 Jeep Wrangler 4-doors. Thanks for watching. And for all things Wrangler, keep it right here at extremeterrain.com.
View Full TranscriptNow Playing

Jeep Wrangler JL Amp Research PowerStep XL Running Boards Review & Install
33:47
Subscribe: New Wrangler videos daily!
Subscribe to our YouTube Channel
Features, Description, Reviews, Q&A, Specs & Installation
| Brand | Amp Research |
| Side Step Finish | Black |
| Side Step Type | Power / Electric |
Amp Research 77132-01A
CA Residents:  WARNING: Cancer and Reproductive Harm - www.P65Warnings.ca.gov
Installation Info
Installation Time
(approx) 3 Hours
Difficulty Level:
Mechanical expertise or professional installation required.
Installation Guides
No guide available for this part yet.
What's in the Box
Review Summary


Installation Time: Full Day
Installation Cost: $450.00
Dec 23, 2024
power steps
love the product, vary well made and vary happy with the service.
Jun 1, 2024
Great Looks, super functional
Bought these because I love how high my wrangler sits with the Rubicon X Package. So I love that these give that rock slider look, and give the step that has great functionality. And when I say functional, I mean the step is actually a good step and plenty of room to get my size 13 foot on. And, by opening the door, apply pressure on the step and they will stay extended to better access the roof. Then just open and shut the door to retract them back up. I do wish you could add a switch to manually open and retract when the doors are off, but won't knit pick too much.
Apr 17, 2024
PowerStep XL
It was a pleasure installing these steps. Never had to force anything into position. All the needed parts where there. And the icing on the cake, USA....
Apr 7, 2024
AMP PowerStep XL
Great looking steps my wife really loves them. Installation instructions could have been better but had no issues and they have worked flawless
Nov 12, 2023
AWESOME for short women
AMP Research Powerstep board is an awesome product. I am 5 foot and getting into my 2 inch lifted jeep on 37’s was Quite challenging.
Jul 11, 2023

Amp research power step xl
Steps look and work great,the motor responds as soon as the doors open they are a little noisy but work good
Jul 6, 2023
Great retractable running boards
My Jeep has a small life which made it very difficult for my parents to get into the car. I carried a step stool to help them get in which I no longer need. I leveraged the professional installation which was perfectly done. I'm very happy with the look and convenience of the running boards
May 15, 2023
Awesome running boards
Work great and help get in and out of jeep. Take your time putting them on and have someone help you will make it much easier.
Aug 7, 2021
Beautiful and Functional
These were perfect! The extra 3 inches with the xl is well worth it. My wife has a bad hip and this was just the trick for her to get in easily! The lighted steps look awesome at night! However be prepared for a long day to install. But the instructions covered everything! BTW this is the only power running board that I have found that works on the ecodiesel! Others have issues with the positioning of the DEF tank.
Mar 11, 2021
Amp Research XL
Love the new step. If anyone is considering a new drop step but uncertain which brand or model to choose, I highly recommend this one. I installed on a stock height 2021 JL and the step height is 11” from the ground. The provided instruction aren’t perfectly clear and there’s really not a great video out there that I found. I was able to run the wiring harness through the the frame to keep the install clean. I found that the most difficult part of the installation was wiring at the inner side panel. The factory wiring is tough to get at but the provided quick couplers eased the install.