
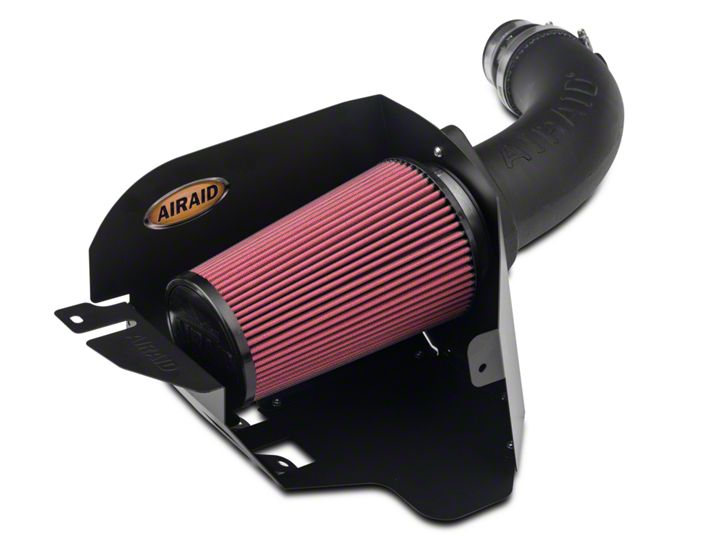
How to Install an AIRAID Intake System on your 2007-2013 3.8L Jeep Wrangler JK
Installation Time
1 hours
Tools Required
- 5/16"
- 10mm Socket
- Ratchet & Extension
- Phillips Screwdriver
- 5/32"
- 7/32" Allen Wrench
- 7/16" Wrench
Shop Parts in this Guide
Installation Instructions
Part Number 310-208
2007-11 Jeep Wrangler (JK)
3.8L V-6
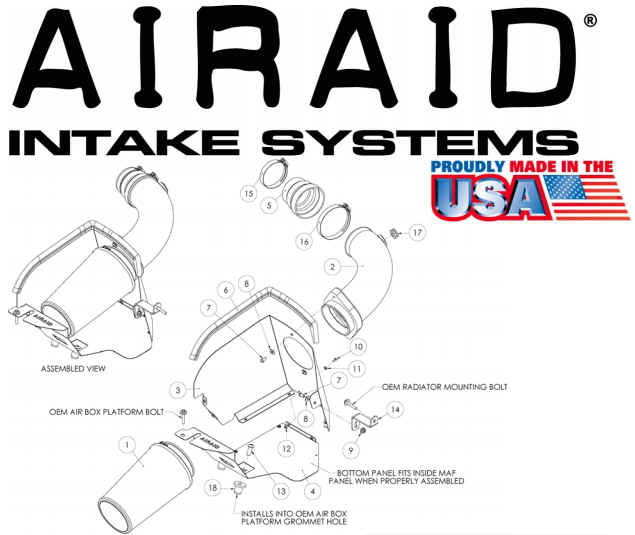
Packing List:
| #1 | 700-471 | Airaid Premium Filter | 1 |
| #2 | KIT208T | Airaid Intake Tube | 1 |
| #3 | KIT208MAFC | MAF Panel | 1 |
| #4 | KIT208BPC | Bottom Panel | 1 |
| #5 | KITHUMPHS15 | Reducing Hump Hose | 1 |
| #6 | KITWSTRIP02 KIT208HP | Weather Strip 20” Hardware & Instructions | 1 1 |
| #7 | KIT15DHC3050 | 1/4-20x1/2” Button Head Bolt | 3 |
| #8 | KIT09FWZ019 | 1/4” Flat Washer | 3 |
| #9 | KIT1420WZZF | 1/4” Serrated Nut | 1 |
| #10 | KIT6C31MXPPZ | 6-32x 5/16” Screw | 7 |
| #11 | KIT6NWSAPZ | #6 Flat Washer | 7 |
| #12 | KIT6CNKEPZ | 6-32 Keps Nut | 7 |
| #13 | KIT15BHC3100 | 3/8-16x1” Button Head Bolt | 2 |
| #14 | KIT201B | Bracket | 1 |
| #15 | KITHS44 | #44 Hump Hose | 1 |
| #16 | KITHS52 | #52 Hose Clamp | 1 |
| #17 | KITGRMT03 | Grommet | 1 |
| #18 | KITNUT01 | Well Nut | 2 |
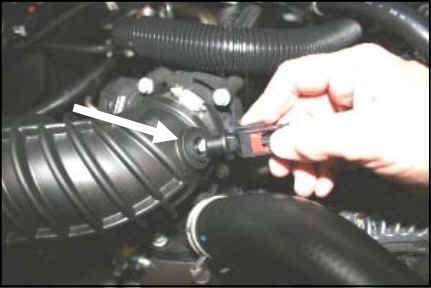
1. Disconnect the negative battery cable. Very Carefully remove the temperature sensor from the factory intake tube by using a circular motion while pulling it straight out. There is no need to disconnect the wiring harness.
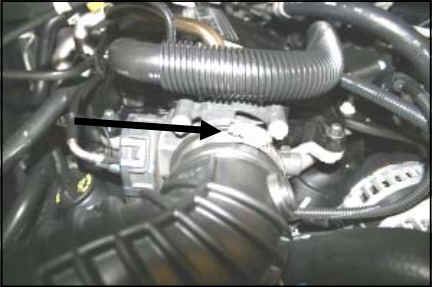
2. Loosen the intake tube hose clamp on the throttle body.

3. Unlatch the 4 metal clips that hold the factory air cleaner lid to the base. Next disconnect the breather hose that attaches to the rear of the air cleaner lid.
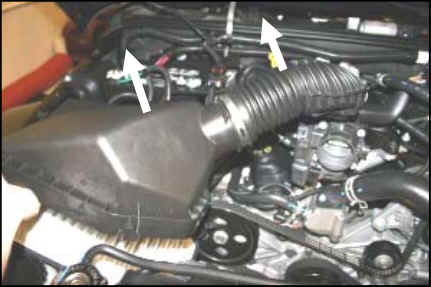
4. Remove the factory intake tube, and lid from the vehicle as an assembly.
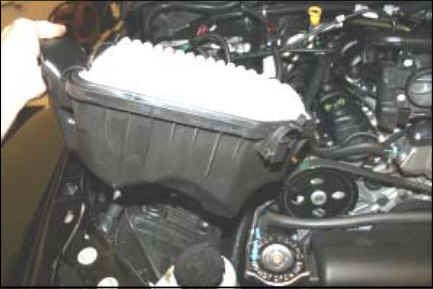
5. While rocking the factory air cleaner base back and forth, pull up, and remove it from the vehicle. There are no bolts holding it down, just grommets.
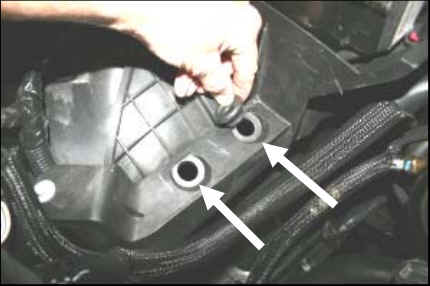
6. Remove the 2 lower grommets from the factory plastic air cleaner mount.
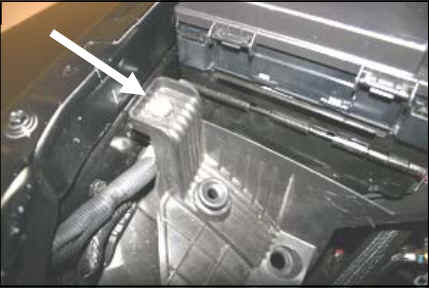
7. With a 10mm socket, remove and save the bolt from the factory plastic air cleaner mount. It will be re-installed in step #12.
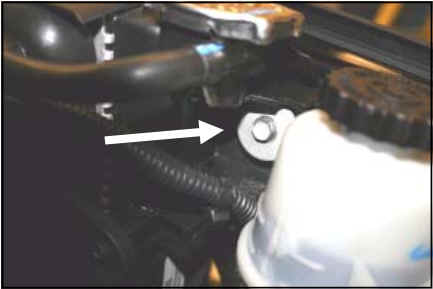
8. With a 10mm socket, remove and save the bolt that holds the radiator to the radiator support. It will be reused in step #10.
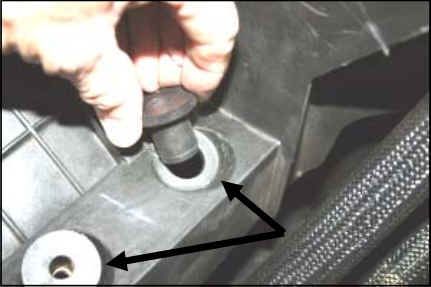
9. Install the 2 well nuts (#18) into the holes in the plastic air cleaner mount where you removed the grommets in step #6.

10. Insert the bolt, removed in step #8, thru the round hole in the provided L-bracket, and back into the radiator support. Leave the bolt slightly loose for now.
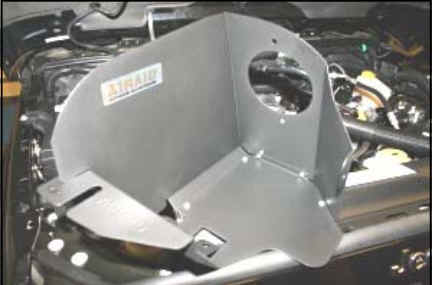
11. Assemble the Cool Air Dam panels (#3 & 4) as shown, using the seven 6-32 screws (#10), flat washers (#11), and keps nuts (#12).
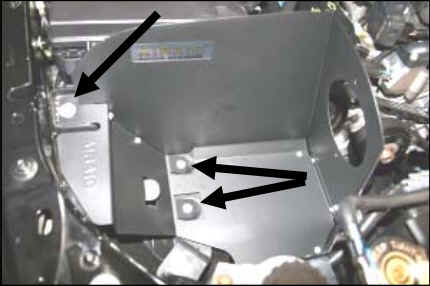
12. Install the CAD into the vehicle. Install the two 3/8x1” button head bolts (#13), thru the bottom panel, and into the well nuts. Reinstall the factory bolt removed in step #7 thru the panel, and into the fender well. Tighten all three bolts at this time.

13. Using one 1/4” button head bolt (#7), 1/4” flat washer (#8), and 1/4” serrated nut (#9), attach the CAD panel to the L-bracket, as shown. Now tighten the radiator mounting bolt on the other end of the L-bracket.

14. Install the supplied grommet (#17) into the Airaid Intake Tube (#2).

15. Install the reducing hump hose (#5) onto the throttle body as shown, with the #44 hose clamp (#15) on the back, and the #52 hose clamp (#16) on the front. Leave the clamps loose for now.
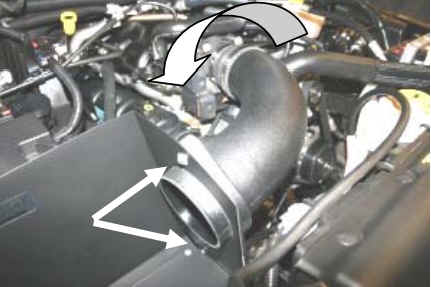
16. Install the Airaid Intake Tube into the hump hose first, and then rotate it down, and into the CAD. Install two 1/4” button head bolts (#7), and 1/4” flat washers (#8) thru the CAD, and into the inserts in the tube. Adjust for fit, and tighten both hose clamps, and bolts.
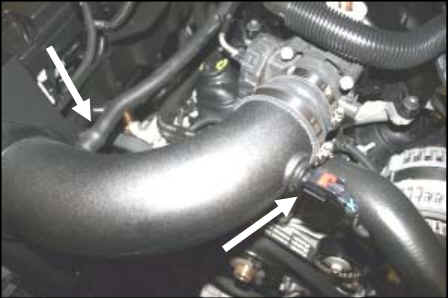
17. Very Carefully reinstall the temperature sensor removed in step #1, into the grommet in the Airaid Intake Tube. Reconnect the factory breather hose to the nipple on the intake tube.
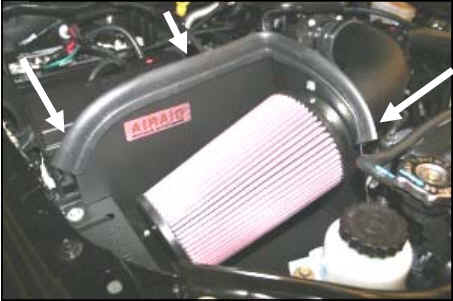
18. Install the Airaid Premium Filter (#1) onto the intake tube, and tighten the clamp. Next install the weatherstrip (#6) onto the top of the CAD as shown.
19. Double check your work!
Make sure there is no foreign material in the intake path. Make sure all clamps, hoses, bolts, and screws are tight. Periodically check all clamps, and fasteners for tightness.
20. Reconnect the negative battery cable!
Thank you for purchasing the Airaid Intake System. Contact Airaid @ (800) 498-6951 8:00 AM - 5:00 PM MST weekdays for questions regarding fit or instructions that are not clear to you. Your Airaid Intake System was carefully inspected and packaged. Check that no parts are missing, or were damaged during shipping. If any parts are missing, contact Airaid. The air filter element is protected from direct exposure to water and debris; care should be taken not to drive through deep water. WATER INGESTION IS THE DRIVERS RESPONSIBILTY! The air filter is reusable and should be cleaned using the Airaid Filter Tune-Up Kit periodically.
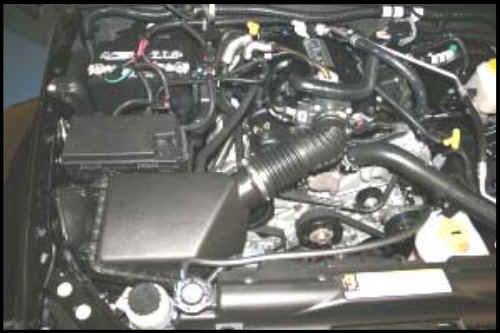
Before!
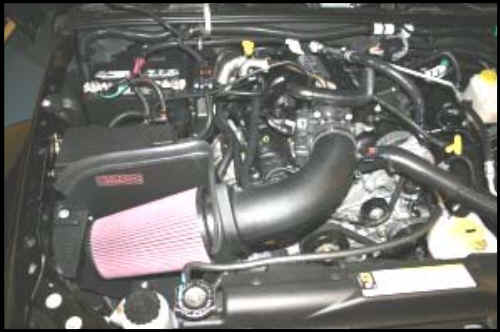
After!
Don’t Forget Your AIRAID Filter Tune-Up Kit!
